
If you have access to a 3D printer, a bit of maker prowess, and a love for sound, you can build your own 3D Printed Mini Bluetooth Speakers.
Create your ultimate 3D Printed speaker box
Coder and tinker Yasthil Bhagwandeen shares a new Instructables project on how to build your very own 3D Printed Mini Bluetooth Speakers, now that is really cool. 3D Printing technology is discovering new ways to make things simpler and productive and so even an audio gear is not an exception.
https://youtu.be/5IMl47iG-28
With companies like print+ and V-Moda using 3D printing to offer a modification to consumers, the technology could soon become a valuable part of the audiophile’s sonic experience.
Yasthil Bhagwandeen takes a DIY approach with his new project, showing how to print your own mini Bluetooth speakers. The coder and Tinker shows the full process of the project right from trials, failures, designs to the finished final successful project.
What will you need?
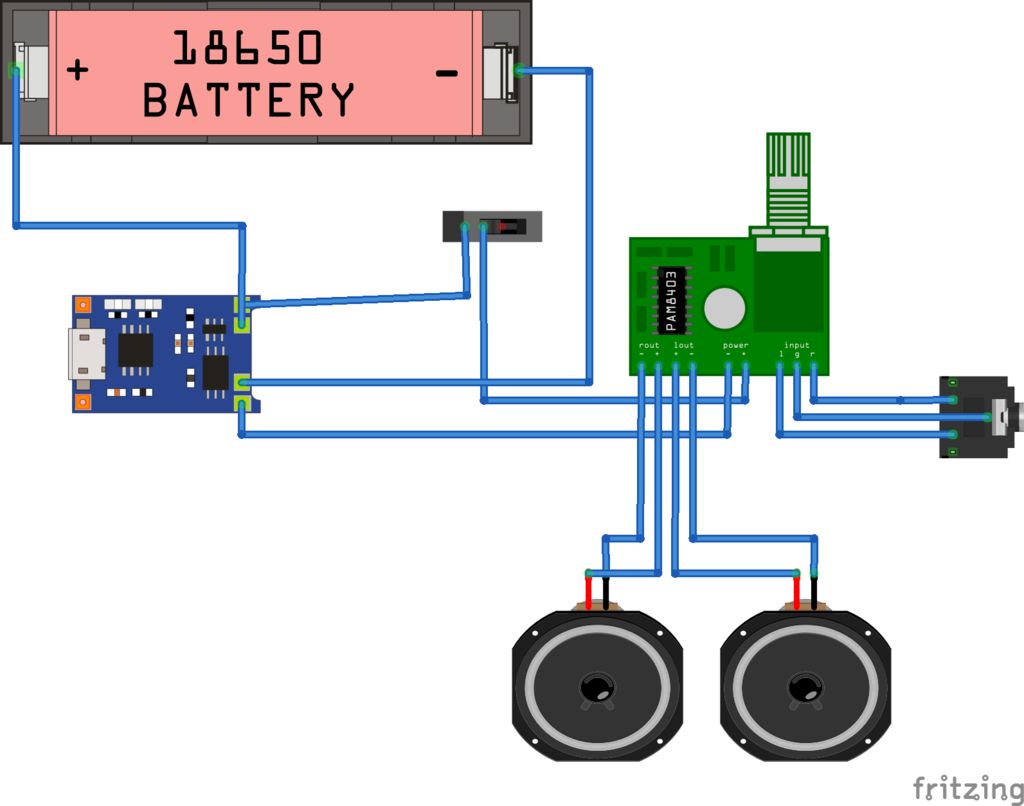
3D Printed mini blue tooth speakers need a handful of components and tools.
COMPONENTS
- PAM8403 2x3W amp
- 1850 Lithium-ion battery
- TP4056 charge and discharge protection board
- 3.5mm jack
- PCB Switch
- Micro USB breakout board
- 2x3W speakers
- Bluetooth module
TOOLS
- 3D Printer (along with STL files via Thingiverse)
- Soldering iron
- Solder
- Light gauge wire
- Helping hands kit for soldering
- Hot glue gun
- Vernier caliper
Design the Speaker Box 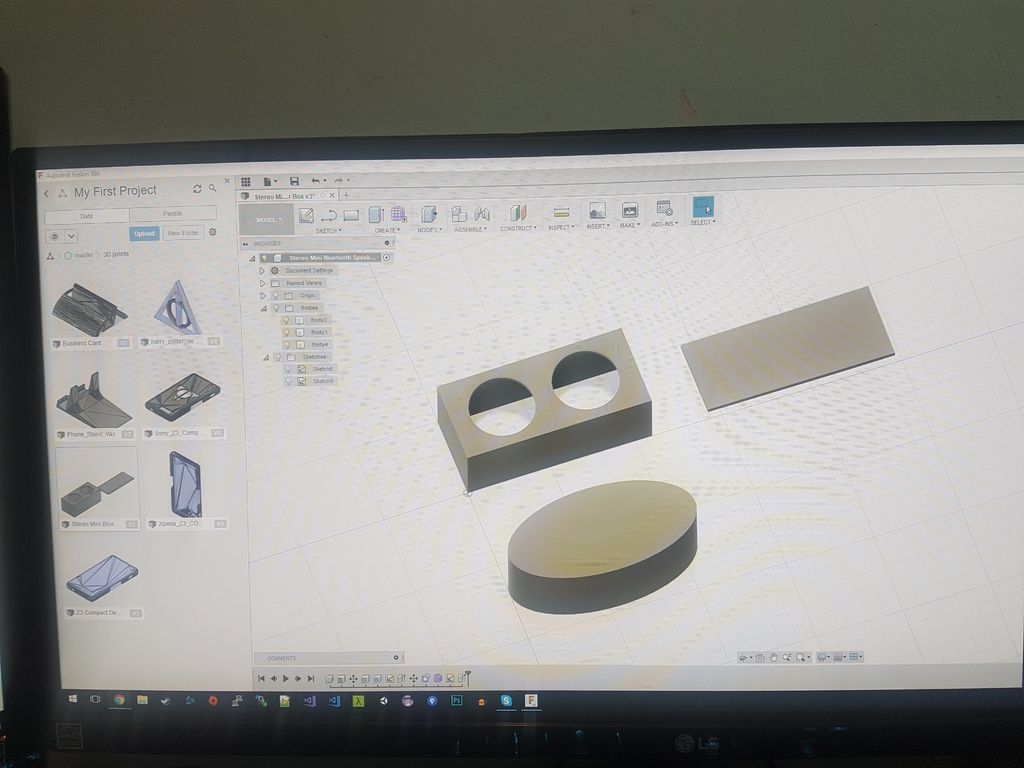

The speaker isn’t extremely loud, but it does produce a fair amount of volume. It’s an intermediate project that does require some time and maker skills, but it also seems like a nice undertaking for a beginner looking to get familiar with soldering, or even a more experienced maker who wants a fun and useful project for the weekend. Either way, you can bring your favorite sounds right to your own DIY speaker box and get speakers of your own designs and you can even customize it.
So start with 3D Printing right away and know about the latest trends of the industry with Geeetech.
credits: all3dp,instructables.com
Thanks for the post. It was amazing. The customize boxes manufactures quality Custom Printed Speaker Boxes at wholesale rates with free shipping services.
ReplyDelete