Showing posts with label Tutorials. Show all posts

Friday, March 2, 2018

DIY: 3D Print your own Bluetooth Speaker

If you have access to a 3D printer, a bit of maker prowess, and a love for sound, you can build your own 3D Printed Mini Bluetooth Speakers.

Create your ultimate 3D  Printed speaker box

Coder and tinker Yasthil Bhagwandeen shares a new Instructables project on how to build your very own 3D Printed Mini Bluetooth Speakers, now that is really cool. 3D Printing technology is discovering new ways to make things simpler and productive and so even an audio gear is not an exception.

 https://youtu.be/5IMl47iG-28

With companies like print+ and V-Moda using 3D printing to offer a modification to consumers, the technology could soon become a valuable part of the audiophile’s sonic experience.

Yasthil Bhagwandeen takes a DIY approach with his new project, showing how to print your own mini Bluetooth speakers. The coder and Tinker shows the full process of the project right from trials, failures, designs to the finished final successful project.

What will you need?

3D Printed mini blue tooth speakers need a handful of components and tools.

COMPONENTS

TOOLS

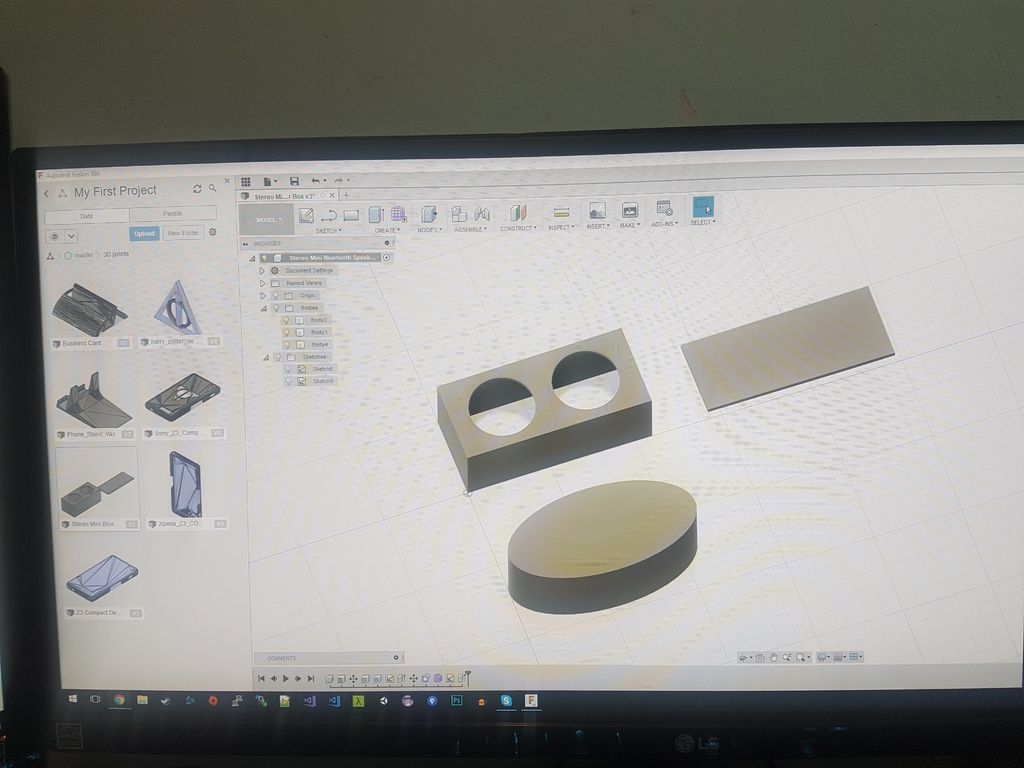
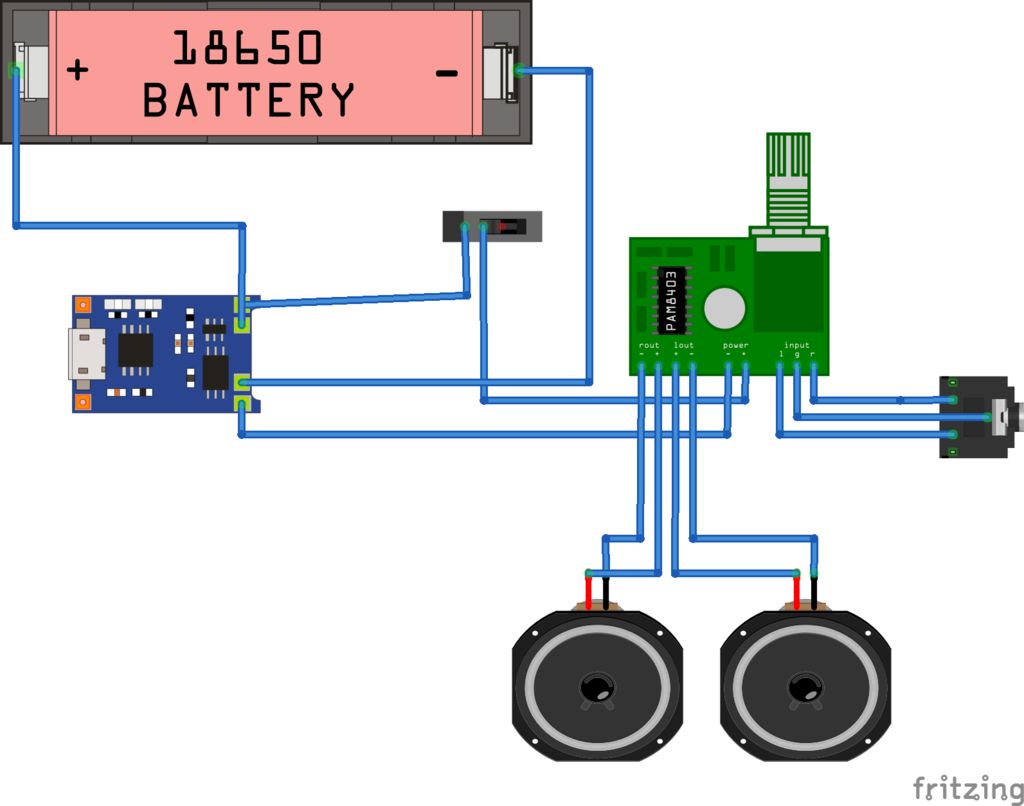
Design the Speaker Box The software used is Fusion 360 and you can get the STL files from Thingiverse. Make sure that you use the vernier calipers correctly as the measurements are important so that the electronic component can be assembled properly in the box so that there is no noise and disturbance in the quality of the sound. Print it out: Bhagwandeens version of mini Bluetooth speakers uses a Anet A8 and the filament used is CC Tree PLA  of 1.75 mm, layer height of 0.32 mm and 50 percent infill. The 3D model for the speaker box, designed by the tinkerer on Fusion 360, is a relatively quick 5 hour 3D print. He also shares the initial mistakes and subsequent redesign that came with developing this project. Obstacles included incorrect measurements, which made it difficult to fit in the speakers, as well as forgetting to print holes for the switch, jack, and micro USB slot. Eventually, Bhagwandeen overcame these issues and was able to build his speakers. Before going to the further step of soldering the maker recommends to test the electronic components and check whether they are working properly.Then start with the soldering which has to be done accordingly to the below schematic diagram.   After the soldering process simply uses the hot glue gun to assemble the electronic elements into the 3D Printed speaker box. The speaker enclosure is designed in such a way that it is easy to open and shut the box without any problem.

The speaker isn’t extremely loud, but it does produce a fair amount of volume. It’s an intermediate project that does require some time and maker skills, but it also seems like a nice undertaking for a beginner looking to get familiar with soldering, or even a more experienced maker who wants a fun and useful project for the weekend. Either way, you can bring your favorite sounds right to your own DIY speaker box and get speakers of your own designs and you can even customize it.

So start with 3D Printing right away and know about the latest trends of the industry with Geeetech.

credits: all3dp,instructables.com

Monday, January 15, 2018

Tips And Tricks If You Have Just Started With 3D Printing…

Even if you are a beginner or have mastered most of the 3D printing software, the designing part is not that easy when it comes to 3D printing. Optimizing a 3D print is quite a tough task for beginners or even for a person who has spent quite some time in this field. Some essential tips and tricks are always helpful when you are into such a creative and complicated industry.

So here is a compilation of the tips from the professionals which will help you start smoothly with the 3D printing process and make your designing fun.

Start with sound Geometry

The geometry of the design depends on the software you use. If you do not use a proper software, it won’t create a solid geometrical design and there will be some holes or errors. This can be erased by using software which allows you to check the solidness and some programs where we need to create the solidness. There are a lot of analytical tools within the software. It is a good practice to make sure that as you are going along, the geometry that you are doing is valid geometry.

Calibrate the 3D Printer 

Calibrating a 3D printer is essential as it directly reflects the accuracy. If the calibration isn’t proper then it will result in weird shapes and sizes. Checking the calibration is important when you are printing with overhang objects as they are required to be accurate. The best way to calibrate your 3D Printer is by using a digital caliper so that designing complex objects doesn’t become problematic.

Choose the right wall thickness

Precision is important in 3D Printing and so is maintaining the thickness of the walls of the design. Choosing right thickness so that the object appears as defined is crucial. The famous Kristoffer Rønn-Andersen basically starts with drawing a rough sketch by hand or directly jumping to the software he adores the most user-friendly EasyPrint 3D.

According to Kristoffer, the biggest problem in 3D printing is optimizing 3D model for the printing material. Kristoffer Ronn-Anderson says “To me, it is crucial that these aspects are integrated into the early design of the pieces, otherwise they might not turn out well; either because the piece is not printable or because you have to make last-minute changes to the dimensions, which ruin the design.”

Break the objects into smaller chunks

An essential tip is to break down the complex objects into simpler ones and then join them. Designing complex objects can be troublesome and even printing them out is not that easy. It becomes pretty simple if you print out smaller parts separately and then bond them together.

Try multiple types of 3D printing Filaments

ABS and PLA were the only traditional filaments that were used for 3D printing in the earlier days. They are still the most common types of filaments used but you can experiment with numerous other filaments. Like nylon, wax, and others made from wood, brick, steel or copper. The type of filament to choose depends upon the object you want to design. Trying different types of filaments will give you exposure to various aspects of the 3D printing industry.You can know more about the filaments here.

Troubleshooting is looking at other aspects of the problem from different angles

The 3D Printing is not as simple as 2D printing, there can be problems arising from any nook and corner while you 3D print a design. The problems you can face with your 3D printer are innumerable. The first layer laid down by your 3D printer could be off the centre or of a different size than you suggested and the problem may not be connected to calibration of your print heads. Similarly, the filament you’re using may warp in a certain direction while cooling because you didn’t consider the chemistry aspect of the filament. You can find more solutions to all your troubleshooting problems here.

When there arises a troubleshooting problem have more patience and see the problem from different angles.

Use the various 3D Printing Forums

You can utilize the various 3D printing forums available in the market and take the most benefit of it as it is a community-based hobby, therefore, it’s a little complicated.Also, you would want to make your designs famous and tell the world how much good you are at it. Before you get to that stage though, you’ll need all the help and advice you can get. Even if you follow all the 3D printing tips here, you’ll still need these communities for more specific issues and purposes.

These tips and tricks can help you print the best designs and Geeetech 3D printers will enhance the printing process just as the way you want.

Credits: i.materialise.com,blog.inkjetwholesale.com.

Monday, January 8, 2018

Now You Can 3D Print Your Thoughts Into Reality!!

All actions result from thoughts, so it is thoughts that matter.

What could be more beautiful than giving life to your thoughts and printing them out? Doesn’t that sound cool?

The traditional way of 3d printing is changing drastically and this vast industry has a lot to offer.Every day there is a new technique that is transforming this industry and similarly, there is too much of competition going on. The 3D printed thoughts are the new innovation and is gaining popularity recently.

So basically, 3D printing your thoughts is printing out anything that you think. It is all related to your thought process and these brainwaves are transmitted to the printer via sensors resulting into the design that you want.

The first ever object developed by  3D printing thoughts is the monster hand.This garish orange piece of plastic, small enough to hold in the palm of a hand, could pass for a missing limb of a toy Tyrannosaurus. It is appealing just for two reasons, firstly it’s a 3d printed  and secondly, it is printed via thoughts.

Thoughts

This all started at fanfare of Santiago Makerspace, a  technology design studio in the Chilean capital. This toy limb’s shape was designed according to the designer by connecting his brainwaves to the headset and then transferring the neurological signals to the PC. It was invented by George Laskowsky, Chief Technical Officer of Thinker Thing, the Chilean start-up developing the mind-controlled 3D printing system.

Why 3D printed thoughts?

The traditional 3D printers are helpful only to the people who know the software well and are a pro in the industry. A beginner will be confused and also rely on downloading the designs from the internet and then printing them out. Also, the design software is not easy to master, especially if you are four-years-old and haven’t yet learned to hold a pencil properly.

“What is the point of these printers if my son cannot design his own toy?” says Bryan Salt, CEO of Thinker Thing. “I realized that while there were a lot of people talking about the hardware of the printer no-one really seemed to be talking about how to actually use it.” In theory, 3D printers could help unleash our inner creativity, freeing us from the constraints of traditional manufacturing methods. However, in practice, those unwilling or unable to plough through the software instruction manual could be left downloading ready-made models designed by others.

That’s where the software Emotional Evolutionary Design (EED)  comes into play where the thoughts are presented in some real action. Their present plan is to focus on the Monster Dreamer Project, which will allow users to design their own fantastical creatures using the power of thought. When the children will sit in front of the computer they will see different body shapes in the form of bubbles. These will mutate randomly, with built-in rules preventing them becoming too abstract. The children’s reactions to the changes will be picked up by an Emotiv EPOC headset, a electroencephalography (EEG) device designed to pick up the electrical signals from brain cell interactions using fourteen sensors on the scalp. As different states of the brain as excitement or boredom specific patterns of brain activity will be generated.The favoured shapes will grow bigger on the screen, while the others shrink. The biggest shapes are combined to generate a body part, and the process is repeated for different body parts until the monster is complete. The final result should be a unique 3D model that is ready for printing as a solid object.

FUTURISTIC THOUGHTS

Second Nature

A design featured by emotional response is rather based on the thought of critiquing more than thinking to. make one from scratch. “One of the biggest bottlenecks right now with 3D printing is content,” says Professor Hod Lipson, director of the Creative Machines Lab at Cornell University, in Ithaca, New York State. “We have iPods with no music. We have machines that can make almost anything but we do not have a lot of things to make with them.”

Lipson’s Lab is also working to create 3D objects from the mind. Two Lipson’s students have developed a website     EndlessForms which mimics nature’s way of creating new designs in small steps. In the start of this process, there are 15 3dimensional shapes presented, from which the person needs to choose 2shapes. Then after combining these two shapes more 15 shapes will be available. Thus the proper combination of shapes can give you the desired design.

If you wanted to make a cat, you might click on one shape with the semblance of a muzzle and another with two pointed, ear-like triangles on top. The computer would then offer up a series of new shapes that more closely resemble the cat you have in mind, and so on until the model reaches the desired shape. This was taking a long time so the Lipson’s decided to use the Thinker Thing idea, but the issue with headsets is that when you tend to think about a particular state for a long time i.e. happiness it tends to result in sweat also if the headsets are of poor quality the wrong signals get transmitted. Some sceptics argue that consumer EEG devices are not really measuring thoughts at all.

With some of the limitations of consumer EEG technology in mind, Lipson and colleagues decided to monitor thoughts via the eyeballs. Eye tracking can identify the shapes that get the most attention, and this could be used to shape design processes. The snag is that without an EEG headset it is not possible to tell whether someone is looking at a shape because they find it strange or beautiful. Even so, the team’s research so far suggests that at the end of the process participants still feel they have managed to reach the desired design. There’s some way to go, but in the future, a combination of brain scanning and eye tracking may be preferred to the trusty old mouse when it comes to 3D object design.

Dream Maker

Imagine your dreams getting into reality just by the help of 3D printing. A Japanese scientist led by Yukiyasu Kamitani, of the ATR Computational Neuroscience Laboratories in Kyoto, revealed they had made significant steps towards automated dream decoding. Three people had there brain scanned by an MRI, they were awakened when EEG signals indicated they had reached an early phase of sleep associated with dreaming. Researchers asked them to describe their dreams.Kamitani’s group then chose 20 categories of objects and scenes based on the words that occurred most frequently in the descriptions. Then they listed out the categories on the basis of frequently imaging objects thus decoding the dreams.  Thus now we can even decode the dreams and print them and know about the future dreams this 3D printing is making impossible things possible.

So what are you guys waiting for? Get involved with the future techniques by buying a 3D printer by Geeetech right here and give life to your dreams.

Credits: bbc.com,designboom.com

Wednesday, December 27, 2017

Why these 3D Printing Filaments are the Best – Part I

Getting your 3D design printed with the right material is the most crucial task. You need to make sure that the filament you use for printing will give you the desired results and the design are far more than perfect. One of the main problems with any technology is the overwhelming choices available to the end user. 3D printers and 3D printing materials, or filaments, are no exception. And 3D materials—like the machines—are not all equal. You need to think about things like your budget, the kind of parts you print, your expectations, and personal experience when choosing a filament. As new types of materials enter the marketplace it becomes even harder to make well-informed decisions. There’s also a steady stream of new companies jumping onto the 3D filament bandwagon.

Why should you choose the best 3D printing filament?

Getting the quality right is the biggest frustration with 3D printing is getting the quality right.A poorly configured machine or a substandard printer results in delivering poor quality parts and designs. A lot of the time, poorly designed 3D parts are the result of low-grade filament or the wrong type of filament used for the job. There is nothing that can stop a manufacturer from selling low-grade filament and also advertising it as something quite special. This is why a guide is so essential for knowing the best filament that is available in the market.When users rate a brand filament they take into consideration a number of essential factors. Some of these will include ease-of-use, reliability, the overall print quality, available colours, bonding between layers and after-sales support, etc.


The most commonly used materials in 3D printing are the thermoplastics PLA and ABS, but the list goes on (and on). Other materials that are sold as 3D printer filament include polycarbonate, carbon fibre, polypropylene, and many more! There are even special blends which can conduct electricity or glow in the dark!

Below are the most common and mostly used Filament types :

ABS ( Acrylonitrile butadiene styrene) 

With respect to its material properties, ABS is actually moderately superior to PLA, despite being slightly more difficult to print with. It’s for this reason that ABS is found in many manufactured household and consumer goods, including LEGO bricks and bicycle helmets!

Products made of ABS boast capacity to withstand high temperatures and high durability, but 3D printer enthusiasts should be mindful of the filament’s high printing temperature, tendency to warp during cooling, and intense fumes. Be sure to print with a heating bed, and in a well-ventilated space.

The strength of ABS is high, flexibility is medium and the durability is high. It is medium difficult to use. The print temperature should be 210°C – 250°C and the bed temperature should be 80°C – 110°C.It is not food safe and is soluble in esters, ketones, and acetone.

PLA  (polylactic acid )

In the realm of home 3D printing, polylactic acid (PLA) is king. Although it’s often compared to ABS – next in line to the throne – PLA is easily the most popular 3D printer filament, and for good reason.First and foremost, it’s easy to print with. PLA has a lower printing temperature than ABS, and it doesn’t warp as easily, meaning it doesn’t require a heating bed (although it definitely helps). As a biodegradable thermoplastic, it is more environmentally friendly than most 3D printer filaments, being made from annually renewable resources such as corn starch or sugar cane.Benefit to using PLA is that it doesn’t give off an evil smell during printing. It’s generally considered an odourless filament, but many have reported smelling sweet candy-like fumes.

Strength wise PLA has High strength, flexibility is  Low and durability is  Medium.It’s not much difficult to use. The print temperature is 180°C – 230°C and the print bed temperature is 20°C – 60°C.It is not soluble in any esters or ketones.

Nylon

Nylon,  is a popular family of synthetic polymers used in many industrial applications, is the heavyweight champion of the 3D printing world. Compared to most other filaments, it ranks as the number one contender when together considering strength, flexibility, and durability.In general, many grades of nylon exist, but among the most common for use as a 3D printer, filaments are 618 and 645.Another unique characteristic of this 3D printer filament is that you can dye it, either before or after the printing process. The negative side to this is that nylon, like PETG, is hygroscopic, meaning it absorbs moisture, so remember to store it in a cool, dry place to ensure better quality prints.The strength of nylon is  High its flexibility is also high and similar is durability. It is medium difficult to use. The print temperature is 240°C – 260°C and also the print bed temperature is  70°C – 100°C. It’s not soluble in any esters or ketones.

PC (Polycarbonate)

PC, in addition to being the strongest 3D printer filament presented in this list, is extremely durable and resistant to both physical impact and heat, able to withstand temperatures of up to 110°C. It’s also transparent, which explains its use in commercial items such as bulletproof glass, scuba masks, and electronic display screens.PC 3D printer filament is hygroscopic, able to absorb water from the air, so remember to store it in a cool, dry place to ensure better quality prints.

Despite some similar use cases, polycarbonate shouldn’t be confused with acrylic or plexiglass, which shatter or crack under stress.  Polycarbonate is moderately flexible (though not as much as nylon, for example), allowing it to bend until eventually, it deforms.

The strength of this material is very high, flexibility is medium and durability is also very high. It is medium difficult to use. The print temperature is 270°C – 310°C also the print bed temperature is  90°C – 110°C. Polycarbonate is not at all food safe.

Geeetech does offer these best filaments for 3D Printing your stunning designs so get them here.

We have introduced you to few of the best filaments in the market, the next part will contain the rest common and best 3D printing filaments that are available in the market.

Credits: All3DP.com

Friday, December 15, 2017

These YouTube channels teach you how to 3D print the coolest stuff!

The internet is full of cool people doing cool things and 3D printing is no exception to this trend! With tutorials and guides soon catching up, it’s no surprise that there are some really talented YouTubers sharing their work and making it a lot of fun too!

Whether you’re looking for 3D printing tips and tutorials, product reviews, DIY projects or just enjoy watching people make stuff(hey, why not) here’s a list of the coolest YouTube channels for 3D printing.

1. Barnacules Nerdgasm

A wacky personality, Barnacles has curated a rather fun 3d printing channel. A mixture of passion projects like a 3D printed stormtrooper outfit and reviews of the latest tech and games, he’s fun to watch thanks to his energy and sense of humor. No wonder he has a growing fan base!

Location: United States

2. XRobots

XRobots is not your average 3d printing channel. If you’re into cosplay sci-fi themes then James Bruton’s YouTube Channel offers you just that. From Star Wars and Iron Man to Alien Vs Predator, you’ll be blown away by the intricacies of his designs and ability to utilize 3D printing to create costumes, cosplay, and robotics. Sponsored by LulzBot, XRobots is ideal for those looking to complete ambitious build projects that require more than just hitting the print button.

Location: United Kingdom

3. Punished Props

Punished Props is run by husband and wife duo Bill and Brittany Doran and is definitely the best place to learn how to create your favorite props from a variety of video games, TV shows, and movies. From modeling to giving them a finish, the Dorans will have you walking around in 3D printed armor in no time.

Location: United States

4. Make Anything

As the name suggests, this channel will show you just how to MAKE ANYTHING. Expand your 3D printing horizons and embrace the creative flow as host Devin Montes shows you how to create and print optical illusions, upgrade 3D printers, integrate virtual reality into 3D printing, and much more. And he makes it look so easy too!

Location: United States

5. I Like To Make Stuff

“I Like To Make Stuff” is a cool channel combining a number of manufacturing techniques to create unbelievable projects.  From Arduino to casting patterns, his range of unique projects includes pudding guns, arcade cabinets, snack machines, and much more. Apart from 3D printing, this channel also touches upon metalworking, woodworking and many more.

Location: United States

6. Maker’s Muse

When the time comes for you to make the critical decision of what 3D printer, 3D scanner, or software is right for you, Angus Deveson’s Maker’s Muse YouTube Channel is here to save the day. Focused on providing unbiased and comprehensive reviews, Maker’s Muse tests out everything from 3D printers to filaments. The additive manufacturing expert also provides insight on how to optimize the 3D printing experience, showing his viewers how to properly prepare the CAD, slicer, printing process and beyond.

Location: Australia

7. RCLifeOn

Although many in the maker community mean serious business, sometimes the best projects are those that bring as much smiles and laughter as they do satisfaction. That’s exactly what you get with RCLifeOn, the 3D printing Youtube channel of Simon Sörensen. His projects range from Rick & Morty props to 3D printed t-shirt designs. There are also a few 3D printer reviews in the mix, creating a perfect balance of fun and educational content.

Location: Sweden

8. Sexy Cyborg

Sexy Cyborg, Naomi Wu is more than just a pretty face. Wu gives unique cultural insight into the life of the female maker from Shenzhen, China, taking viewers through her everyday life as she builds 3D printers, creates unique outfits, and tours maker spaces and 3D printing cafes throughout her hometown. She has over 10,000 subscribers and her channel is different from most 3D printing YouTube Channels. If you’re looking for a 3d printmaker who will simultaneously give you a cultural tour then head to her channel.

Location: China

9. 3D Printing Nerd

Learning all the ropes of 3D printing from someone with an exciting perspective and sense of humor is definitely what you need to be tuning into. With one of the most popular YouTube Channels centered around 3D printing technology, Joel Telling is a self-admitted nerd who loves to create and educate.  Whether you’re looking for fun 3D models suitable for the whole family or in-depth 3D printer reviews, 3D Printing Nerd has all of that and more. His projects are easy to follow and fun to print so take a look at his channel.

Location: United States

Credits- all3dp.com, youtube.com, punishedprops.com
Friday, December 8, 2017

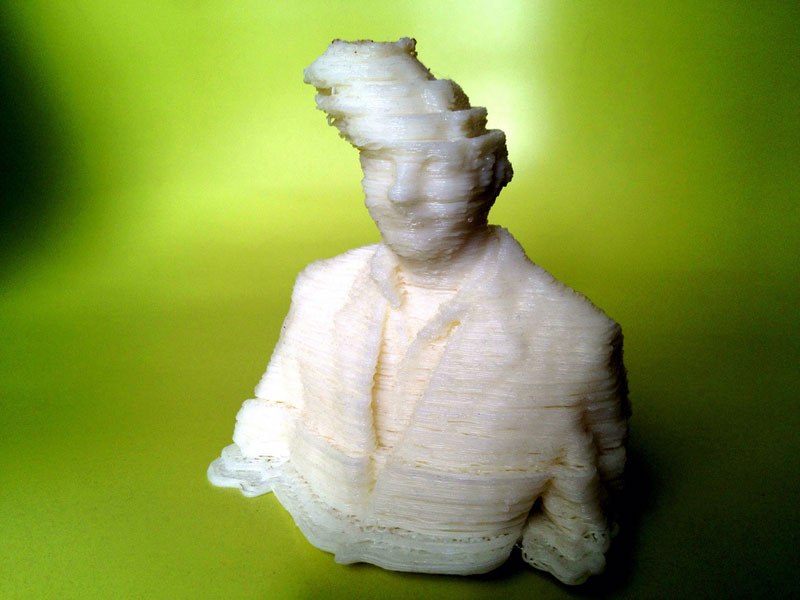
Troubleshooting Guide to 7 Common 3D Printing Problems, our solution.

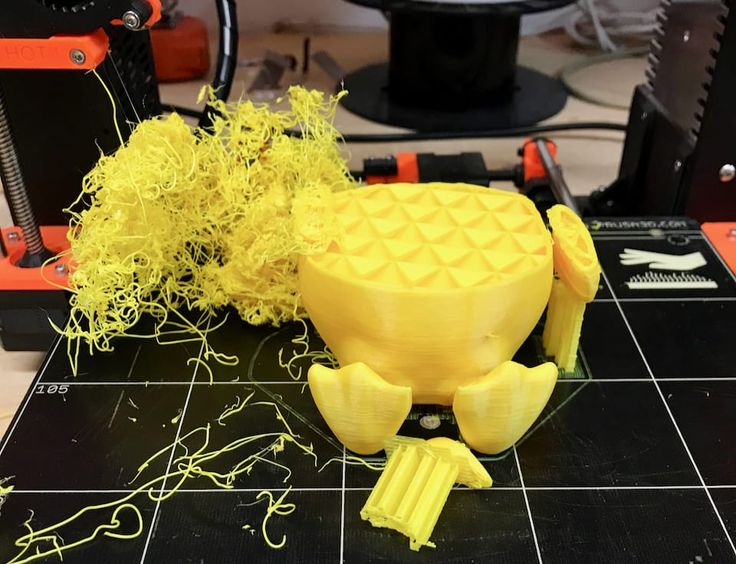
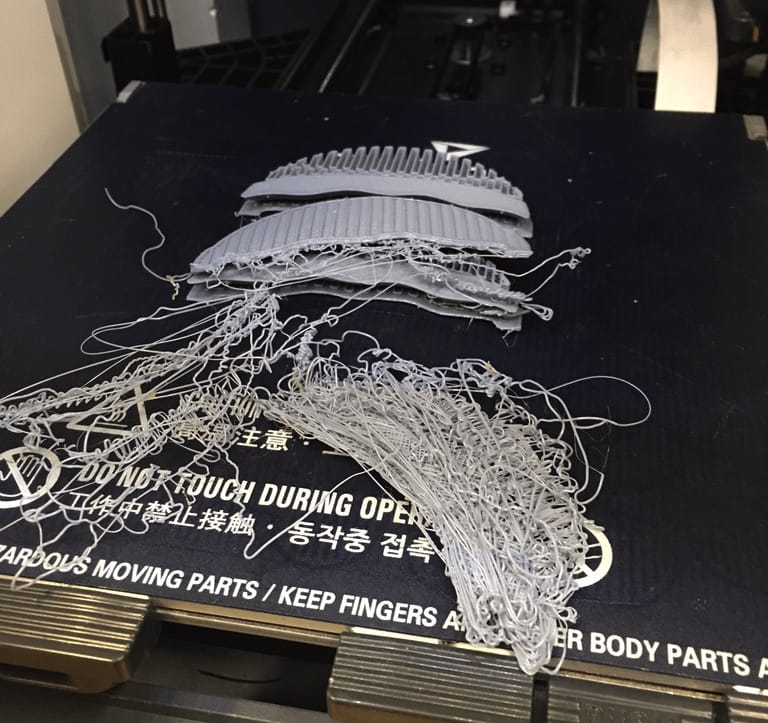
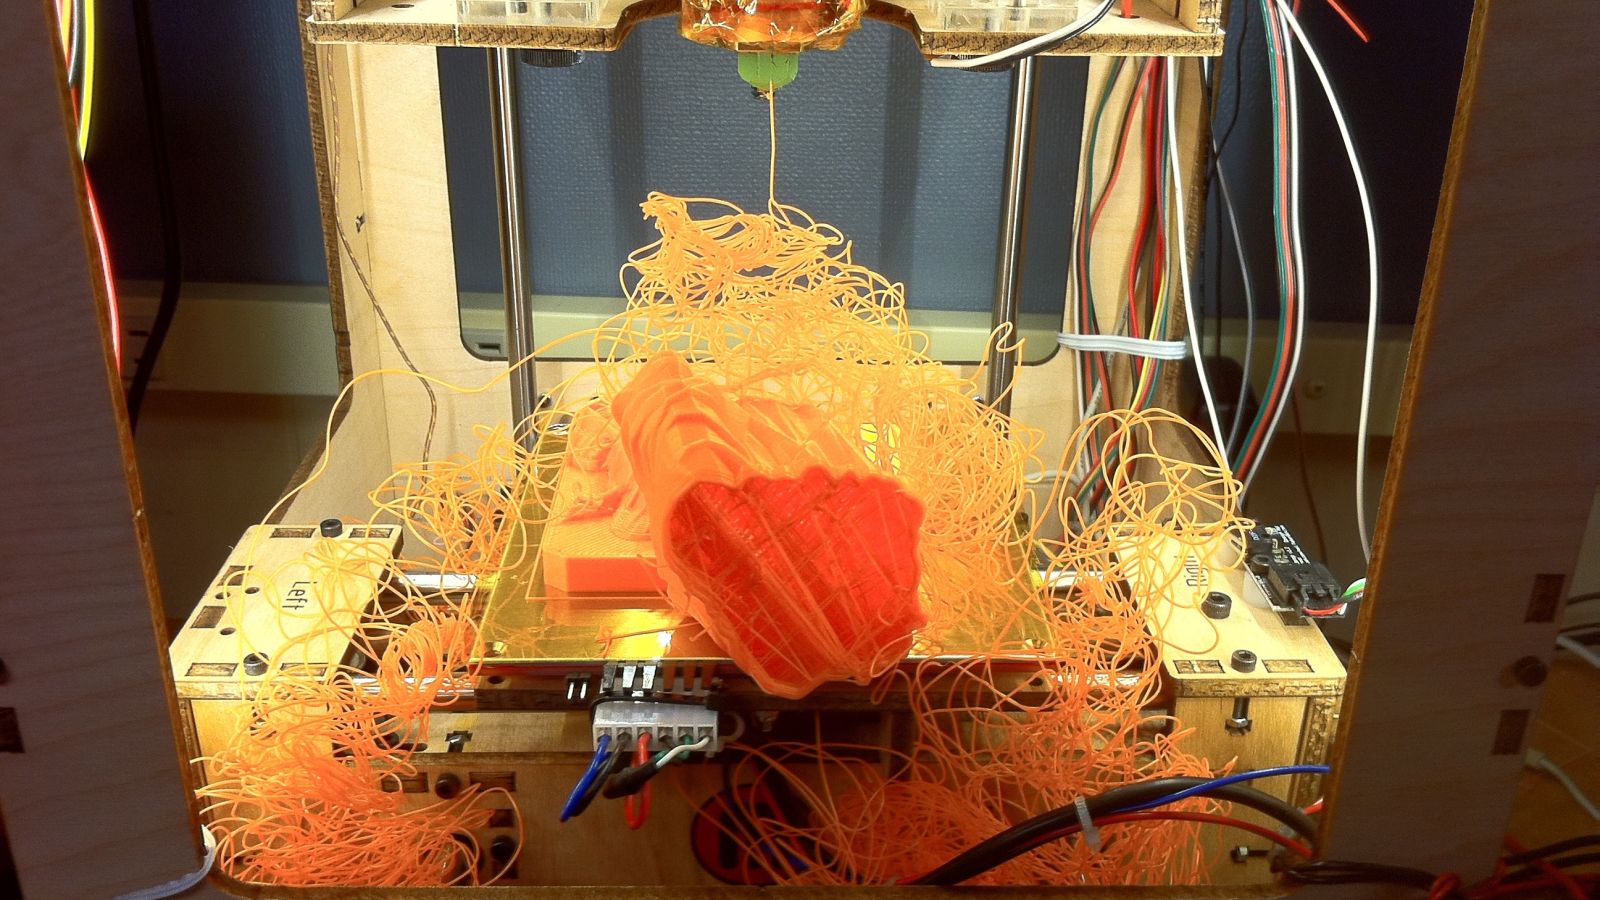
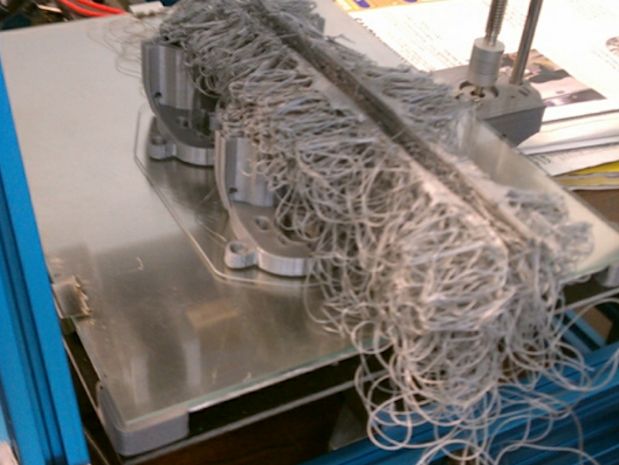
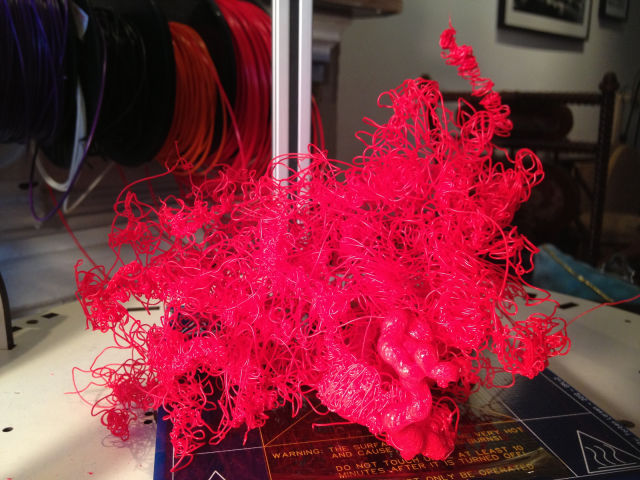
I’ve seen this a lot of times when utilizing plastic expulsion 3D printers and have come to acknowledge there are a few standard issues that may cause the issue. It’s extensively disappointing as prints may take a long time to finish and you’re squandering much time and in addition fiber.  
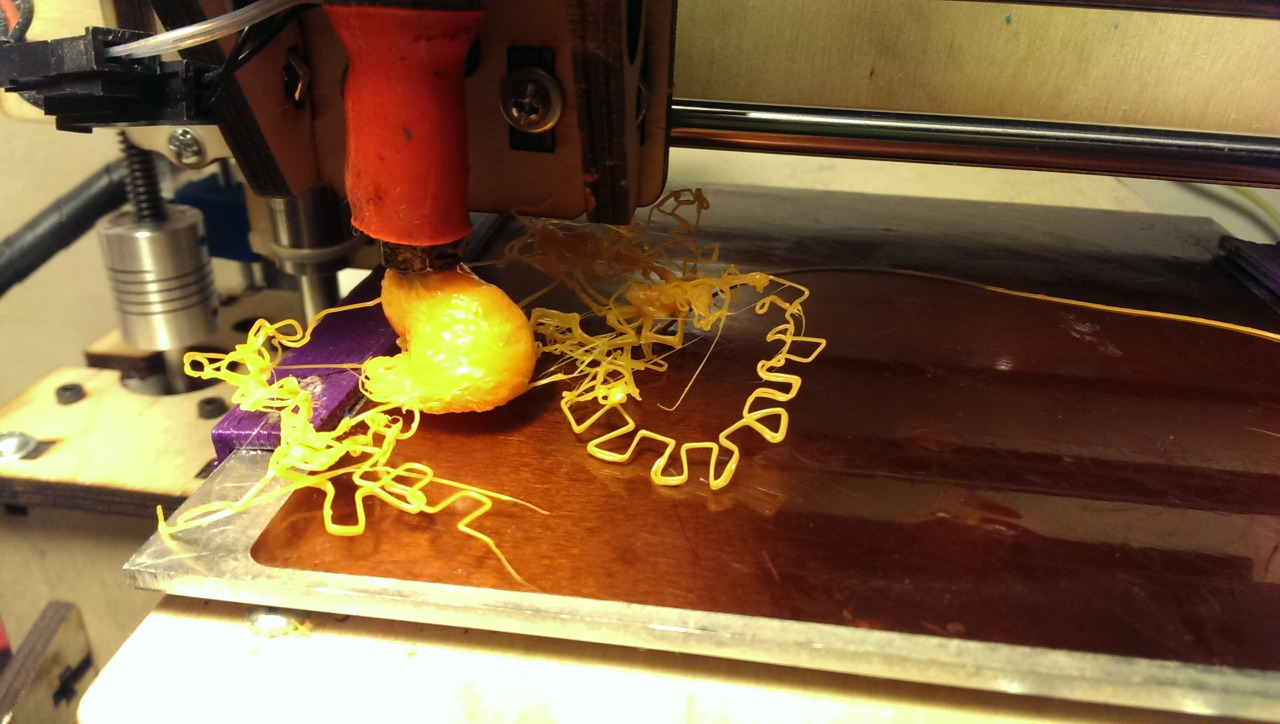
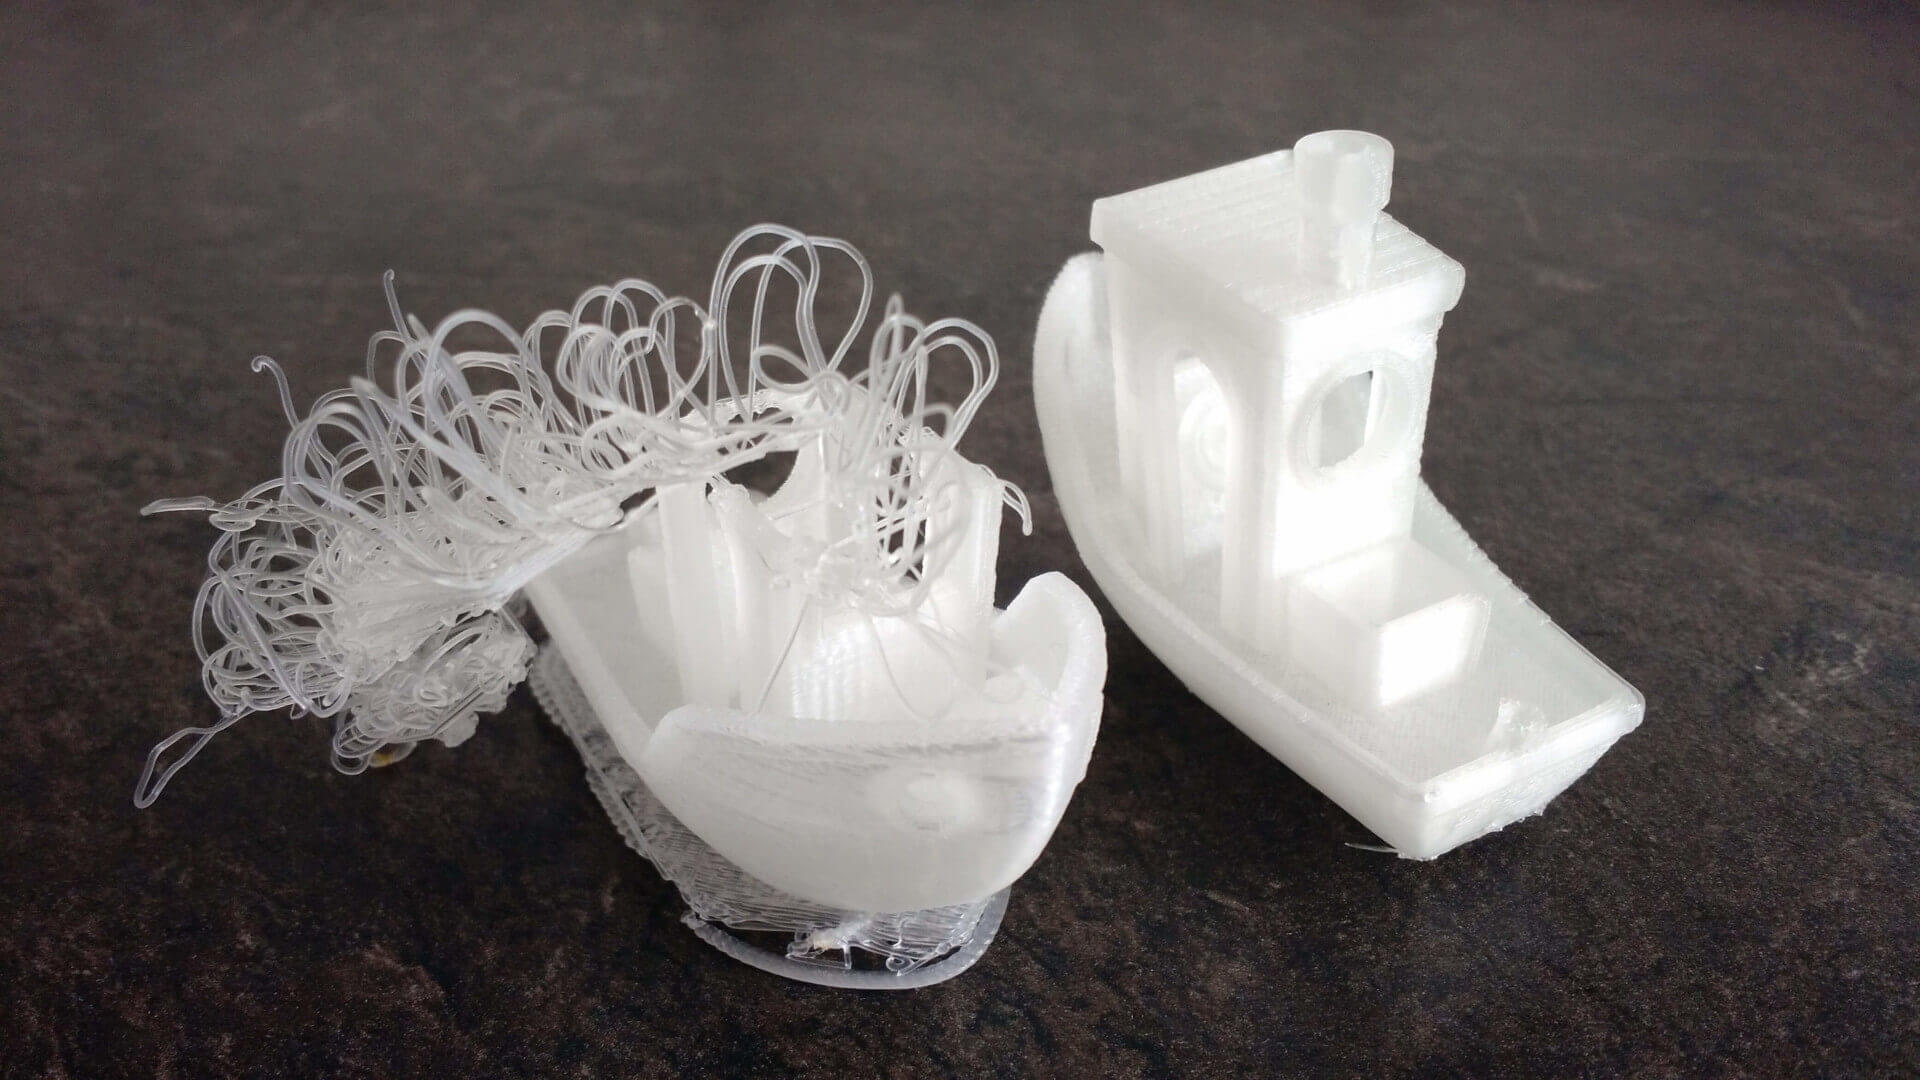
The circumstance is normal: you begin a print to run overnight and in the morning you check the 3D printer just to discover a heap of spaghetti. Surprisingly more terrible, dissolved – and now set – plastic may be inserted in the segments of your machine. In the most pessimistic scenario you may really wreck your machine.
The situation is common: you start a print to run overnight and in the morning you check the 3D printer only to find a pile of spaghetti. Even worse, melted – and now solidified – plastic might be embedded in the components of your machine. In the worst case you might actually wreck your machine.
It’s best to avoid these situations. Here’s a few things to consider if you’re having consistent problems printing a particular 3D model.

1.Bed Level? 
The most obvious problem you may encounter is that your print surface may be slightly unlevel. This means that in part of your 3D print’s first layer the extruder will be too high, while in the rest it will be too low. For a very small portion of the print surface it will be at the correct height. For machines that do not have an auto level function, you should ensure the machine is in fact level.
In some extreme cases the print surface itself is bent and thus cannot be properly leveled. This tends to happen only in older machines with non-metal print beds, such as acrylic.
ACTION: Level your print surface using the standard approach for your machine. 

2. Z-Gap Wrong?
Even when a desktop 3D printer is completely level, there is still the matter of ensuring the gap between the nozzle and the print surface is optimum. If it’s too much, then the first layer will not be sticking properly and likely will come loose later on. If it’s too tight you may find the print sticking too much when completed, or in some cases the extrusion may stop due to back pressure from a very tight squeeze pushing the filament.
ACTION: Set the z-gap properly with a test print. Some machines actually allow you to tweak this on the fly, which you should almost always do during the first layer. 

3.Print Surface Unclean:
Very often people are handling the print surface and inadvertently leaving oils and other material. You can’t necessarily see it, but it can affect the adhesion properties of some plastics. There’s also the possibility of crud leftover from previous prints should should be removed. Each new print should face an unpolluted print bed.
Broke from supports during print
ACTION: clean the print bed with appropriate solutions. Usually this means isopropyl alcohol, but check with your 3D printer manufacturer. 

4.Filament Snagging?
The plastic extrusion 3D printer will work only so long as filament is being delivered to the extruder. This means that your filament spool should rotate smoothly without much effort. Sometimes you can find the spool having too much friction on its mount, which can put undue stress on the extruder that could even slip.
ACTION: Ensure the spool rotates smoothly and even lubricate if necessary. 
Knots: Another possibility is that the filament itself is knotted up. This occurs when you accidentally let the end of the filament slip underneath other strands, typically when changing spools.
ACTION: Always hold on to the loose end of the filament and stick it in the holes in the filament spool. For untangling

5.Flat Bottom?
A print will stick if there is sufficient surface area on the bottom of the 3D model. But although your 3D model might LOOK like it’s flat, it may NOT BE SO. If this is the case, you might be surprised to find your first layer is fantastically smaller than you thought and is insufficient to stick.
ACTION: Use a 3D modeling tool to inspect the bottom of the 3D model before printing. If necessary, use a Plane Cut to slice off a wee bit of the bottom to ensure it’s truly flat. 

6.Enough Bottom?
What is the ratio of surface area of the bottom to the rest of the print? Do you expect to 3D print a large object and have only a 4mm square area support it? I think not.
ACTION: Make sure the bottom of the 3D model is sufficient to support the rest of the model. Reorient if necessary. 

7.Temperature Correct?
Sometimes layers aren’t sticking together properly in mid print and depending on the model’s geometry it might cause a failure. This could be because you’re 3D printing at a temperature that’s a bit too low. 
ACTION: Increase the print temperature slightly and ensure those layers really fuse into each other. 


Credit: pinimg.com;squarespace.com; izismile.com; gambody.com; wordpress.com