Showing posts with label activities. Show all posts

Friday, March 9, 2018

Multi-Material 3D Printing is a lot more fun than you think!

The 3D Printing community is constantly making new efforts and updating new processes to get things done easily. The most difficult process is multi-material and multi-color 3D printing. Both are time-consuming processes and also more fun. You can know everything about multi-color printing at Now you can 3D print your models in multi-color.
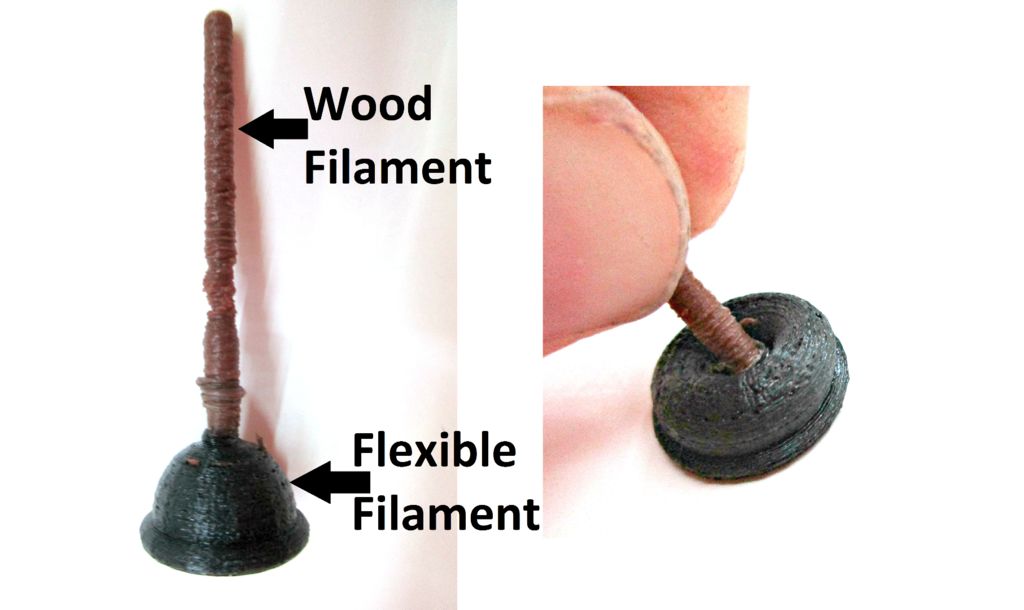
During the initial stages of 3D Printing, the whole object had to be printed using a single material. That’s impossible because you can’t print a house or fashion accessories with a single material.Thus Multi-material 3D Printing, prints a single object with two or more filaments rather than just using PLA, ABS or any other filament.

This is a bit tricky! You can use a dual extruder printer or get things done with a single extruder printer itself.

The question is how?

A Dual extruder has multiple extruders that allow you to have multiple filaments ‘piped in’ and ready to be used whenever the object being printed requires them, and this is where the saved time comes from.Having different filaments ‘ready to go’ means you no longer have to pause a print, empty out the extruder of the previous filament, feed in the next filament, and resume the print every time you need a different material. The printer will simply call on which filament it needs when it needs it.
While with a single extruder when you want to print a multi-material thing you have to replace the previous material with the other one and then print it. This takes time as in 3D Printing it prints layer-wise and if you have multiple layers of multiple materials than it requires a lot of time just changing the filament.

How to create a multi-material print with a Single Extruder printer?

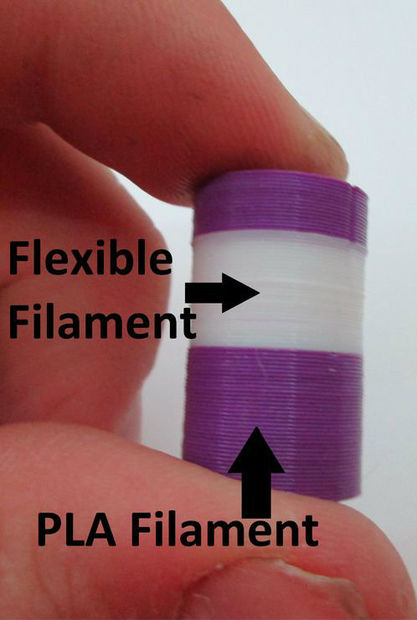
The secret? Spread the different materials across different layers of a single extruder printer. Both of the models that are shown have the materials at separate heights; on separate layers. The process basically works by printing with one material to a certain height, pausing the printer, switching materials, and continuing the print.

Step 1: Choose your 3D Model

Icecats has explained this with really well with an example of printing a toilet plunger as it has a flexible filament and a wood filament.So you need to find a good 3D model from Thingiverse or MyMiniFactory or any other 3D Printing website. You need to keep certain things in mind like:

  • Choose the object wisely which makes sense of carrying out a multi-material printing process.
  • Keep a certain height within two materials as this is the key to the process like the flexible plungers base is lower than the wooden handle.
  • See whether the model is printable with the desired materials.

Step 2: GCODE and other settings
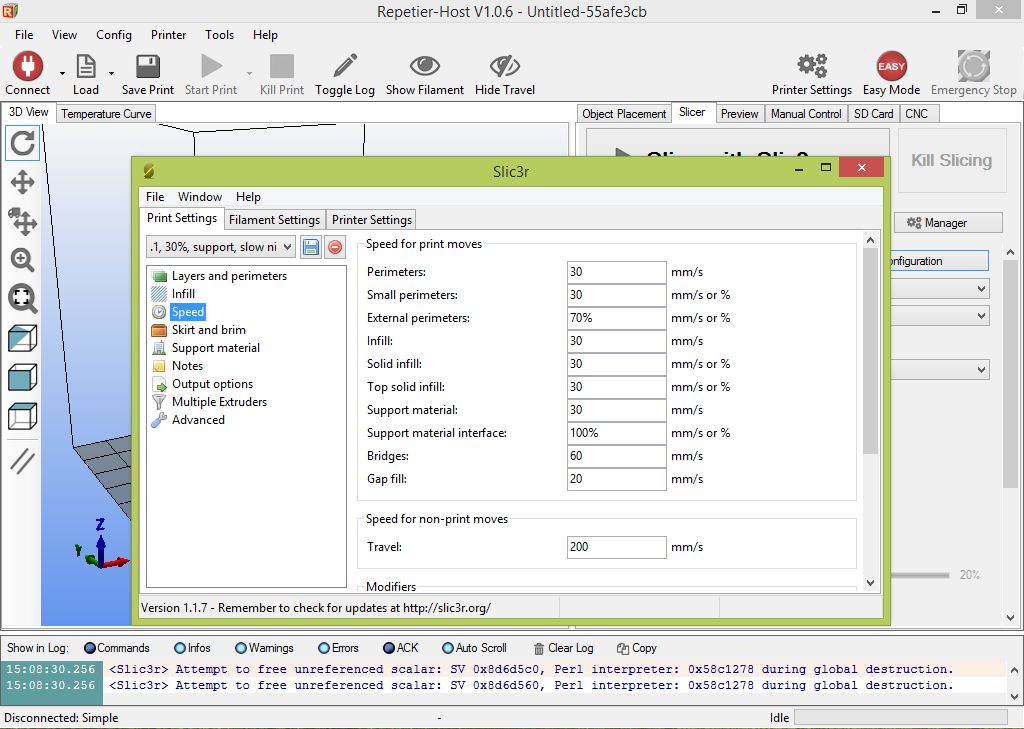
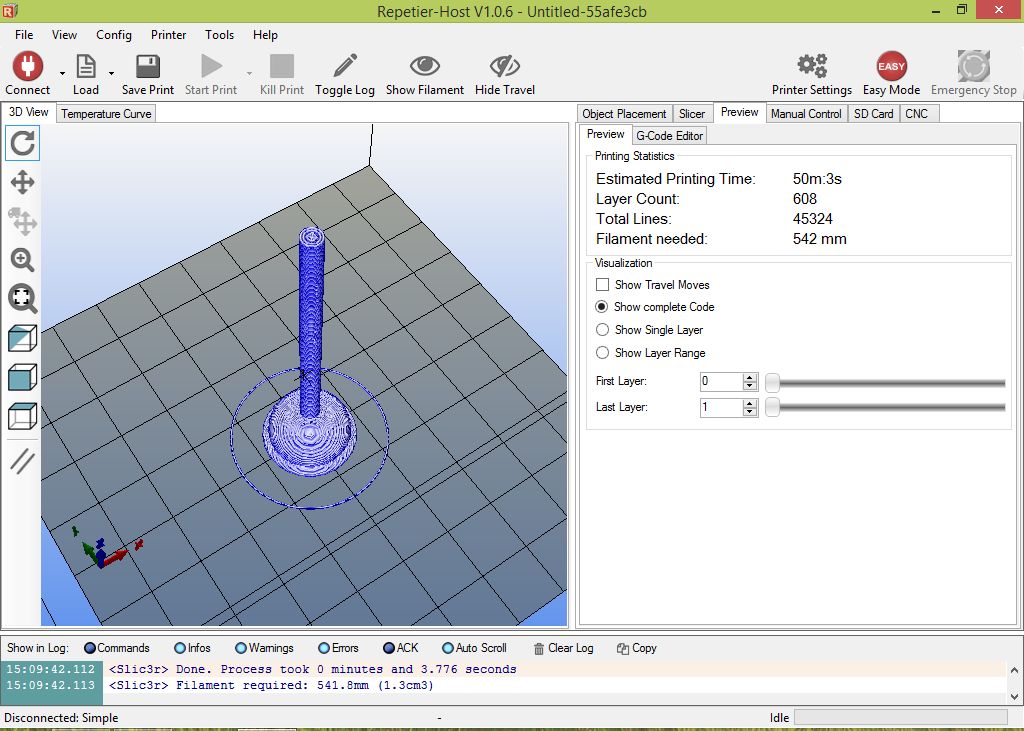
  • Slice your 3D Model into a GCODE with your 3D Printers host software.
  • Look up the speed settings into it and then set it up to the slowest.
  • Find a proper balance of layer height, infill, and retraction settings for your prints.
  • After you are ready, heat the printer and fill the first material into it. You can change the temperature later when you want to fill in the other material. The first material used by icecats was Ninjaflex.

Step 3: Switching materials
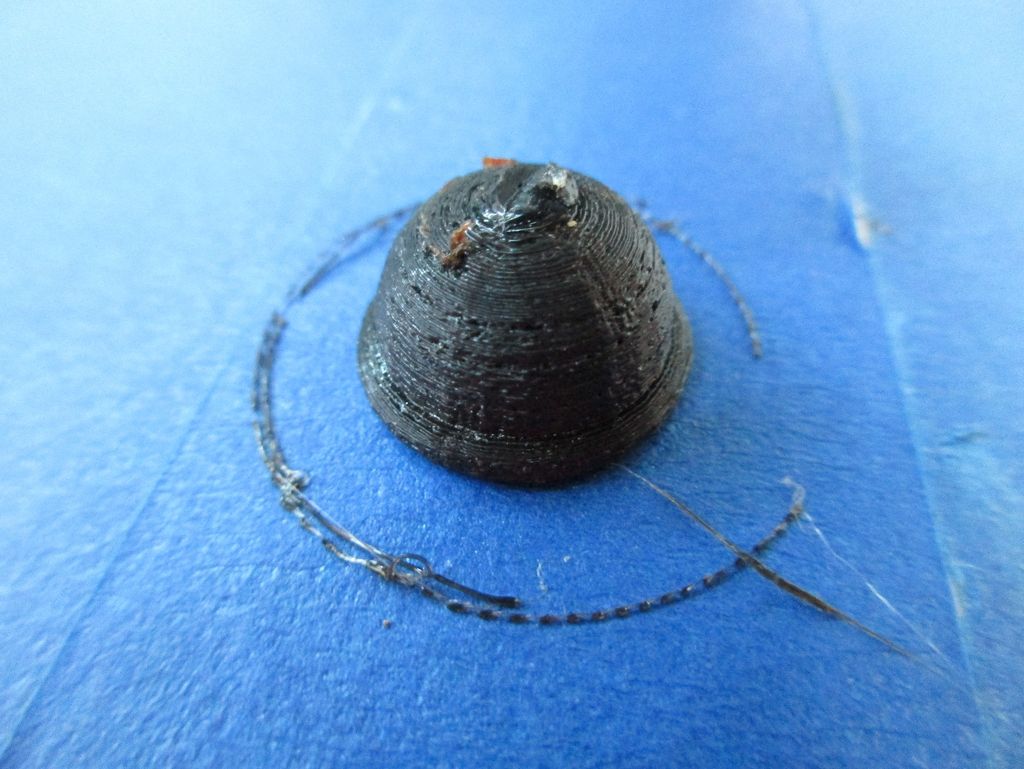
  • Monitor the printer as the first material is extruded.
  • When you want to switch the material, just pause the printer, it usually takes a bit of time for the printer to stop, raise the printer to 10 mm height on the z-axis.
  • To prevent the leakage you need to place a piece of paper below the extruder. If necessary, adjust the hot end temperature in the Manual Control tab to suit the second material.
  • Switch to your second material and purge the extruder until the new material comes out pure. Remove your piece of paper and continue the print. Repeat this process as many times as necessary.

Step 4: The Final Results
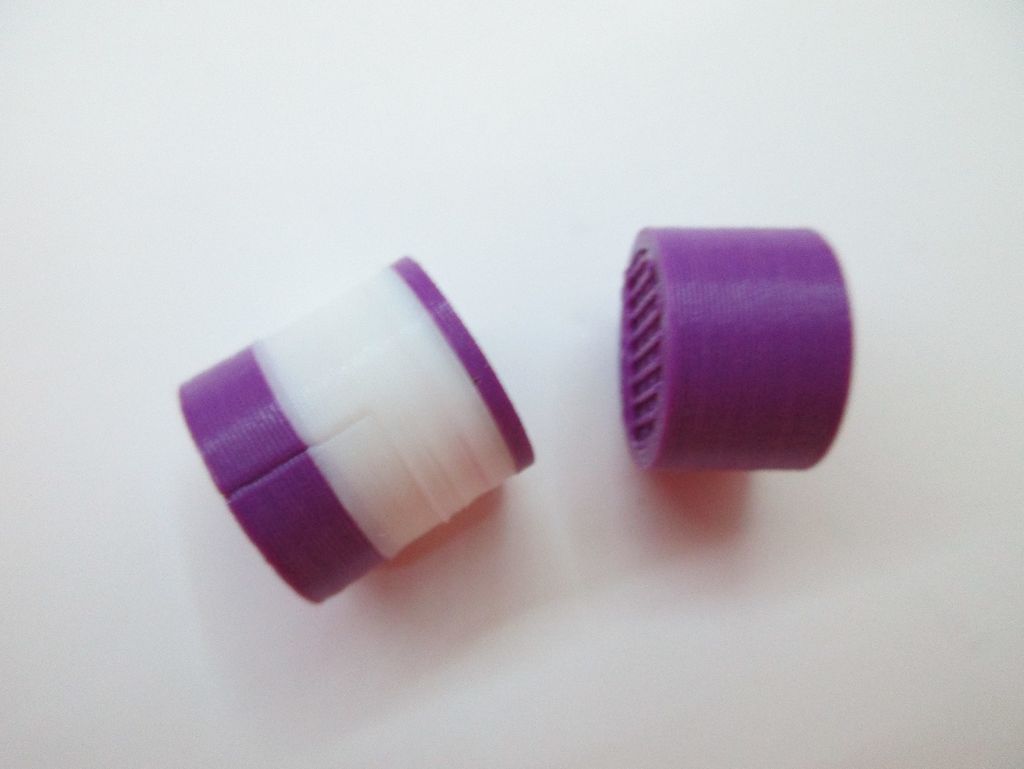
Icecats tells how his 3D Print resulted in, he basically used two different  PLA/NinjaFlex and wood/NinjaFlex. He says that both tests worked well for him.The purple and white cylinder shown above was printed with PLA and NinjaFlex. He has stressed that the print until it broke- two PLA layers spit apart, which means that the NinjaFlex/PLA bond is actually stronger than the PLA/PLA bond! The bonding between the wood/NinjaFlex was similarly high strength.

Here are some other ideas for prints to try.

  • hard PLA/ABS box with NinjaFlex hinge
  • hard PLA/ABS model car with NinjaFlex shocks and tires
  • wood “table” with PLA/ABS legs

Thus you can try multi-material printing with your single extruder printers as well and give your prints the real touch as you want.

Get these dual or single extruder printers for better prints and experiences of 3D Printing.

Credits: instructables.com.

Friday, March 2, 2018

DIY: 3D Print your own Bluetooth Speaker

If you have access to a 3D printer, a bit of maker prowess, and a love for sound, you can build your own 3D Printed Mini Bluetooth Speakers.

Create your ultimate 3D  Printed speaker box

Coder and tinker Yasthil Bhagwandeen shares a new Instructables project on how to build your very own 3D Printed Mini Bluetooth Speakers, now that is really cool. 3D Printing technology is discovering new ways to make things simpler and productive and so even an audio gear is not an exception.

 https://youtu.be/5IMl47iG-28

With companies like print+ and V-Moda using 3D printing to offer a modification to consumers, the technology could soon become a valuable part of the audiophile’s sonic experience.

Yasthil Bhagwandeen takes a DIY approach with his new project, showing how to print your own mini Bluetooth speakers. The coder and Tinker shows the full process of the project right from trials, failures, designs to the finished final successful project.

What will you need?

3D Printed mini blue tooth speakers need a handful of components and tools.

COMPONENTS

TOOLS

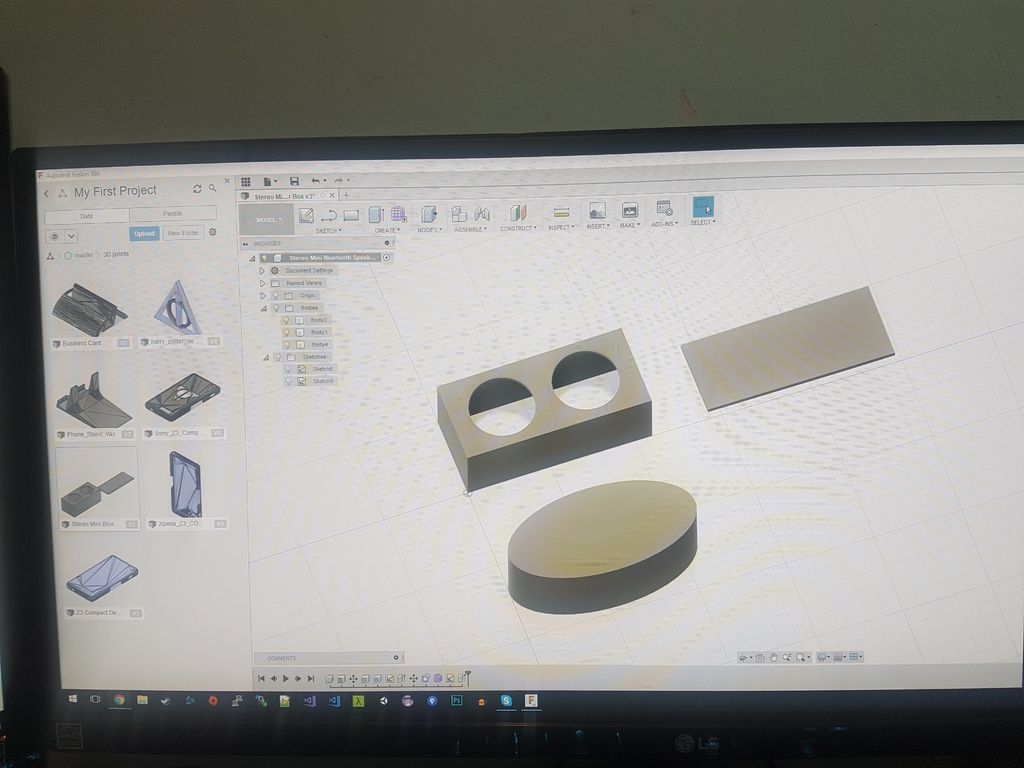
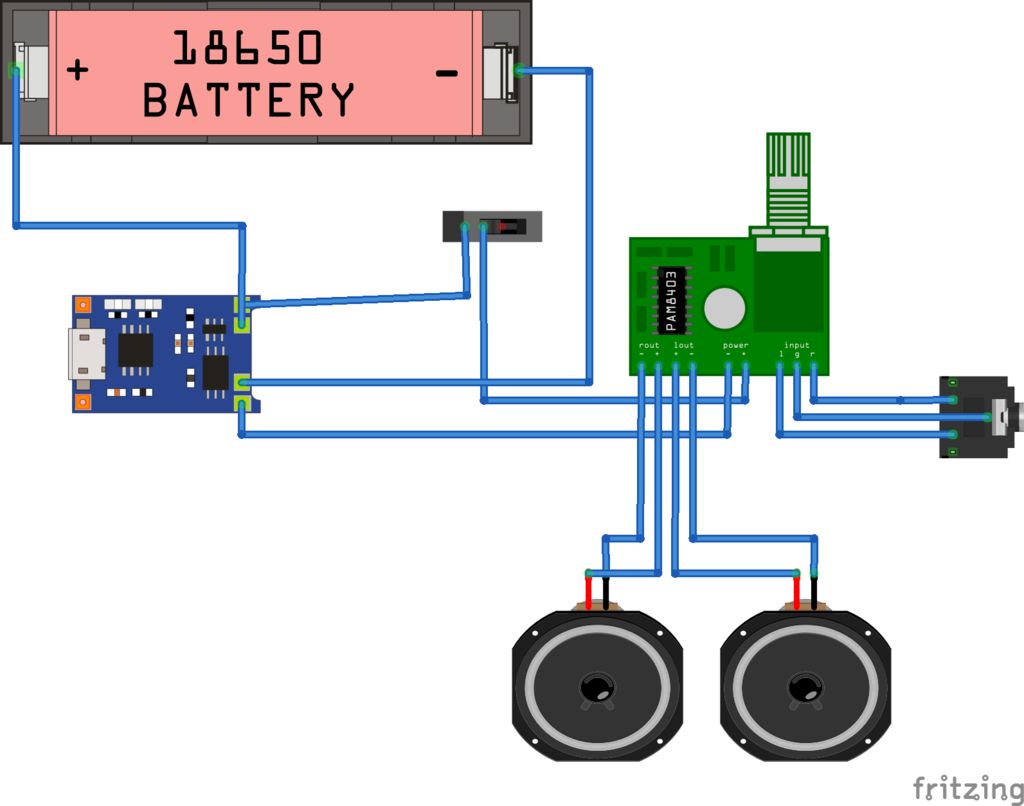
Design the Speaker Box The software used is Fusion 360 and you can get the STL files from Thingiverse. Make sure that you use the vernier calipers correctly as the measurements are important so that the electronic component can be assembled properly in the box so that there is no noise and disturbance in the quality of the sound. Print it out: Bhagwandeens version of mini Bluetooth speakers uses a Anet A8 and the filament used is CC Tree PLA  of 1.75 mm, layer height of 0.32 mm and 50 percent infill. The 3D model for the speaker box, designed by the tinkerer on Fusion 360, is a relatively quick 5 hour 3D print. He also shares the initial mistakes and subsequent redesign that came with developing this project. Obstacles included incorrect measurements, which made it difficult to fit in the speakers, as well as forgetting to print holes for the switch, jack, and micro USB slot. Eventually, Bhagwandeen overcame these issues and was able to build his speakers. Before going to the further step of soldering the maker recommends to test the electronic components and check whether they are working properly.Then start with the soldering which has to be done accordingly to the below schematic diagram.   After the soldering process simply uses the hot glue gun to assemble the electronic elements into the 3D Printed speaker box. The speaker enclosure is designed in such a way that it is easy to open and shut the box without any problem.

The speaker isn’t extremely loud, but it does produce a fair amount of volume. It’s an intermediate project that does require some time and maker skills, but it also seems like a nice undertaking for a beginner looking to get familiar with soldering, or even a more experienced maker who wants a fun and useful project for the weekend. Either way, you can bring your favorite sounds right to your own DIY speaker box and get speakers of your own designs and you can even customize it.

So start with 3D Printing right away and know about the latest trends of the industry with Geeetech.

credits: all3dp,instructables.com

Tuesday, February 27, 2018

Top 5 Artistic Uses of 3D Printing

Exploring new technologies in 3D Printing is something that enthusiasts and businesses are looking up to.Every great artist is adding some creativity and newness to the 3D Printing field.

The below workpieces are developed by some great artists:

A next level Fashion

Download your clothes, print them and get ready for every event with a unique design made by you. Danit Peleg is using 3 D Printing in Fashion.Like other artists in the Fashion world trying to use new methods techniques and fabrics to ensure an innovative hand to the industry, Peleg is also contributing to her new ideas and ways. The new dimension added to her work is the ability for customers to customize the designs.

Last year, she launched a new feature on her website enabling customers to personalize and order the world’s first 3D printed garment available to purchase online. In future, due to advancements, she wishes that these fashion design files could be downloaded and printed at home.Customizing a jacket on Peleg’s website will set you back about $1,500.

Barack Obama’s State of Union speech

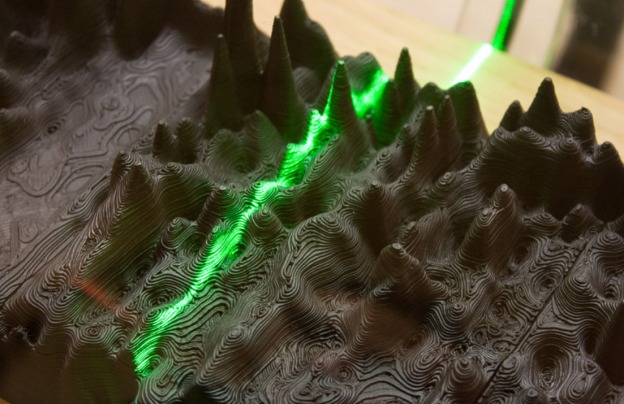
Artist Giles Azzaro in his work, ‘Next Industrial Revolution,’ captures a 39-second clip of Barack Obama’s speech regarding 3D printing in a tangible form. He created a digitally patented software that can create a personal voice in 3D and can be printed and played.In the wake of preparing the bit of Obama’s speech for five hours, he printed the structure for 350 hours on a work area 3D printer.

The model resembles “alien scenes” with every one of the peaks and troughs to take after the high and low tones of the president’s voice. A laser passes the formed surface checking the sound account as appeared beneath and divulges the message on an intelligent screen.

The working of the gadget has appeared in this video here. You need to see it to trust it!Azzaro has also created voice sculptures of Albert Einstein, Mahatma Gandhi, Neil Armstrong, Marilyn Monroe, John F Kennedy and others.

 Rob and Nick Carter 

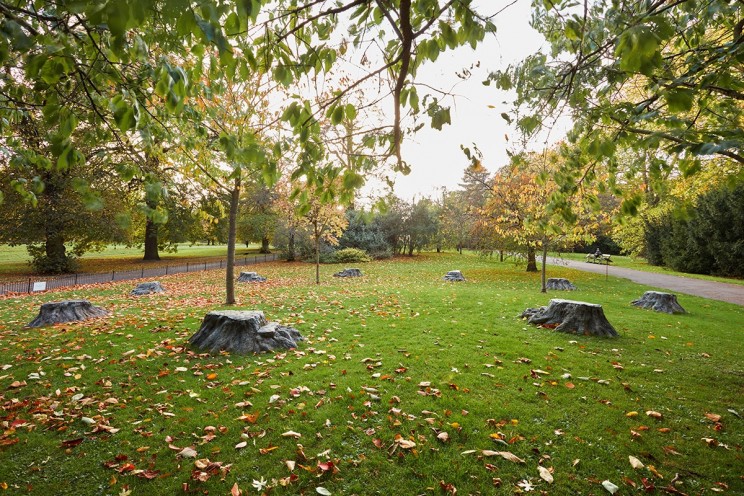
The married couple, Rob and Nick Carter make old artforms new again by interpreting it into 3D prints. Their bronze models pay respect to crafted by ace painters like Vincent van Gogh and Giorgione. Underneath they brought an ink drawing—”The Heavy Trunk of an Oak, Sawn-Off Horizontally Above Its Roots,” which Dutch painter Jacob de Gheyn II finished in 1600—to life as a progression of nine bronze tree stumps masterminded in an open-air establishment at Kensington Gardens in England. The stumps were designed utilizing 3D examining, printing and bronze throwing strategies.

Vincent Van Gogh’s Ear

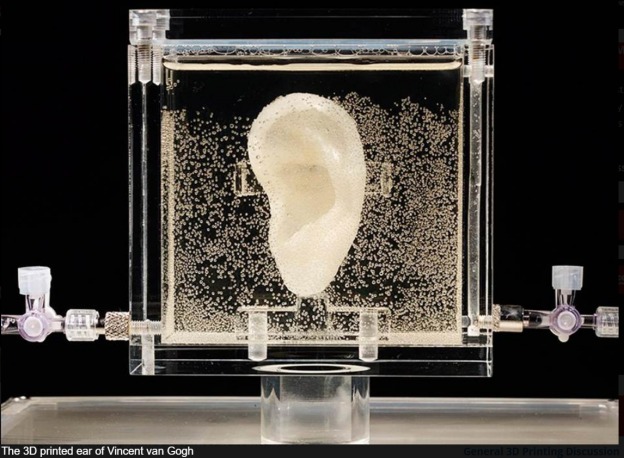
Vincent van Gogh, an extraordinary craftsman from the 1800s, is notoriously known for removing his ear to provide for a whore in 1888. He passed on soon after. An American based craftsman, Diemut Strebe, willingly volunteered to reproduce this bit of life systems. She gathered DNA and cells from his living awesome grandson, Lieuwe van Gogh, and a stamp that Vincent van Gogh had once licked. She at that point worked with MIT to build a tissue material from the DNA and utilized a biocompatible 3D printer and programming to print a correct reproduction of his ear.

This bit of craftsmanship, called ‘Sugababes’, definitely emerges at the Center for Art and Media in Karlsruhe, Germany, since it is alive! The ear is put in a supplement arrangement as appeared above for food. To make it considerably more amazing, guests can converse with it and it can hear! The sound info is handled and changed over into nerve motivations progressively. It, be that as it may, can’t react.

More insights about this insane bit of workmanship are accessible here.

King Tut’s Tomb – A Replica Fit For a King

Tutankhamun, an Egyptian pharaoh was well known when his almost in place tomb was found by Howard Carter in 1922. Passed on mysteriously at 18 years old subsequent to a decision for almost 10 years, King Tut’s tomb has been the most seen, considered, and discussed in Egyptian history.

Notwithstanding, because of the inordinate research and archeological work, numerous were worried over the conservation and corruption of this momentous bit of history. In 2009, an English craftsman, Adam Lowe, chose to create a replica of his tomb precisely, every inch for inch, with his organization Factum Arte. The $690,000 venture looked so credible when it was finished that it conveyed tears to the eyes of an Egyptologist, Salima Ikram.

3D Printing changes your way to look at things and explore new doors towards making things possible so start it today and print your dreams out. Get the best printers at Geeetech.

Credits:interestingengineering.com,grabcad.com

Tuesday, February 20, 2018

Make your Gaming Experience better with these DIY 3D Printed PS4 Mods and Accessories.

Play station 4 is the latest love of every gaming freak and we do love our Play Station more. To pamper it up more you can create 3D Printed accessories and mods. Be it an elegant 3D printed stand for your DualShock 4 controller, or an all-in-one cooling stand USB charging dock — if you can think of a way to make console gaming a little neater or better, the chances are someone has been there and designed that.

Enhance your gaming lifestyle with these DIY PS4 accessories, that will make your gaming experience more worthful:

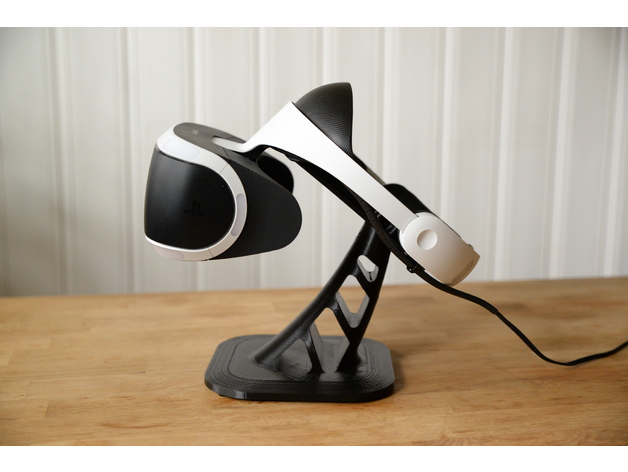
Playstation VR Stand

This accessory helps your Playstation VR to stand stable with an exquisite look and you can’t lose your VR. The configuration is made by Cjwelcome with the thought of sleek design and usefulness in mind. Its tilted headband section and forehead rest are situated at such a point where when strapped on, the VR sits genuinely level and confronting straight. It has four countersunk gaps for sliding the headset.

One more outline by hachi roku is motivated by Cjwelcomes design and composed a customized one.

Download the records from Thingiverse.

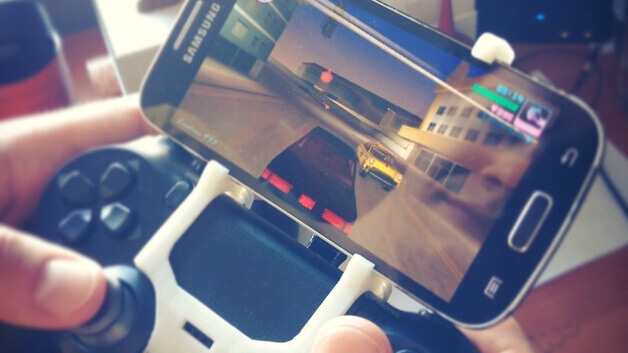
PS4 Gamepad Smart Clip (Samsung Galaxy S4 Mini)

FuBama has created this design , with simple rubber bands so that it stays in place.You can add your customizations to fit it to your phone. An easy to print skeletal design, PS4 mods like this will let you take your PlayStation controller on the road as a Bluetooth controller for smartphone games. Download the file from Thingiverse.

PS4 Controller Charger

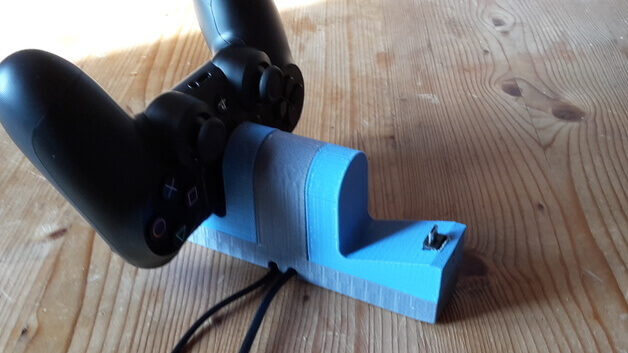
Not only to keep your PS4 accessory, you can also keep the controllers always charged. It is symmetrical so that you can charge your DualShock controllers and also keep them in place. With space for you to feed the console’s controller charging cables through, this PS4 accessory designed by Thingiverse user Stephan Steindl is simple and effective. Download the STL files from Thingiverse.

PS4 Controller Stand

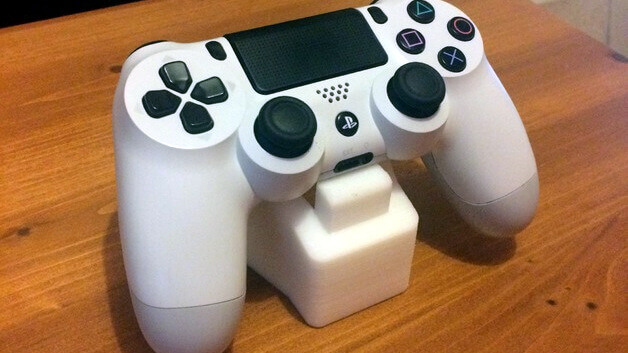
For a single PS4 controller, a classy stand and no complex geometry make this a charmer in the world of PS4 accessories and is quite an easy print. Designed by Luke Boswell  and get it on Thingiverse.

PS Vita Grip With DualShock 4

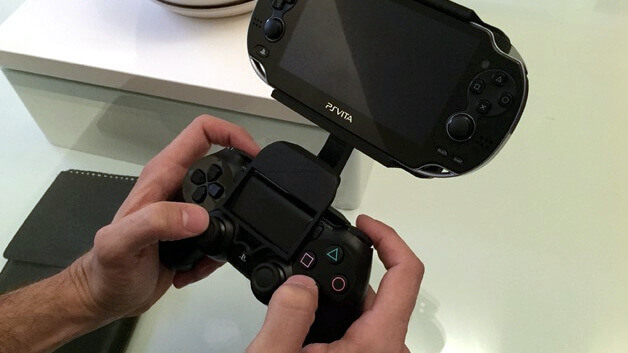
Alongside being an astounding portable PlayStation, PSvita can be appended to your DualShock 4 controller.One of the not very many PS4 mods out there to make utilization of a specialty, yet a great component of the PlayStation 4 support, Thingiverse client MakingZone’s PS Vita mount allows you to advantageously utilize the DualShock 4 controller, rather than the Vita’s downsized catch design. The outline is made by MakingZone and purchase the files on Thingiverse.

Wall Mount PS4

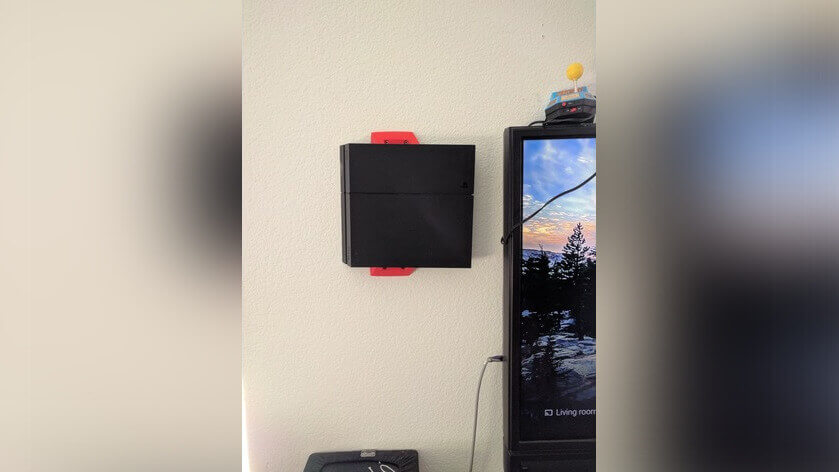
Wall Mount your PS4 so you need creator jameswood notes that the heaviness of the comfort ought to be upheld by the main rack territory of each part, instead of the little prongs that protected it set up. This implies no under rack mounting — vertically on dividers as it were. The files can be downloaded from Thingiverse.

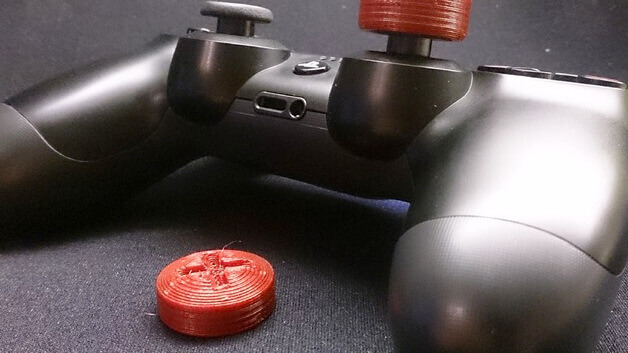
Thumbstick Extender

Mainly in fps games, this allows extending length of your thumbstick for precise aim and faster accuracy.Some PS4 mods enable you to improve and change your Dualshock controllers. The assumed advantages of expanding your thumbstick with this 3D printable PS4 mods come in recreations that require a high level of exactness.Designed by

icecryptex and you can get the files on Thingiverse.

Make your PS4 more exciting and fun with these 3D Printed accessories which will help your PS4 to look more better and help to stay it in place rather than misplacing it always.Now your PS4 has its own home where it feels warmer.

Get a bestprinter which can help you print these accessories and mods for PS4.e

credits: all3dp,thingiverse

Tuesday, February 6, 2018

Worry Not!! You Can Now Reuse Waste Plastic For Your 3D Prints.

3D Printing is certainly having a lot of impact on our lives, exploring creativity and awesomeness but after every print, there is an extra filament left and oozing out which has to be trimmed.This filament cannot be used again as it is too small.Think about how many 3D printers there are in the world and how many things they’re printing every day, and that’s a whole lot of waste that can only really end up in a landfill.

The biggest environmental issue is to tackle the plastic waste. Plastic has been accumulated on our earth since it was discovered and there is no way out to get rid of it, an alarming sign of pollution now. But it can be recycled and reused, so the better way out of this pollution problem is 3D Printing.

We cannot stop utilizing plastic but surely can make the most of it by recycling it…

Read the stories below to know how to efficiently use the wasted plastic while 3D Printing:

Precious Plastic Project

As the name suggests Precious Plastic is the global community of environment lovers who look forward to ending the plastic pollution. Here anyone can share their collaborative techniques and ideas.Already many people are working towards reusing the old plastics and make creative useful products.

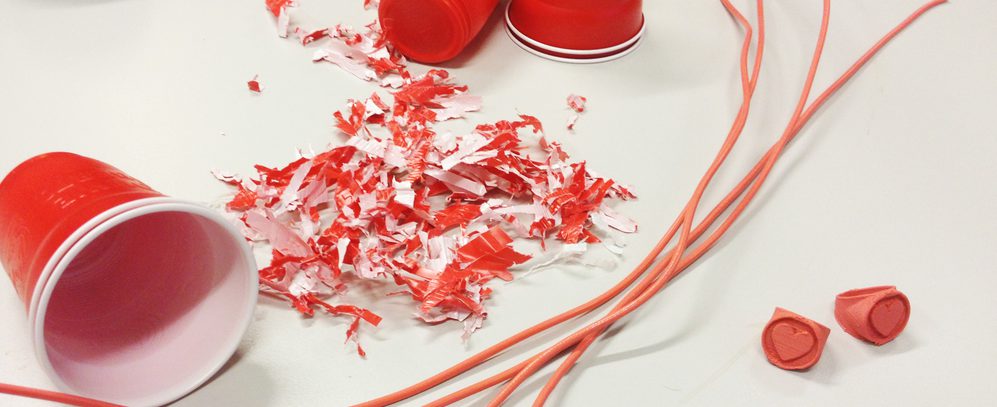
Currently, the team is turning otherwise unrecyclable plastic into functional smartphone cases. Anything from old plastic bottles to takeaway cup tops is being combined to create new iPhone cases.Precious Plastic has created a manufacturing ecosystem to help people to turn plastic waste into valuable products.

We previously covered the project during the initial launch of its open source production platform.The company also gives a toolkit and machinery including a plastic waste shredder, an extrusion machine to create 3D printing filaments from recycled plastics, an injection molder, as well as a compressor to help process the molds. To check the efficiency of these tools they are creating iPhone covers as the first project from recycled plastic.

Reform the campus

UC Berkeley is a leader in 3D printing has students all over the campus printing their favorite things and exploring which also creates a lot of plastic waste.Almost over 600 pounds trash is generated all over. The students Nicole Panditi, and Scott Silva have a solution.

They’re creating a campuswide system that takes used 3D printer plastic, grinds it up, melts it down and produces a new spool of plastic that can be used again in the campus’s 3D printers.

In spite of the fact that there have been a few endeavors to reuse 3D printer plastic on campus and some labs purchase reused fiber, this would be the first run through Berkeley had a framework to reuse all the 3D plastic waste on campus, something Panditi says will be fundamental as 3D printing turns out to be increasingly well known.

From Plastic Bottles

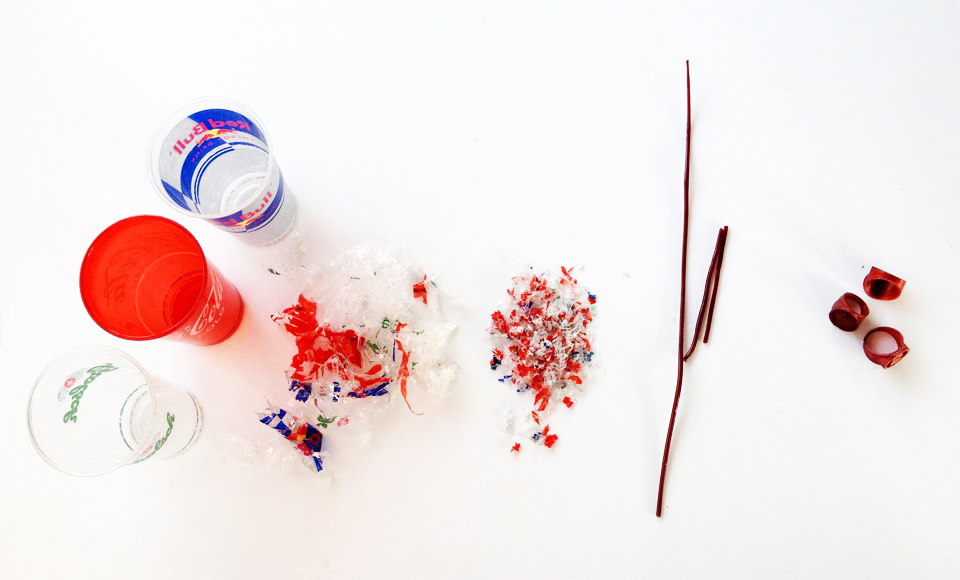
Three engineering physics students at the University of British Columbia in Canada have developed the ProtoCycler, a gadget that can crush a wide range of waste plastic into an excellent clean spool of plastic fiber that can be utilized as a filament of a 3D printer.

We’re talking anything – plastic jugs, 3D-printing shorts, takeaway nourishment compartments. In the event that your children forget their LEGOs one too often for you to tread on with your uncovered feet… toss them in as well. It works simply like a juicer, which you can find in the video.

Sustainability is what we all are striving for. We can surely lend help to keep the earth pollution free by whatever means we can. Even if its a small thing it matters a lot. Plastic cannot be eradicated but better used, so making the most of it is in our hands.

Start with a small change and see how the world changes. A push towards 3D Printing and the better world starts here at Geeetech. Join us to make the world a better place to live in.

Credits: perpetualplasticproject.com,all3dp.com,youtube.com,news.berkeley.edu,sciencealert.com.
Saturday, February 3, 2018

Essential Tools That Every 3D Printing Passionist Must Have!

3D Printing is love but when it comes to reality we face a lot many issues such as print getting stuck to the bed, the filaments breaking down, the axles not working and getting stuck etc. This is a list of few problems that we face with 3D Printing, so we have bought to you some solutions rather tools that you can use to tackle these common problems.

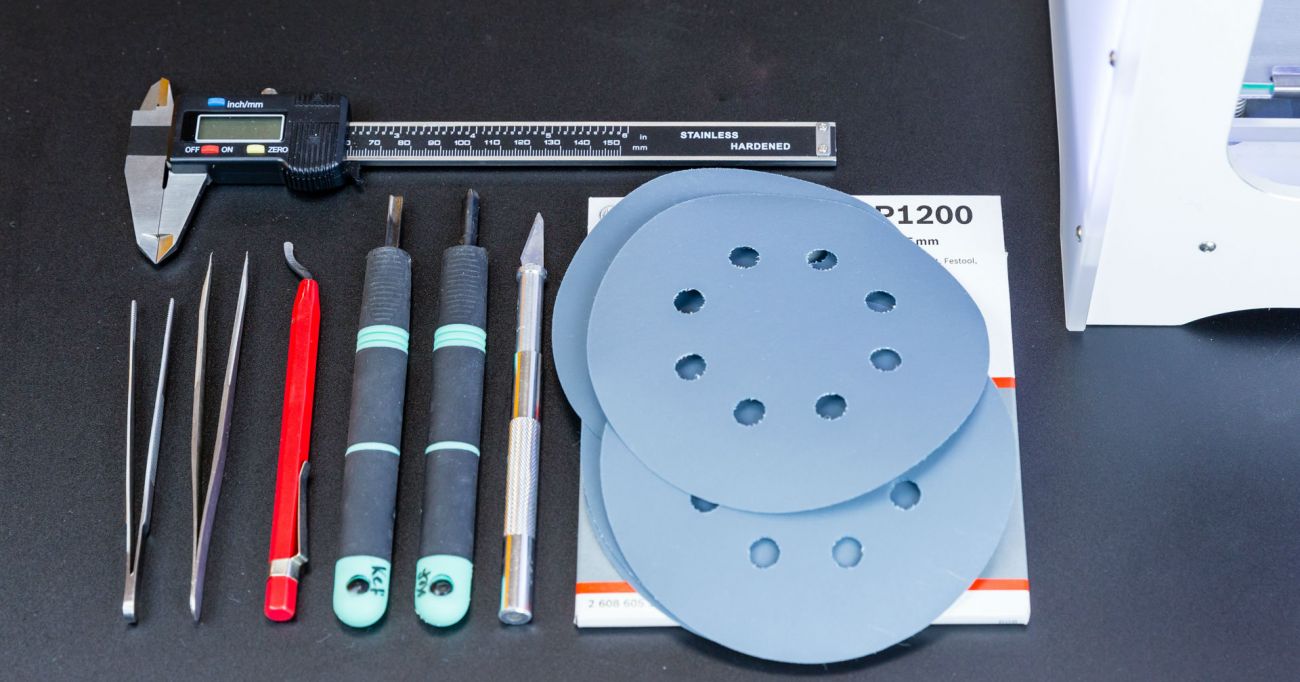
Print removal tool kit

You feel really tensed when your print gets stuck to the bed and becomes hard or impossible to remove them easily.A spatula or knife also works in this case, you need to put in a little forced though.

Just keep in mind that not much force is applied and it doesn’t break the print. So keep in mind to apply the exact force and help your print remove from the bed satisfactorily. The tweezers can be used to remove the oozing filament out of the nozzle.

Great for removing 3D printed support material or cleaning up 3D Printer hot ends. Fine ends let you easily get too hard to reach places.Be careful to not scratch the print bed if you are using such sharp object.The nozzle gets blocked every time after printing a design, an extruder nozzle cleaner is the best solution.

Glue Stick

Bed adhesion building is the pretty essential part when you start to print to keep the object in place. These come in too handy when you have the need to stick your print to bed, hairspray can also be used but it does not deliver that much precision.

If you want to avoid the trouble of warping then glue stick is important.It is simple, just cover your print bed with soluble glue and experience the improvement in adhesion.

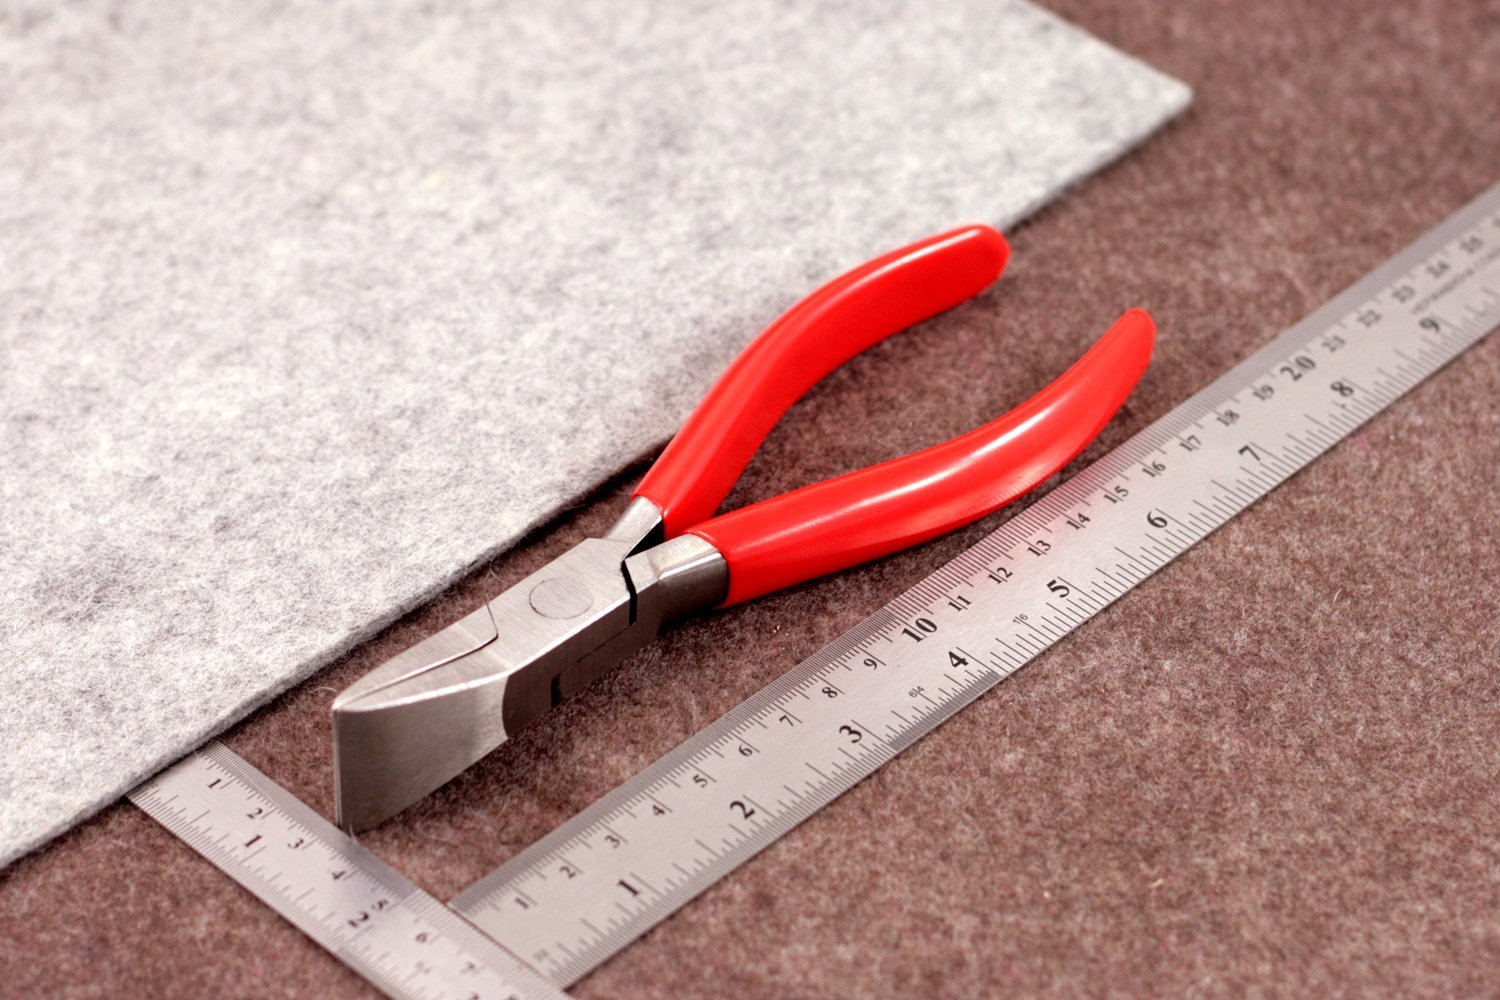
Pliers

A pair of pliers is always good in a kit, its handy to remove any sticky object or to fox the printers if there is some help needed.Get quality pliers with rubberized slip-resistant grips.

No matter what brand you end up buying, the absolute must-haves are needle nose pliers and wire cutting pliers. The wire cutting pliers are particularly useful to snip away support material or when trimming filament.

These can be used to reach into tight spaces to remove tangles or melted material also used to trim filament, larger messes, and any wire or other material used for supporting the printed piece.

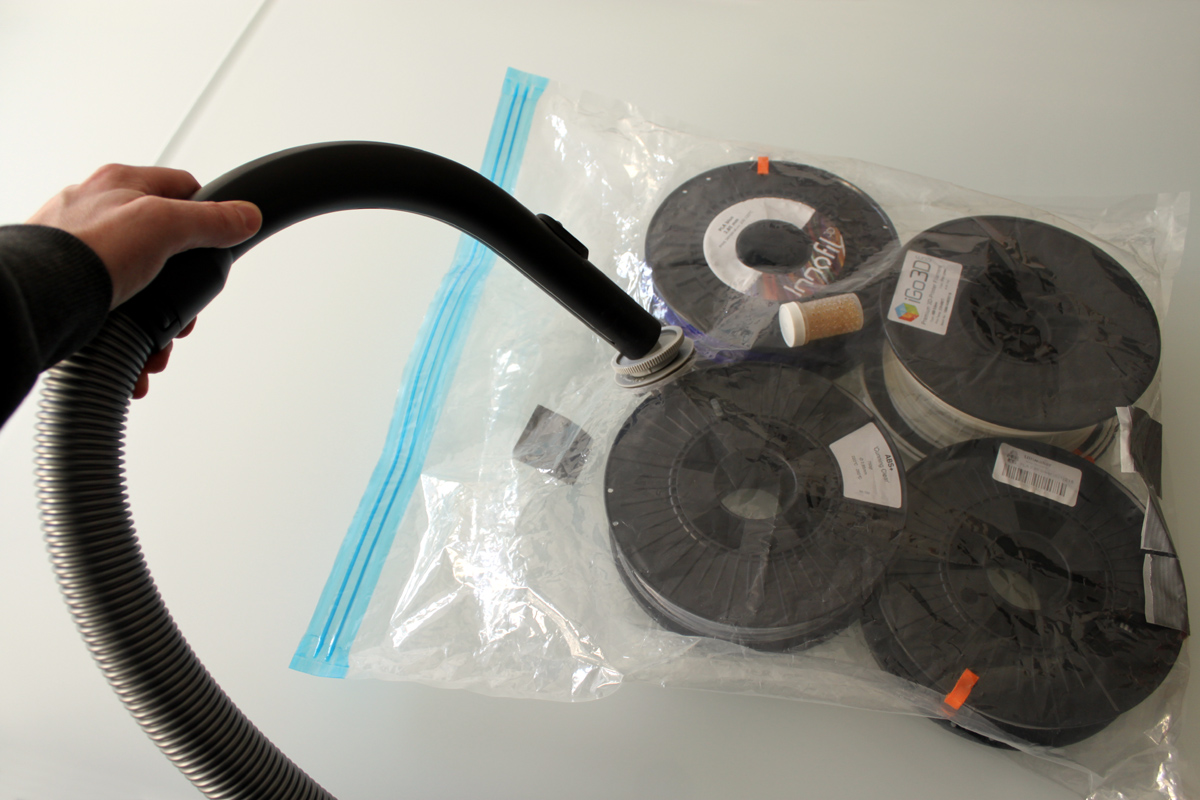
Desiccants

The filaments used for 3D printing are varied and are used to print various objects and designs. They might be environment-friendly filaments made from beer, trash or garbage or the standard filaments like ABS, PLA, Nylon etc.

Storing them is a question and they also catch moisture leading to the breakdown of the filament at such times use a desiccant that can absorb the moisture, add it to the plastic sealed bag which you use to store filament.

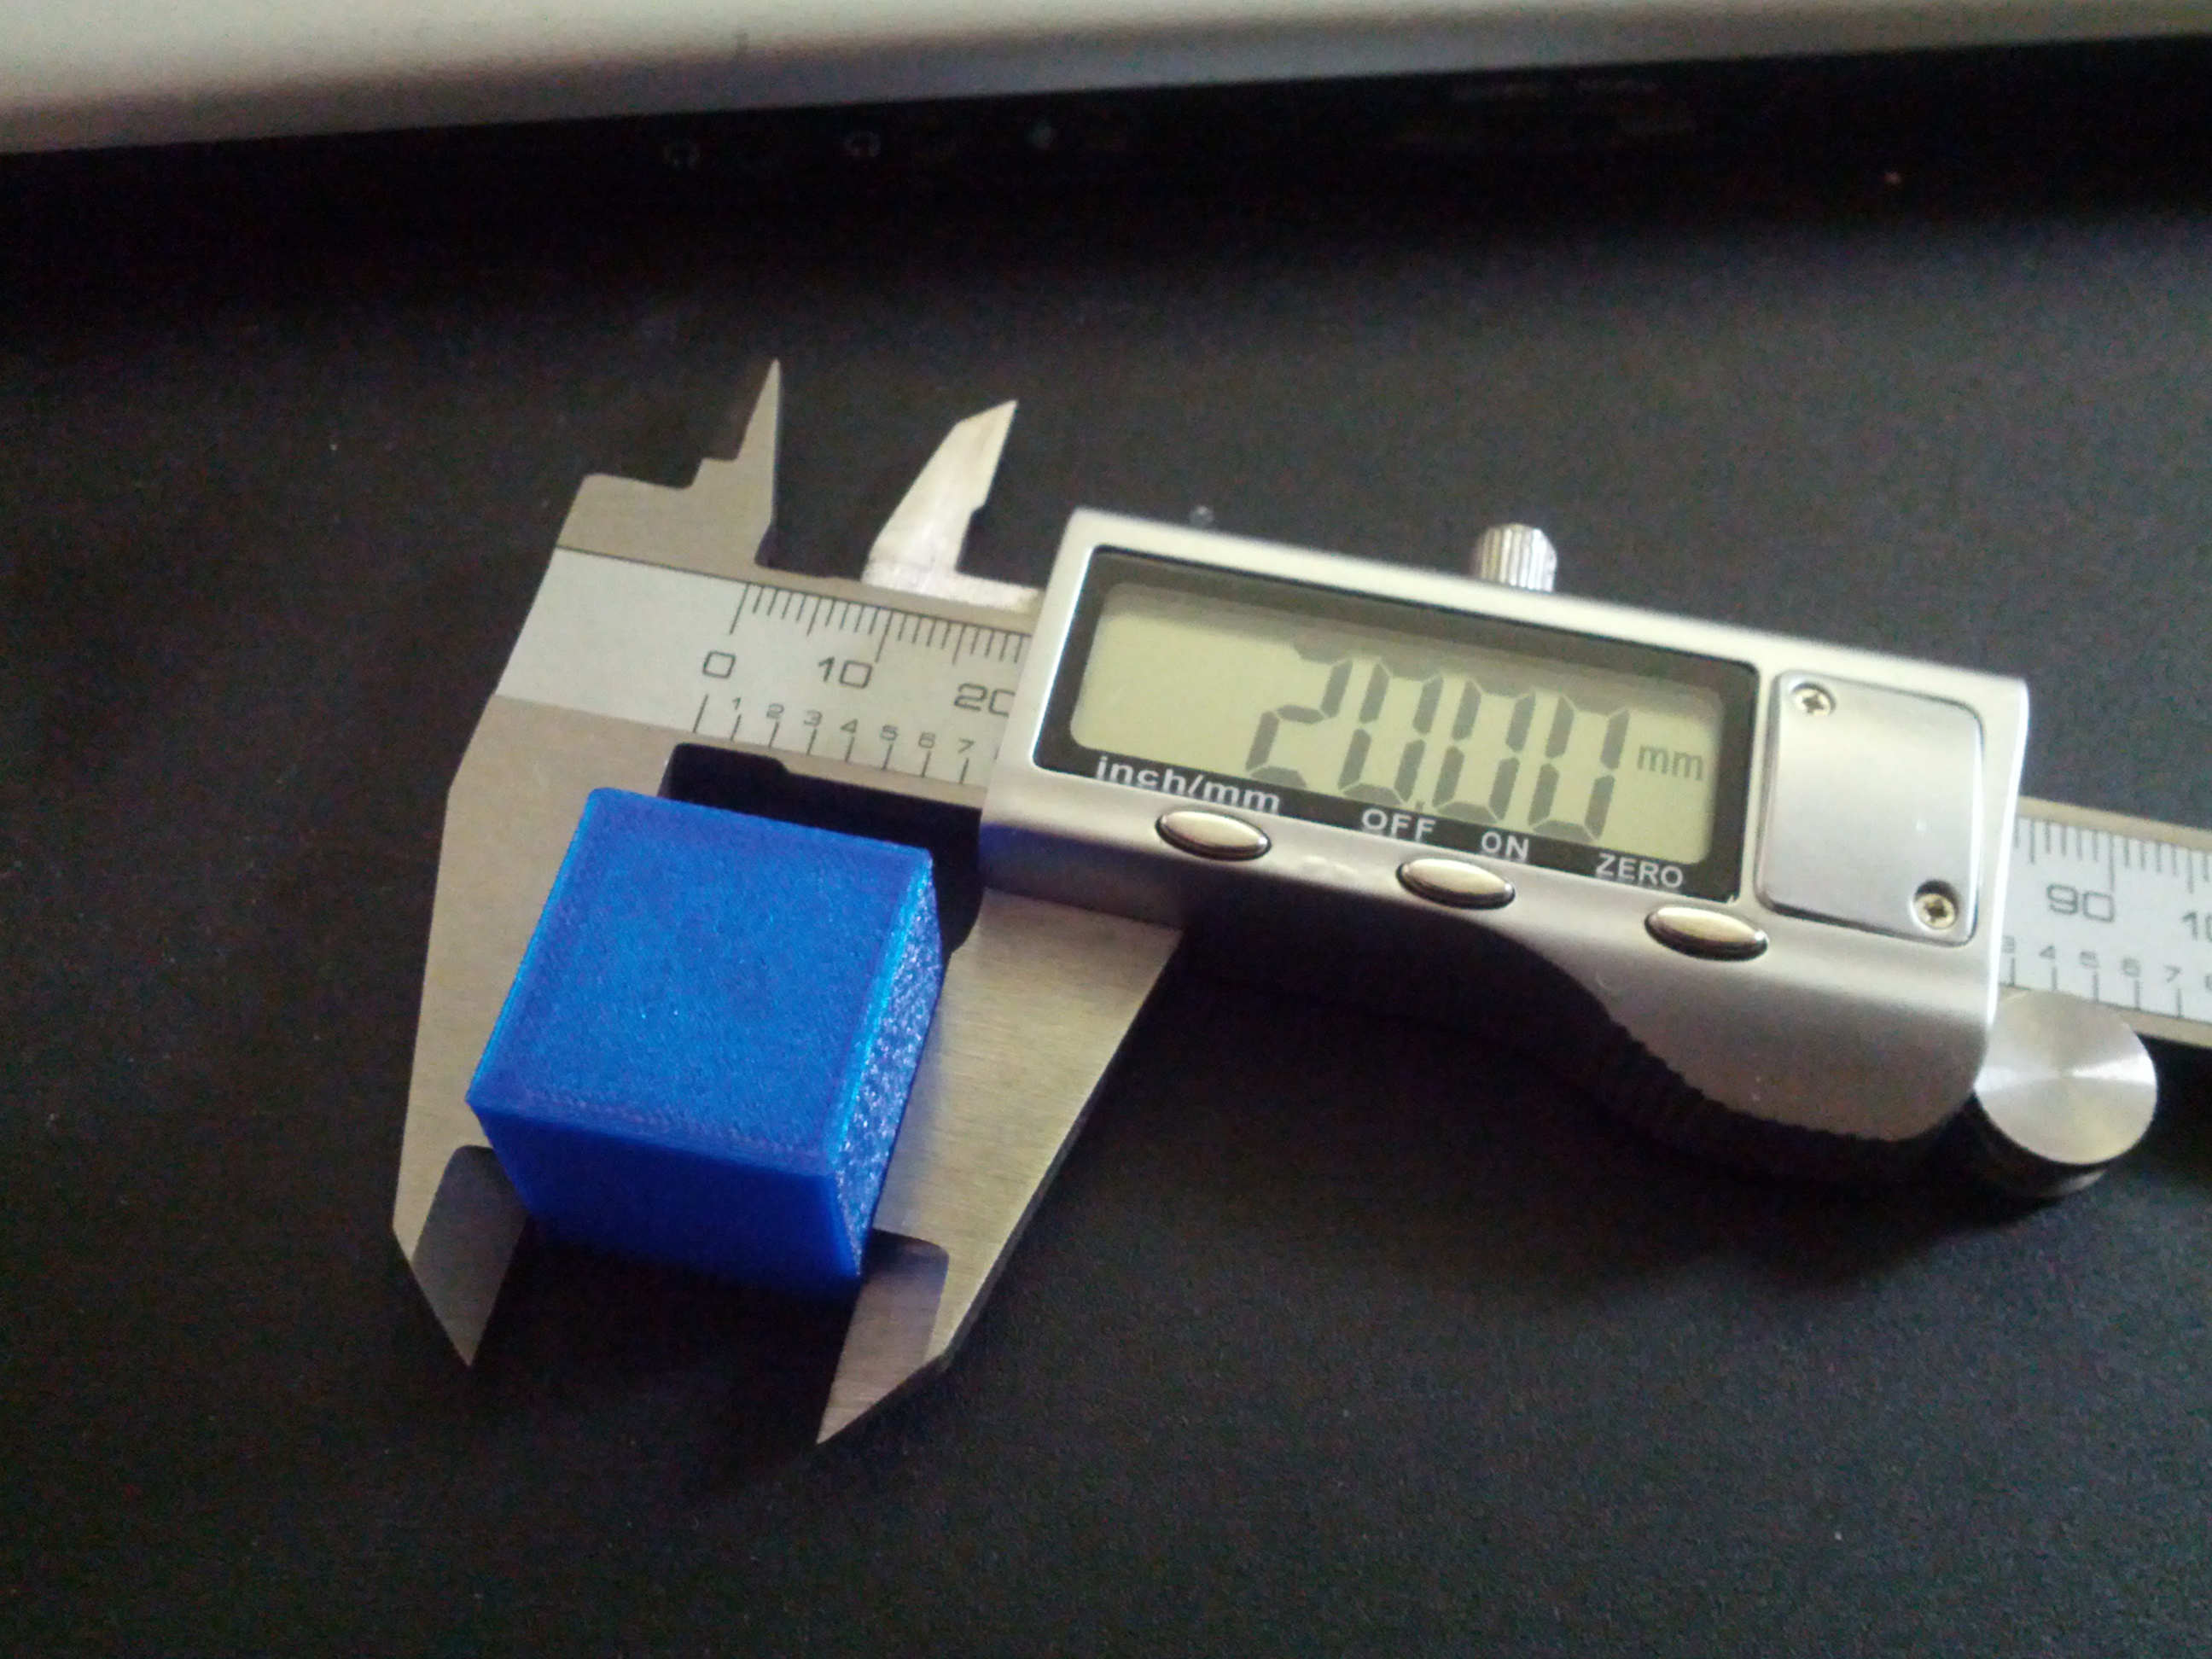
Digital calipers

A caliper should be used to take precise measurements and also to replicate any part of the design that you want to in the software.The 3D printing filament even though it is advertised as  3mm or 1.75 mm, rarely turns out to be manufactured to these exact measurements. Here is where you need a caliper, measure the filaments at certain different positions, average up the readings and if necessary do adjust filament diameter from the slicing settings of your software. Know how to use the digital caliper wisely and it will long last your 3D Printing career.

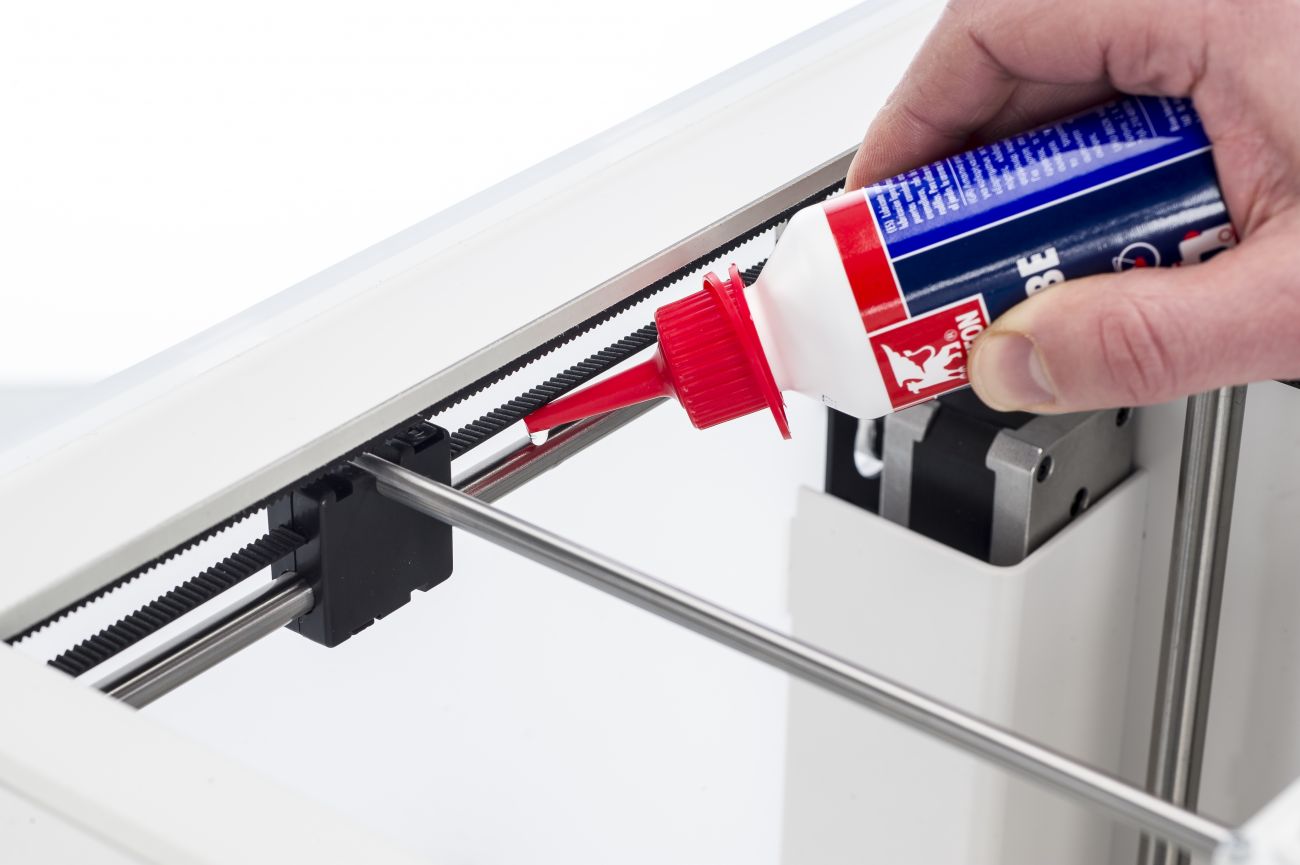
Magnalube and Unilube

Sometimes the X and Y axles need to be lubricated to ensure that they run smoothly.The best lubricant to use is Unilube, and all it takes is a single drop to resolve any issues with dryness. For the Z trapezoidal leadscrew, use Magnalube.

It’s important not to use WD40, as this affects the axle coating and can cause damage to your printer.

Masking tape

The most widely used surface covering for print bed is the masking tapes it allows the prints to adhere better.Additionally, the tape also makes removing the finished print easier and it protects your print bed from scratches.

When buying the tape, make sure to select a width of at least 50 mm (2 inches). Wider tape requires fewer strips to cover your print bed, something you will come to appreciate if you resurface your print bed frequently.

Choosing a proper masking tape of depends on your preferences and build size. If you regularly print to the full width of the bed, it might make sense to get the wider sheets.

You can buy these helpful tools on Amazon and also know more about the troubleshooting problems here.

Credit:adafruit.com, ultimaker.com.

Saturday, January 27, 2018

You won’t believe these 3D Printers cost just below $500!

A common misconception boggling the minds of people who want to start with 3D Printing is – 3D Printers are too expensive, just because the original 3D Printed object comes out of the machine and the object is tangible also the industry is quite new and still some people just know the brim of 3D Printing. We are going to clear out this misconception here itself. 3D Printers are available for everyone right from beginners to the ones having a handful of knowledge about it and are in the industry for a long time. You can read about different misconceptions about 3D printing here.

Know these 3D printers just below $ 500, we have listed them accordingly to the best reviews from Amazon.

Acrylic Geeetech Prusa I3 pro

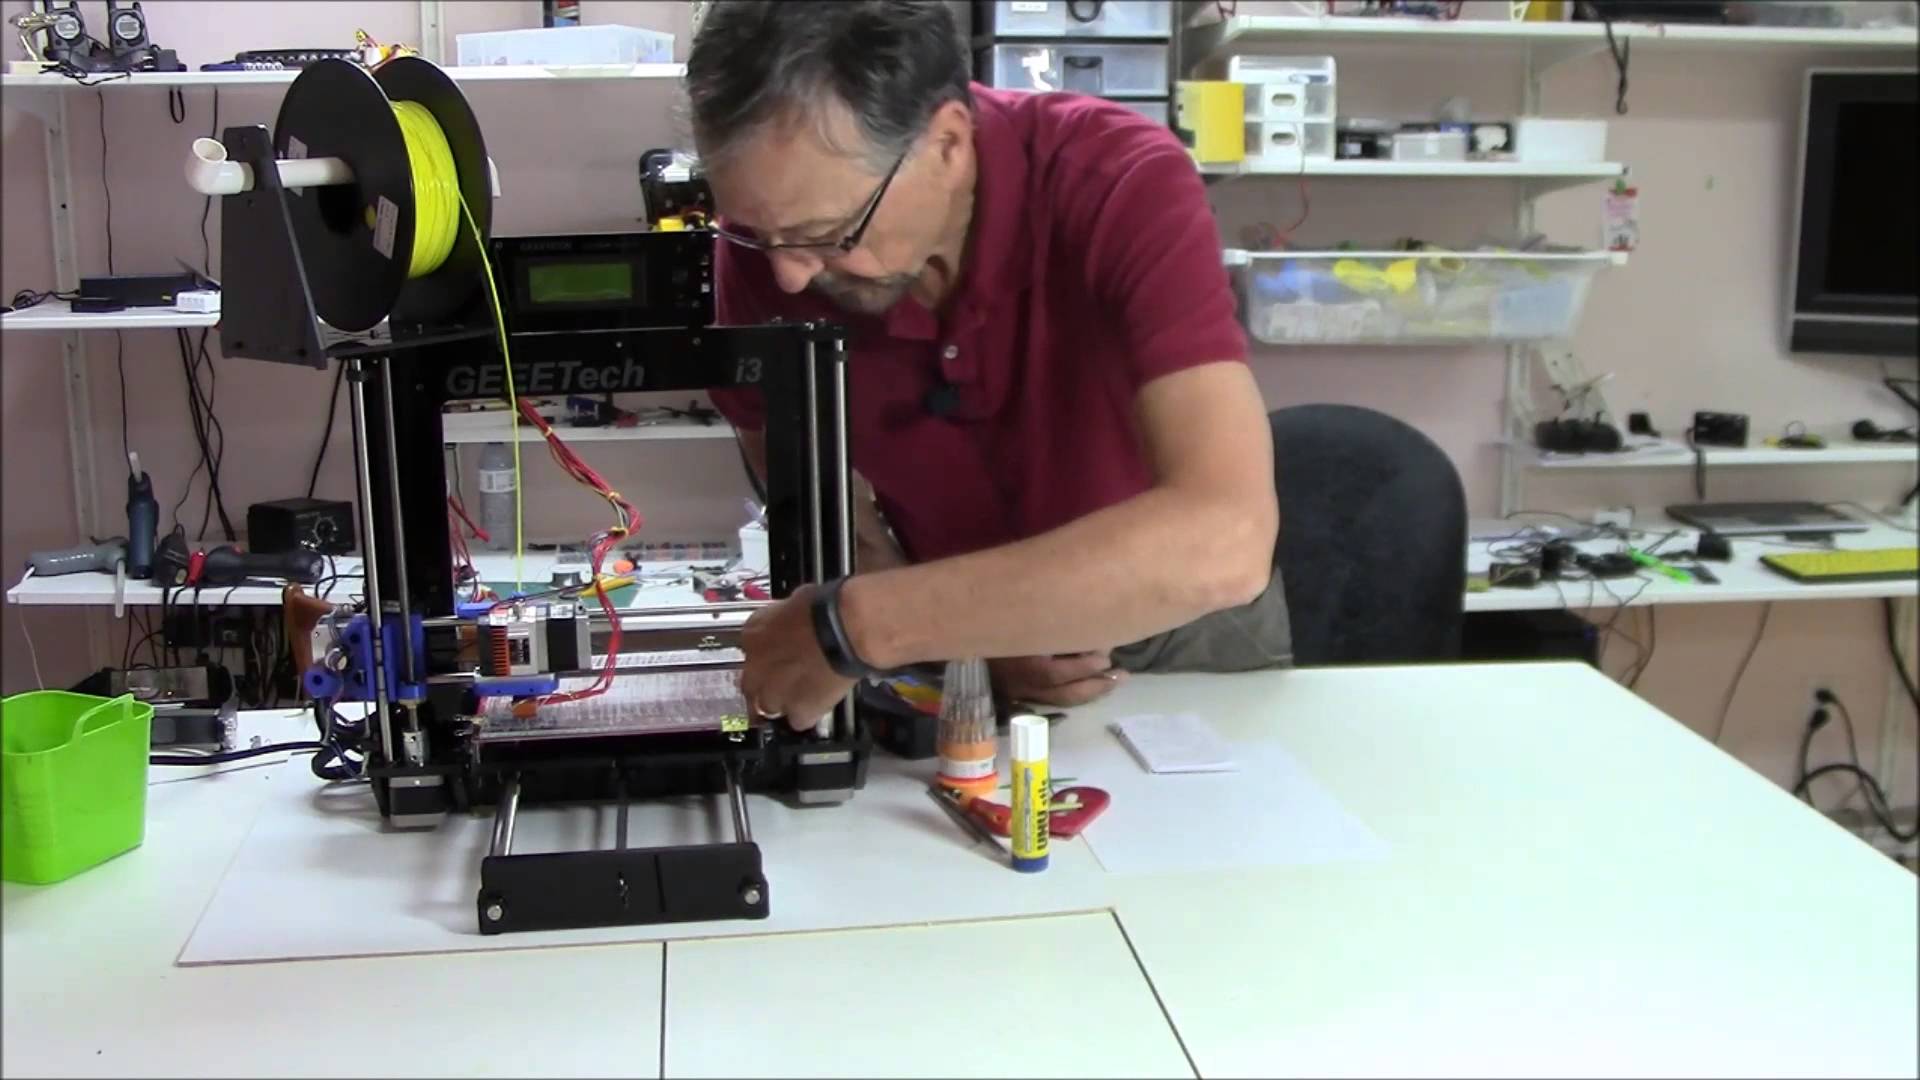
Newbies get ready coz this printer gonna teach you a lot. After being ordered the printer comes with a great packaging without damaging the stuff and the wooden fragmented pieces are easy to assemble.Approximately it takes 5-7 hours to assemble and if you read the instructions clearly you won’t land up into messing it up.

It’s not like a put it together and it works kind of kit, you really need to fiddle with it and show patience if you want great results. The Best way to get the most out of Geeetech Prusa is to watch the youtube videos and read the manual given along with it. If you are starting with printing out the objects then do keep in mind and study well about the slicer settings also the bed gets heated and so fans for cooling the bed is a must have in your kit.

Only things you will need to buy extra after purchasing this item to get like prints is PTFE grease (for z-axis threaded rods), Filament, part cooling fan(s), and tweezers. Now all of these are optional but will aid in getting those high-quality prints much faster.

Buy this on Amazon.com at just $313.99

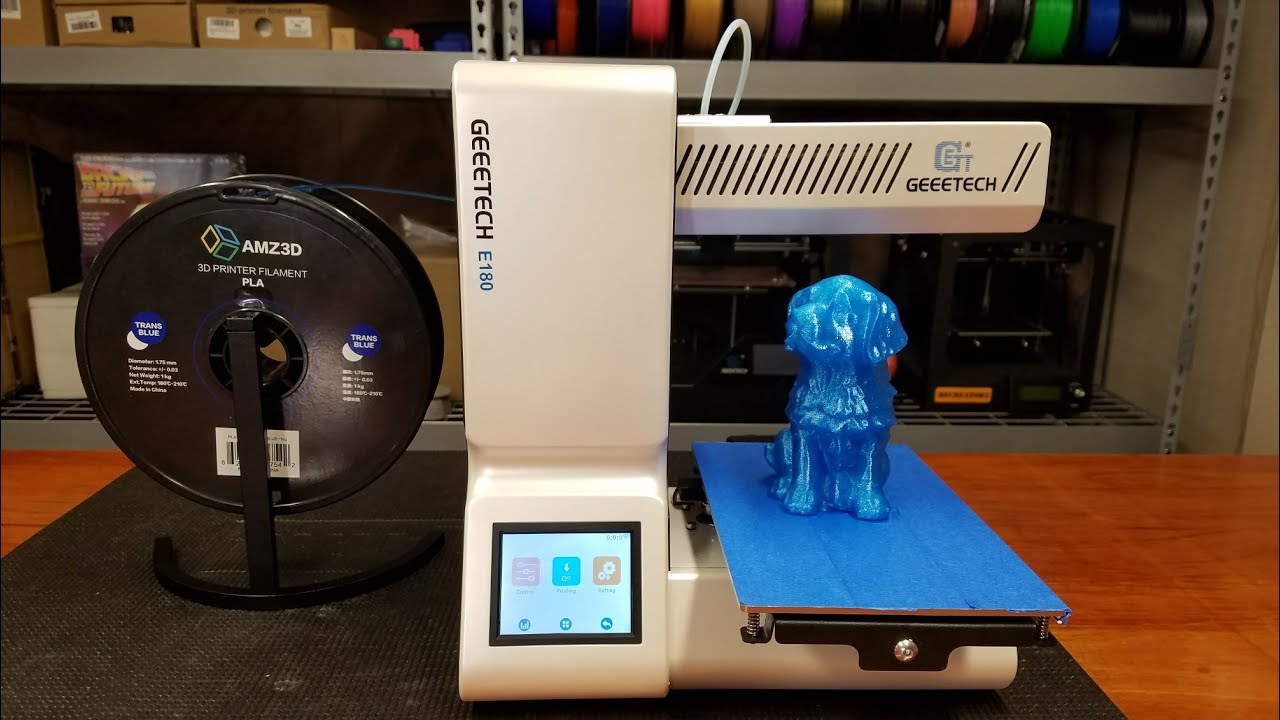
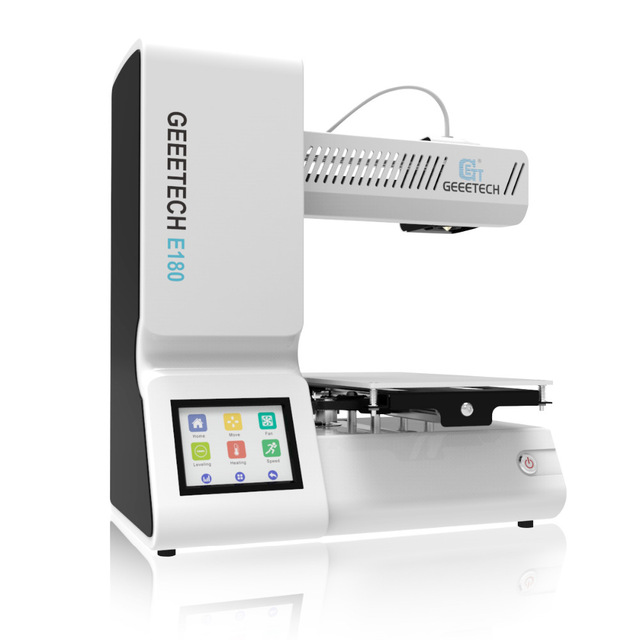
Geeetech E180 Mini Printer

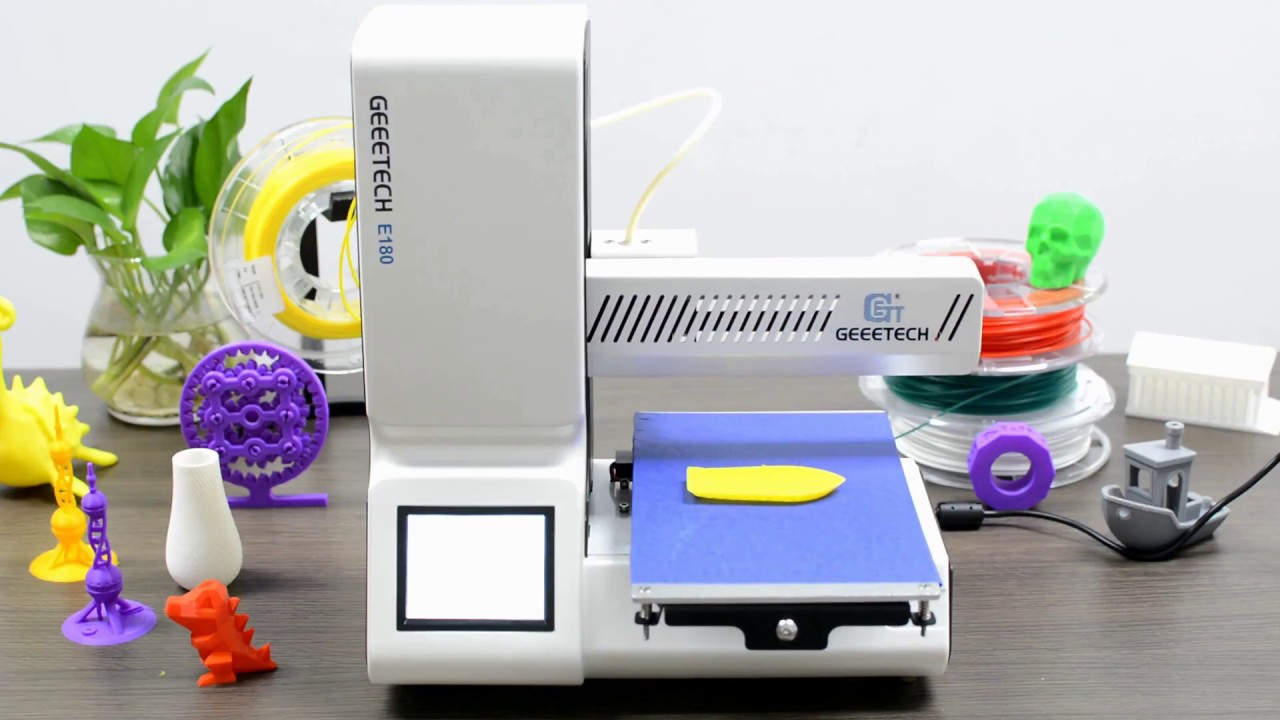
Viewing from the education perspective, this printer focusses on clearing the class book concepts with practical solutions. An elegant and simple design with a lot to offer. Wifi connectivity makes the printing more simple and easier.

Printing via EasyPrint 3D App is quite easier where you don’t have to manipulate the settings much and also a free access to Cloud gallery. You can print large objects by printing them in chunks and then joining them.The touchscreen user interface allows you to change the relevant parameters in real time also the break resuming capability is great helping you to continue the product from where it had stopped. The tiny machine can create giant objects with best finish and smoothness.

Buy Geeetech E180 Mini 3D Printer only at $298.00.

Delta Rostock mini G2S pro

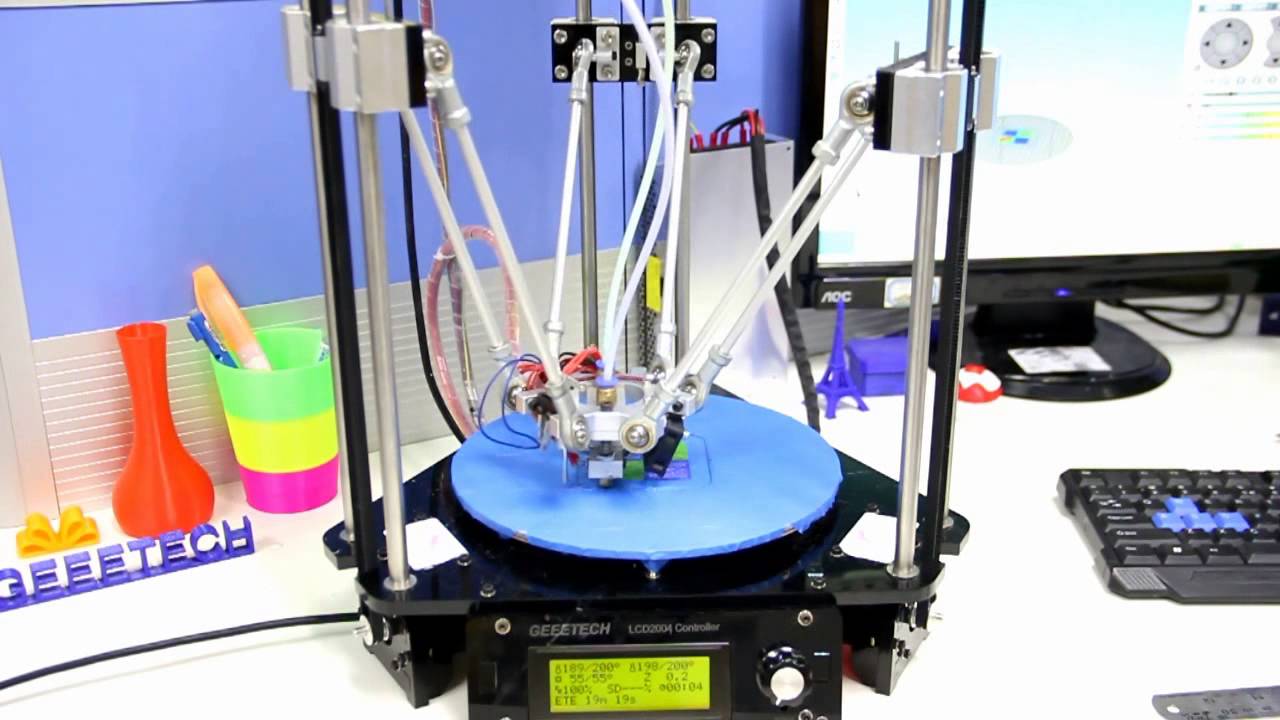
This printer is an improved version with more accuracy and speed enabling you to print a single object of two different colors or two objects with a different color on the same print bed.Follow the step by step procedure for assembling the printer just as given in the Geeetech Rostock mini G2 & G2s pro Quick Starter Manual.zip then continue to read the Delta Rostock mini G2& G2s building instruction.zip thus you are now all set to print on the Delta Rostock mini and get the best out of it. The only thing to remember while 3D Printing is patience and reaching out to people those who can help you solve all your difficulties.

Get this printer on Geeetech official website at just $269.

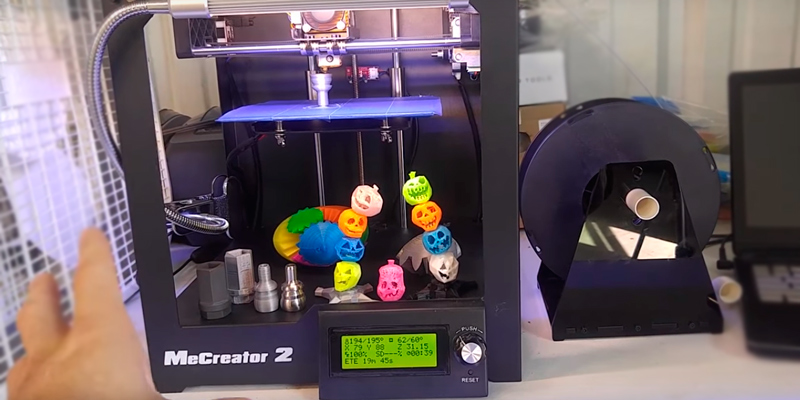
Geeetech High-Quality MeCreator

Precise in printing due to the upgraded hardware and optimized firmware, this printer allows you to efficiently print your designs.The half-open box type design gives protection to the printer and giving you easy access to observe whats getting printed out there.Its compact and comes with an upgraded extruder whose feeding part is V shaped ensuring constant and stable feeding.The best part about MeCreator is it supports various software tools and slicer tools giving you a better experience.

Get this printer on Geeetch Official Site at $385.00

So you need not wait to buy a 3D Printer now as you know it does not cost much and is amazingly helpful. The Geeetech team is always there to help out. You can share the problems you face with the printed on our Fb Group and we will make sure you get them solved.

Credits: youtube.com, i.ytimg.com, amazon.com.
Monday, January 22, 2018

Clearing the Misconceptions about 3D Printing…

3D Printing is surely a big revolution for the 21st century.Changing the lives of the people it has impacted all the industries in some or the other ways. This vast industry also has some misconceptions that are still not clear to people. Whether you are pro or a beginner, some of the misconceptions still remain behind our minds.

Let’s know what these misconceptions are:

3D Printers are too expensive

This depends on what you intend to do in the 3D printing industry. If you want to grow a business around it than investment is worth. Yes, there are a lot of high priced printers, but that involves what you determine to print, the size of the object, which type of filament will be used, the speed of the printer, various features etc.

Image result for Geeetech E180 Mini wifi 3D printer

You need to collect proper information about the printer and what you aim at printing. Thus a plan is required and then the budget summary if you want to buy a printer. There are 3D Printers which cost less than the price of a laptop like Geeetech  E180 Mini wifi 3D printer just at $298.


The E180 lets your children print large sized models by breaking them down into chunks. You can’t print the important machine parts but surely as hobbyists, you can find printers with a varied range of price.

3D Printing is Magic

No No No!!! 3D printing surely isn’t any magic, it’s just additive manufacturing. When you start printing with one of the printers you will feel as if you are in first-year class in the Hogwarts school basically in the potions class. It is learning that matters. Knowing your printer well and the filaments it supports, what settings will work better, how to adjust speed and other software settings etc.

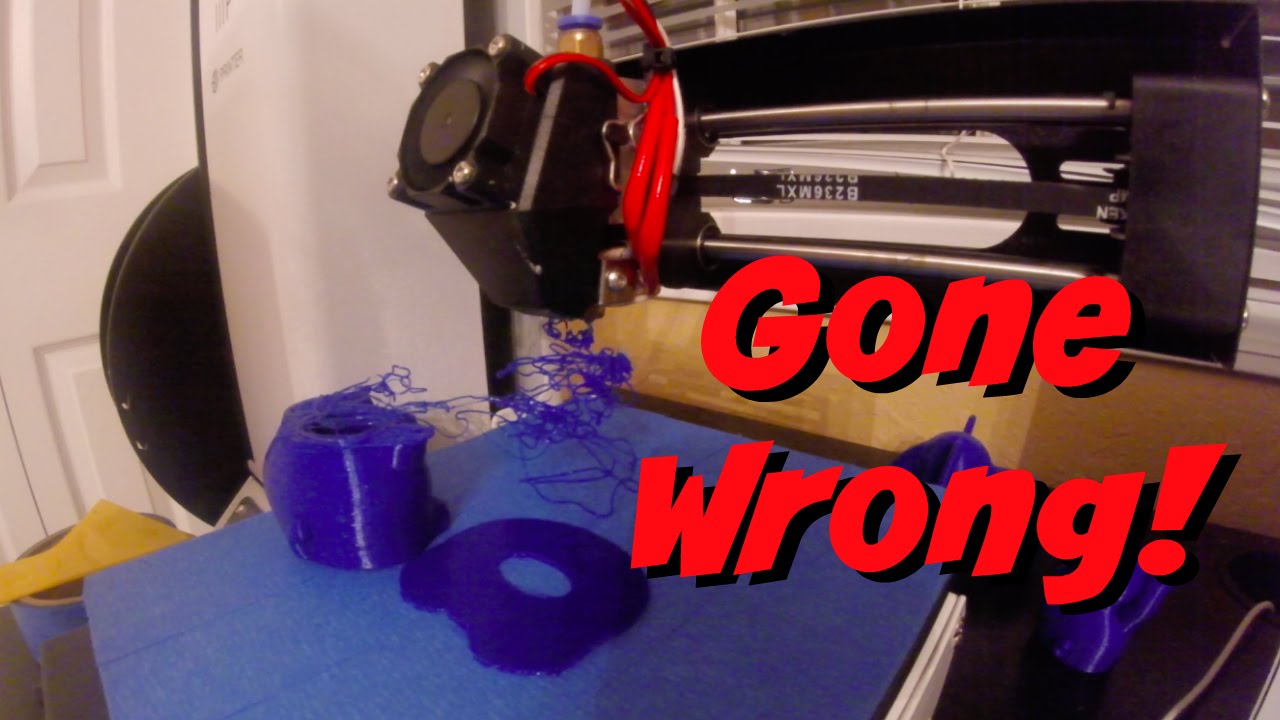
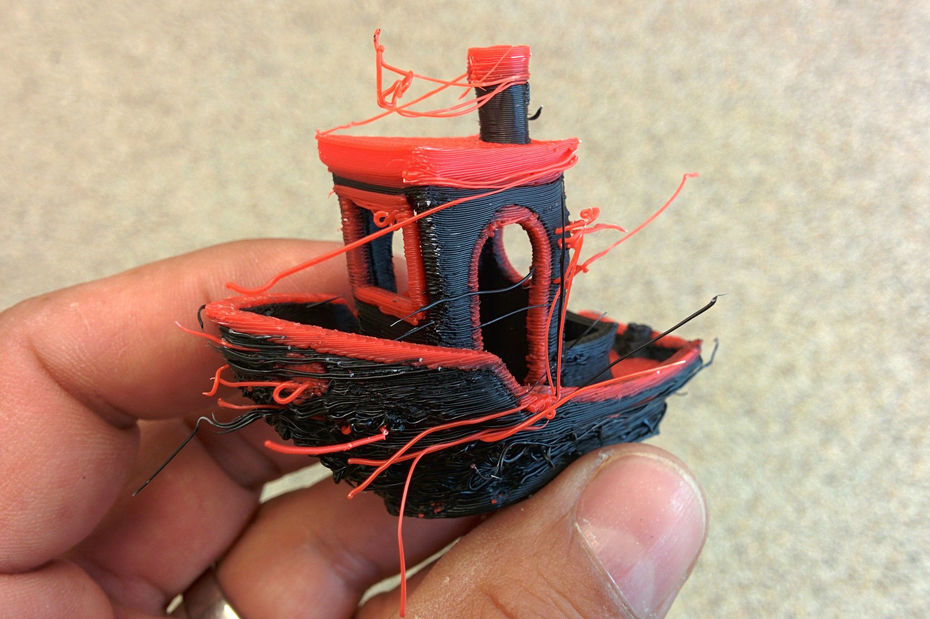
Know that patience is the key to 3D Printing because sometimes the prints will come really easy and perfect and sometimes you will face the problems of warping, stringing and lot more. You can read and know more about the troubleshooting issues on our Geeetech blog.

Failures at 3D printing do not mean that you are not good at it, even the experienced people end up with failed prints, and the causes range from damp filament to a not-sticky-enough build surface to a tiny flaw in the model to a printer that’s just being really, really crabby for no good reason.Some printers do give a smooth print and no post-processing is required but certain objects do require to work on after the build comes off the platform.
It can Print Perfect Pizza!!! 

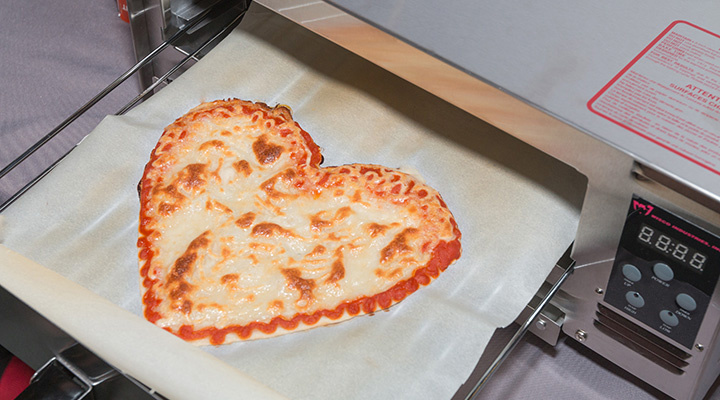
3D printing is over exaggerated as to anything and impossible things can be 3D printed. Surely you cannot 3D print a Pizza which is perfect as the one we get in Dominos, but there are companies like BeeHex, who are hardworking to print a perfect pizza.

While making the pizza they can’t 3D print the vegetables and meat, the soft base could be 3D printed and as heard it is pretty delicious too. They use these Food printers to make candy that shapes like your face, or potato chips etc. 3D Food printing can take over the industry in the future and its gonna become a serious business.

Bonus: It’s like Star Trek

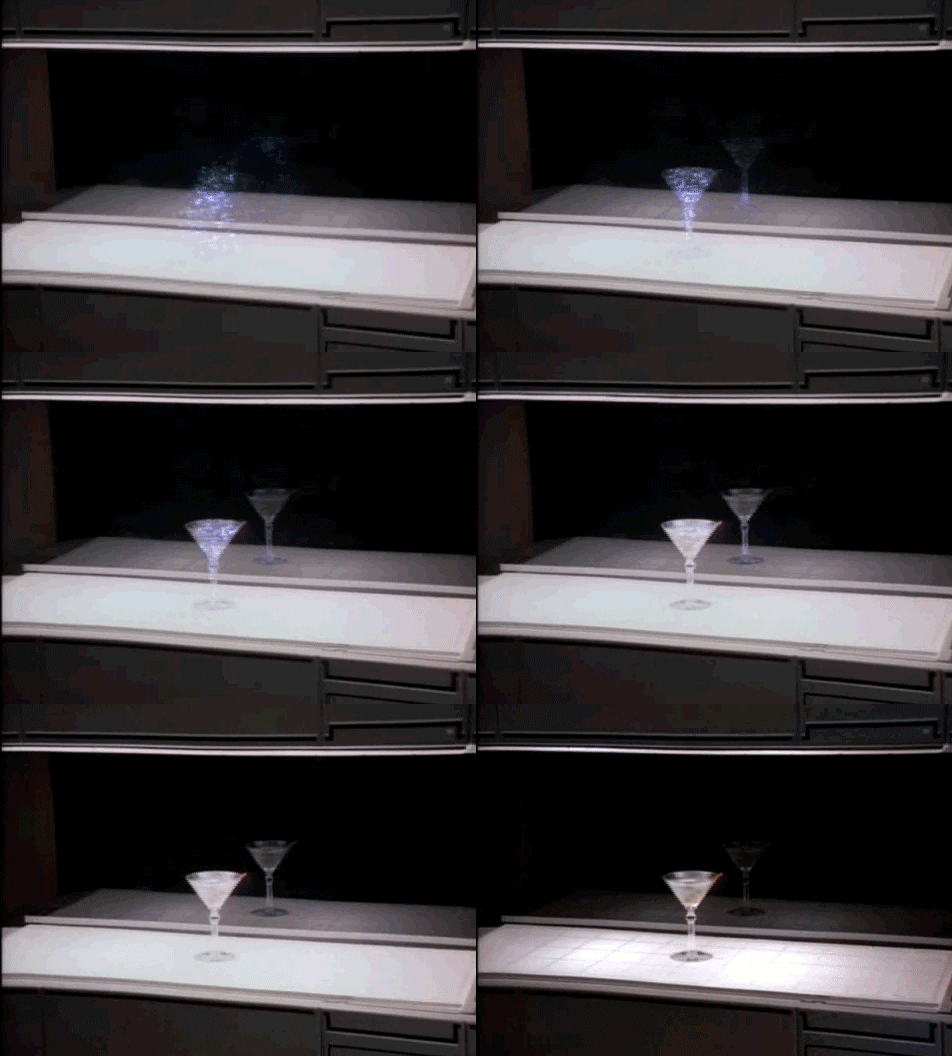
The “Replicators” from Star Trek are probably hard to develop and thus 3D printing is misconceived by many users. Though 3D printing is the future, there cannot be objects produced by pure energy and thin air as in Star Trek.

Image result for STAR TREK REPLICATOR GIF

3D printers are large they require large filaments and manufacturing materials to print out an object and so need space. We also won’t 3D print a working phone, laser pistol or TV remote, because printers can’t (at least yet) use conductive materials to manufacture cables and electronics.

3D printing will take over Manufacturing

That’s not true, you cannot possibly print everything with a 3D printer. This is the hyped misconception about 3D printing. We do come across people saying how additive manufacturing has helped them grow and saved their time also increased the business in manufacturing, but they are basically talking about prototyping.

Prototyping is a time-consuming step in manufacturing where the copy resembling how the final product is shown, which has to be first designed and finalized then sent to the production team to produce. The final product is the replica of the prototype designed having different measurements, but before that, if the product produced needs modifications the whole process starts again.

With a 3D printer, companies can design a part in CAD software, print it out in a matter of hours, and often test it the same day. Then if changes are required,  modify the digital model, print it out again, and continue until the part has been perfected, for no more cost than the price of the filament.

Now when you know about the misconceptions regarding 3D Printing you are ready to start with 3D Printing the small stuff and read the tips and tricks to perfectly print 3D objects with our Geeetech 3D printers.

Credits: 3dprint.com,all3dp.com,medium.com,youtube.com,businessinsider.com,gizmodo.com

Saturday, January 20, 2018

You Can’t Miss These 10 Brilliant Home Decor Ideas!

When you start with 3D Printing, the first thing you do is start printing out small and easy items and then slowly move to a higher level to become a pro. The most basic things that you can start with are the home decor novelties where you can show enough of creativity and innovation. Initiate with certain simple tricks to handle household chores and make things at home exciting rather than mundane. Everyone loves to visit a home that feels lively and pleasing to the eyes.

Thus we have got some better ideas for you to start with 3D Printing:

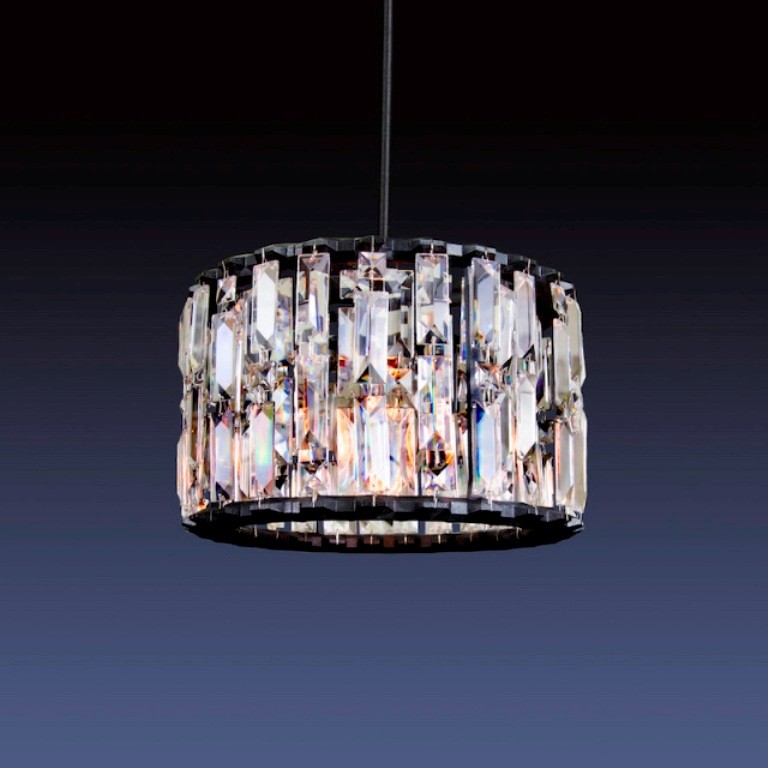
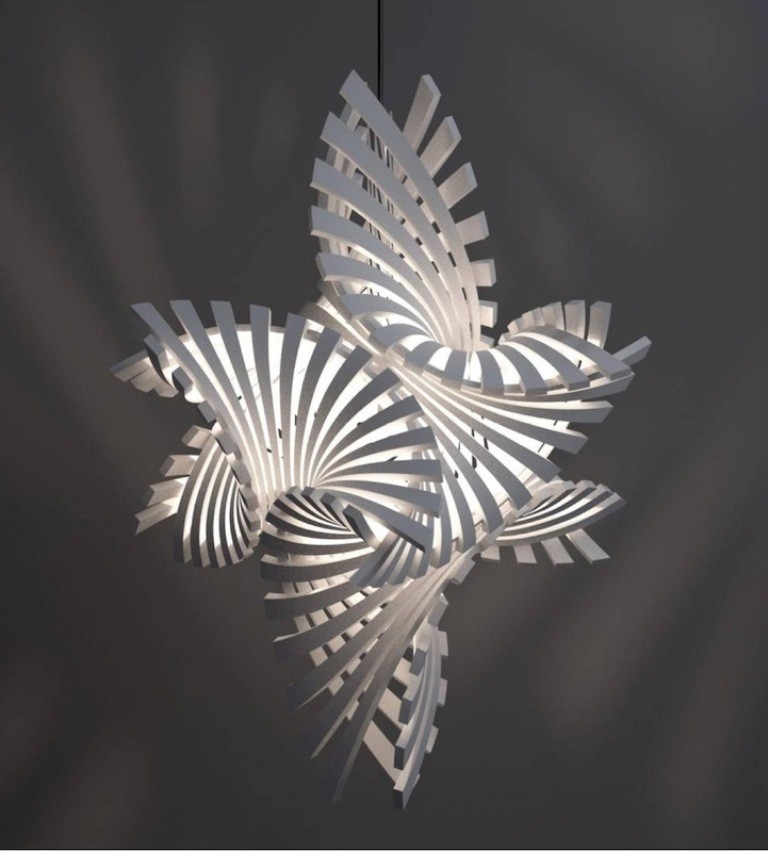
Lampshades 

When we think about decorating the house, the first thing that comes to mind is having lampshades that will give a classy and subtle look to the environment. Moreover, we also want the shades to match with the color of our walls.

The challenging part here is the color combination that would go with the interior of the room. That depends upon whether you want an antique look or a modern one. These essentials are abundant and mostly inspired by natural shapes thus printing them out is a little critical task. You can buy these exquisite lampshades and vases at Shapeways.

Cute Vases

This would be intended for an actual bonsai tree, but the root-shaped planter is cool enough for just about any plant.Don’t you think it would be really cool with a tall growing shrub of some kind, and if it can be printed in a water-safe material would look great outdoors in a garden. If you have the printing volume on your 3D printer it would even be cool to scale the model up a few sizes to really look dramatic.Get this design on Myminifactory.

Egg Holder

Make your breakfast more fun with these delicate egg holder designs. Even if you are not a morning person you have something to start off your day with a smile. You can get this intricate egg holder on  Shapeways.

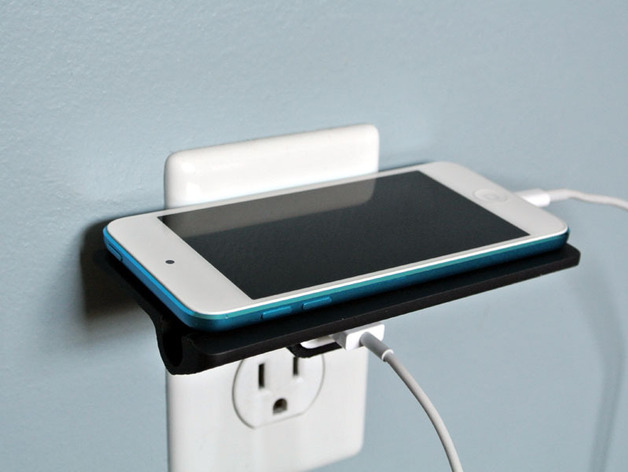
Wall outlet shelf

This shelf is available on Thingiverse and is a need for most of us. While charging our phones if the socket is at a certain height and the cable is of short length then placing your phone needs a support. This simple need generated the innovation of wall outlet shelf. Put the shelf on the socket so that you can prop the phone while charging.This model also has an angled slot that holds your smartphone and tablets in an upright viewing position.

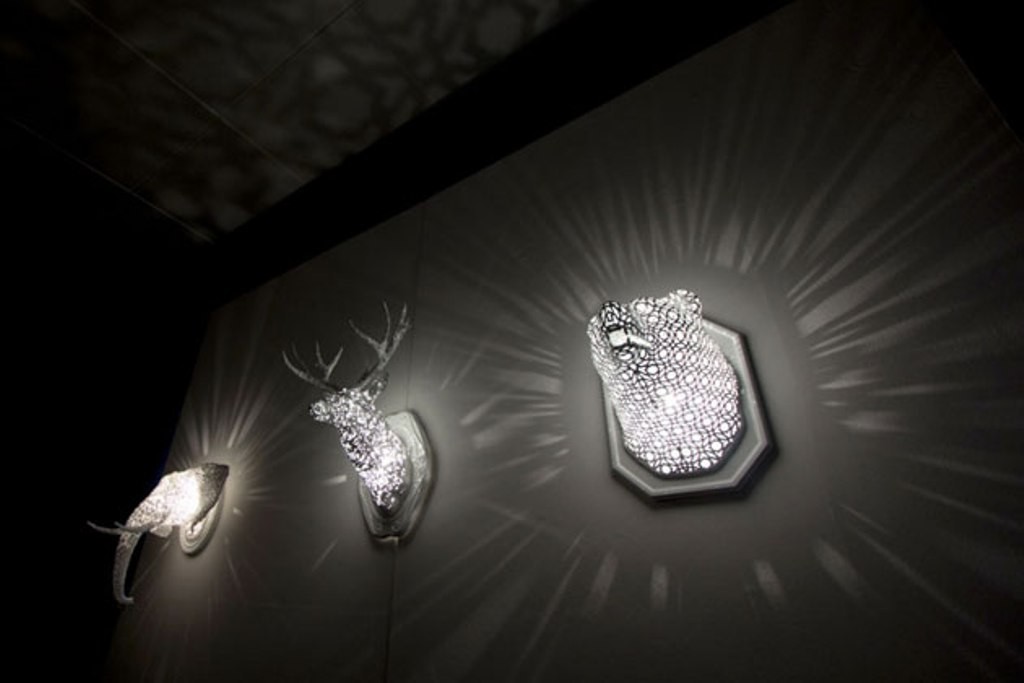
Chandelier

You can have these cool stuff to light up your room rather than a normal bulb. These wall chandeliers glow up to give your home a pleasant feel.Why use those traditional boring bulbs if you can replace them with your own 3D Printed designs and mostly better ones. Artist Linlin and Pierre Yves crafted animal sculptures with advanced lighting effects to give a traditional and refreshing environment to the whole room.

Self Watering Plant

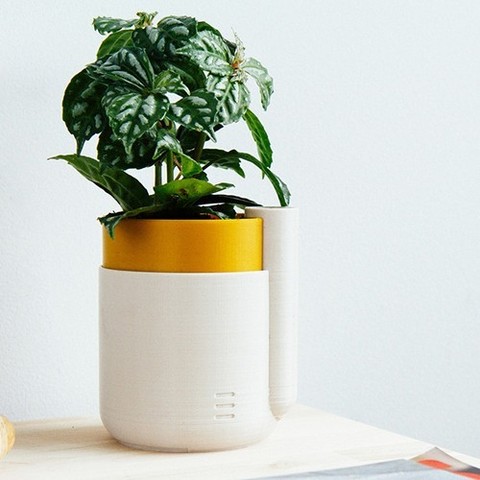
This is the exact environment that your plant needs and also gives you the relief from watering it regularly.It’s super easy to use: just plant your favorite herb or another water-intensive plant, add water, and you’re all set.The Self-Watering Planter was designed to be 3D printed, easy to setup, use, and clean; while at the same time allow for customization through mixing and matching different colors for the pot and reservoir. You can get the plant here at cults. Or you can get the cute octopus-shaped one.

The Intelligent Seating

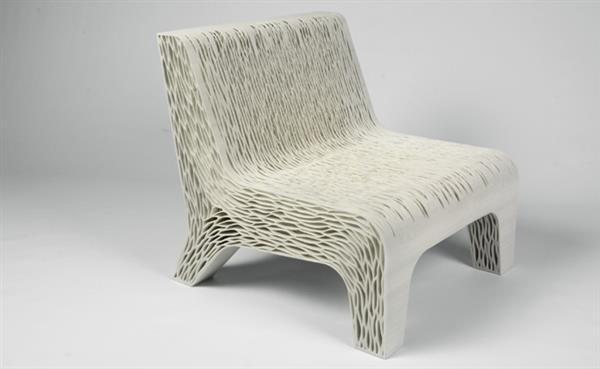
Your traditional sofa takes up too much of space and is too heavy to place it around if you think about rearranging the room and place things differently.Thus the artist  Janne Kyttanen 3D printed out a Geometric Mesh Sofa which can be easily lifted and weighs just 5.6 pounds.So you can 3D print all your furniture too. Thus the whole environment you stay in will be mostly 3D printed which6 is the best thing ever.

Picture Frames

3D print the perfect picture frames that will give your wall a perfect cozy look so that you become happy when you see your pictures attached to the wall in these cute frames. You can choose the color you want and can experiment with the colors to make a new combination that matches perfectly with the color of your wall.Design the ultimate gallery wall on a computer and let all of your house guests observe the magic of 3D printing.

Soap Case

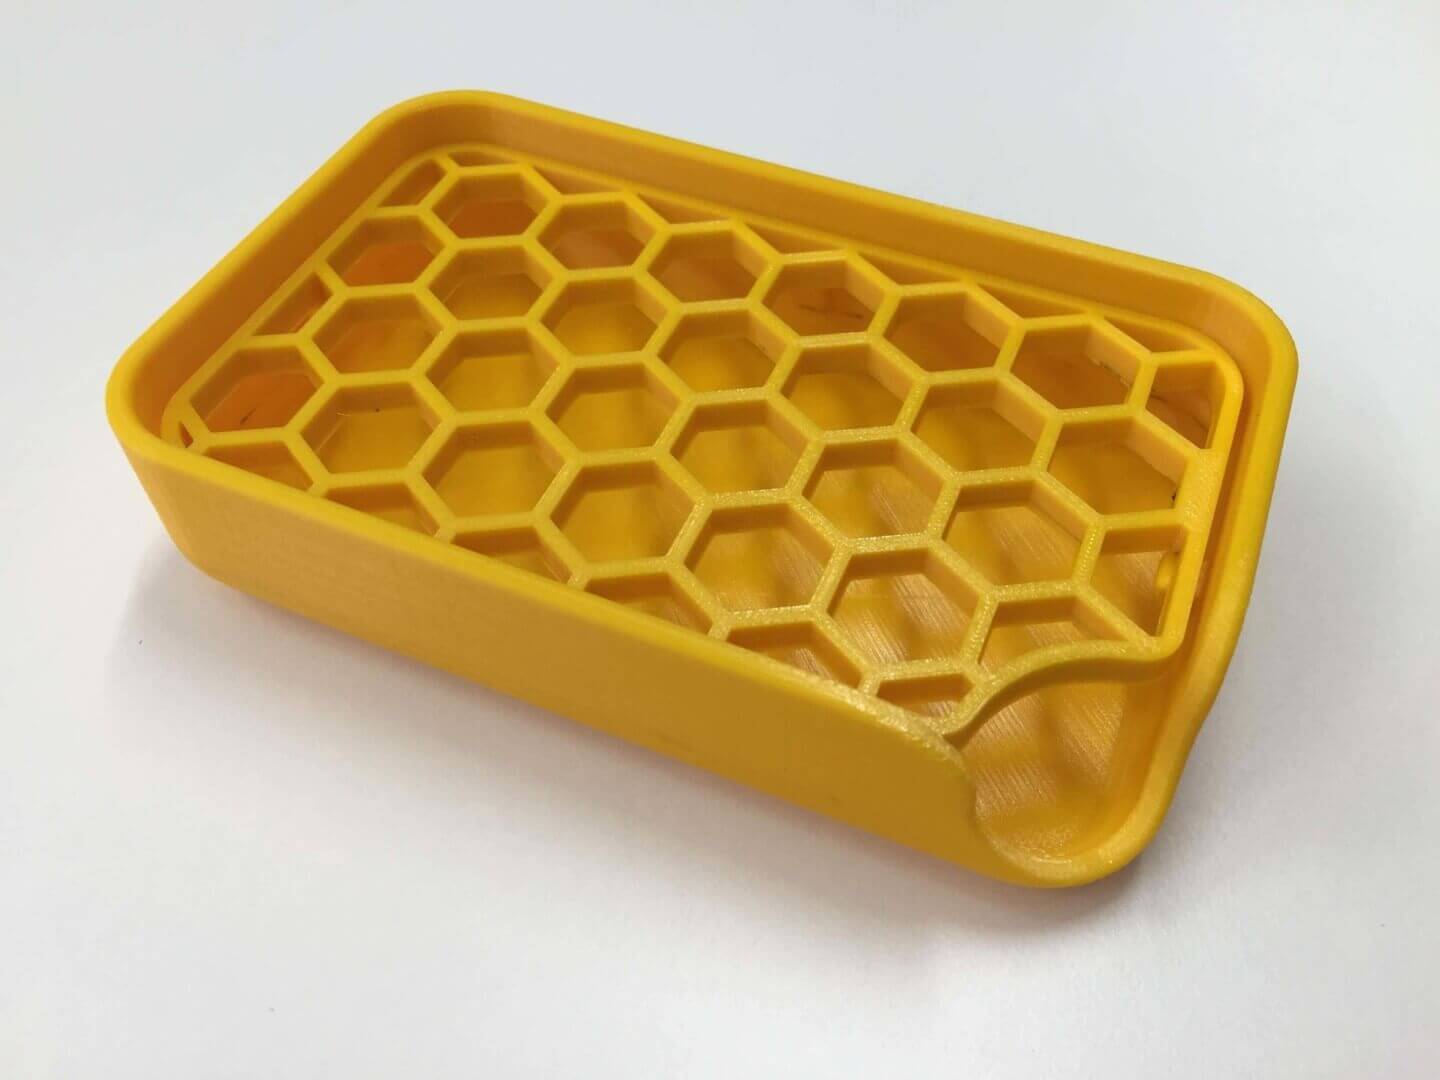
This elegant soap case which is present in two different pieces is totally washable and customizable. You can create your own design for the inner piece of the box and have an altogether new soap case whenever you are bored with the previous one. You can get this design on cults.

U Hooks

Image result for 3d printed hooks

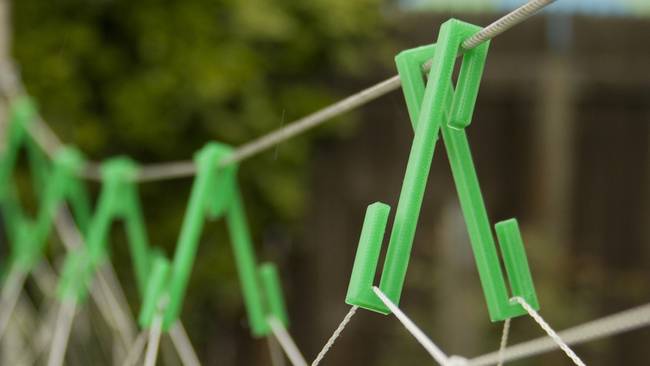
These hooks can carry mass weight. They were tested by hanging almost 47.4 kg of books to them and yet none broke. You can get the CAD files and design your own U Hooks with the color you want. They can be used for many purposes and won’t even break easily and also require less filament for making. You can buy these hooks at Thingiverse.

As you see that these home decor novelties are too easy to 3D Print and also makes you an innovative thinker.So why wait to get into 3D Printing.It starts right here at Geeetech, get a cool printer and print all that you wish for.

Credits: cults.com, thingiverse.com, 3ders.org, all3dp.com,protoparadigm.com.