Showing posts with label 3d printing application. Show all posts

Friday, March 16, 2018

Troubleshooting: What to do when your supports fall apart?

As you continue to model and 3D print various objects, you’ll find that many of them will need support structures to hold the design up. And the more complex the object, the more crucial it is to design a good support structure.

However, on some occasions, you may find your support fail to do its job resulting in a failed or messy print.

The 3D Printing Problem-

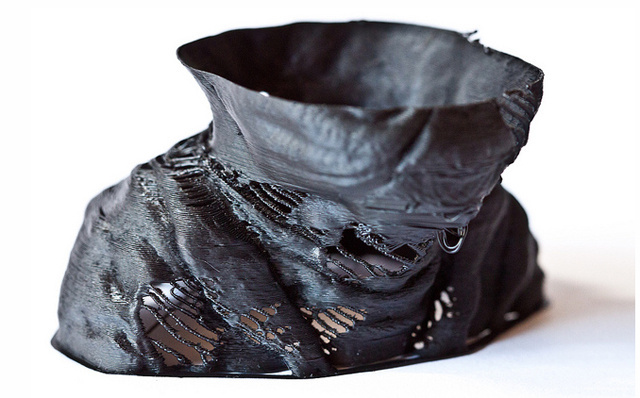
While printing your object, you’ll realize that your support doesn’t look as stable as it should. There may be gaps and it may even fall apart or crack in some places. Weak supports are also stringy and overall your print just looks like a hot mess(not in a nice way!)

Slicer Settings

Most of the time we tend to stick to the default slicer settings provided by the slicer applications. This may work for standard print jobs, but while printing more complex objects it is important to change these settings. For objects like supports, your default slicer setting will not always work. The more complex the object and overhangs, the more attention you have to pay to the slicer settings.

Type of support used

Thinner support structures are easier to remove but are not always strong enough and can break apart during your print process. On the other hand, stronger supports are denser but are much harder to pry off. At the same time, thinner supports may move easily if there are any sudden movements or vibrations from the 3D printer itself.

Many a time, tall and intricate prints will have delicate and thin supports so that they come off clean without ruining the print. Though this sounds good in theory, this kind of support doesn’t offer much stability to tall prints. Triangular and grid-shaped supports work better as they add additional structure under large overhangs.

Problem with the filament

Filaments that are old or cheap are weaker and tend to break more easily which is another reason why your supports don’t hold up. Old and expired filaments won’t bond easily to each other and the structure can tend to have more gaps and cracks.

Lastly, don’t forget to keep an eye on your printer. Many times, there are a few loose screws and nuts that can create vibrations during the print and if your support structures are not strong enough they will fall apart.

How to fix it?

Modify your support structures
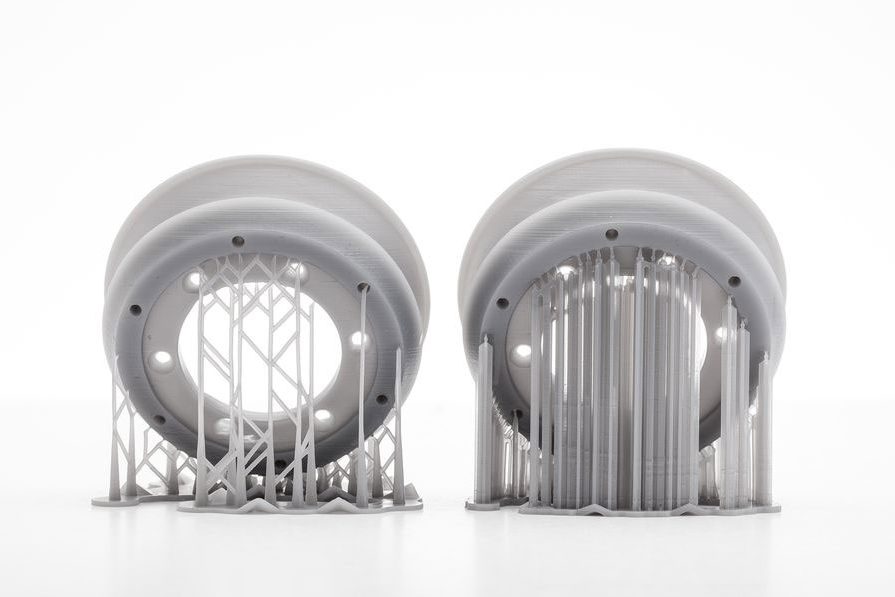
Rather than choosing thin and delicate supports, opt for grid or block shaped supports that can easily take the weight of overhangs without breaking down. You can choose triangular supports for objects that do not have sufficient adhesion to the print bed starting out with a strong base.

Another cool thing to do is using water-soluble support material like PVA glue. In this way, you can increase the support density and make block shaped supports without having to worry about them coming off.

Ensure sufficient adhesion
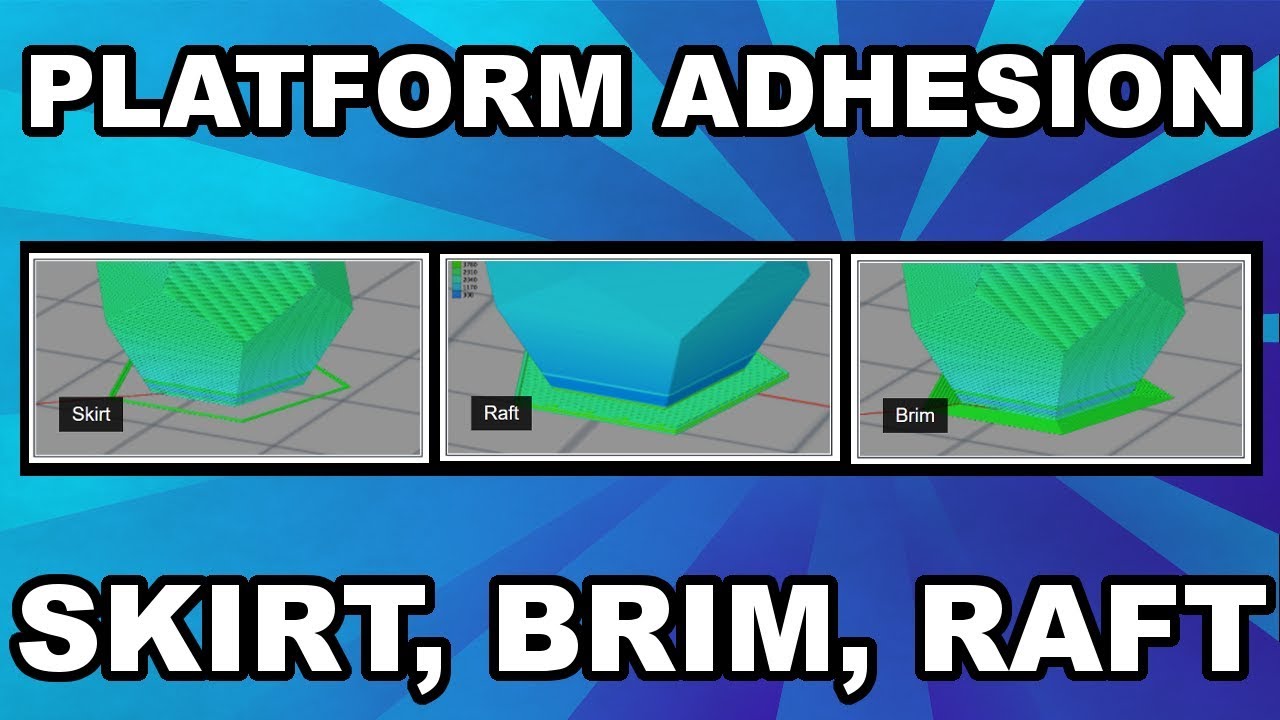
For a strong foundation, your 3D print must stick to the print bed. To increase this adhesion you can use the help of brims and rafts. Once your support has bonded to the print platform, it reduces the chances of it breaking or slipping off.

Use another filament
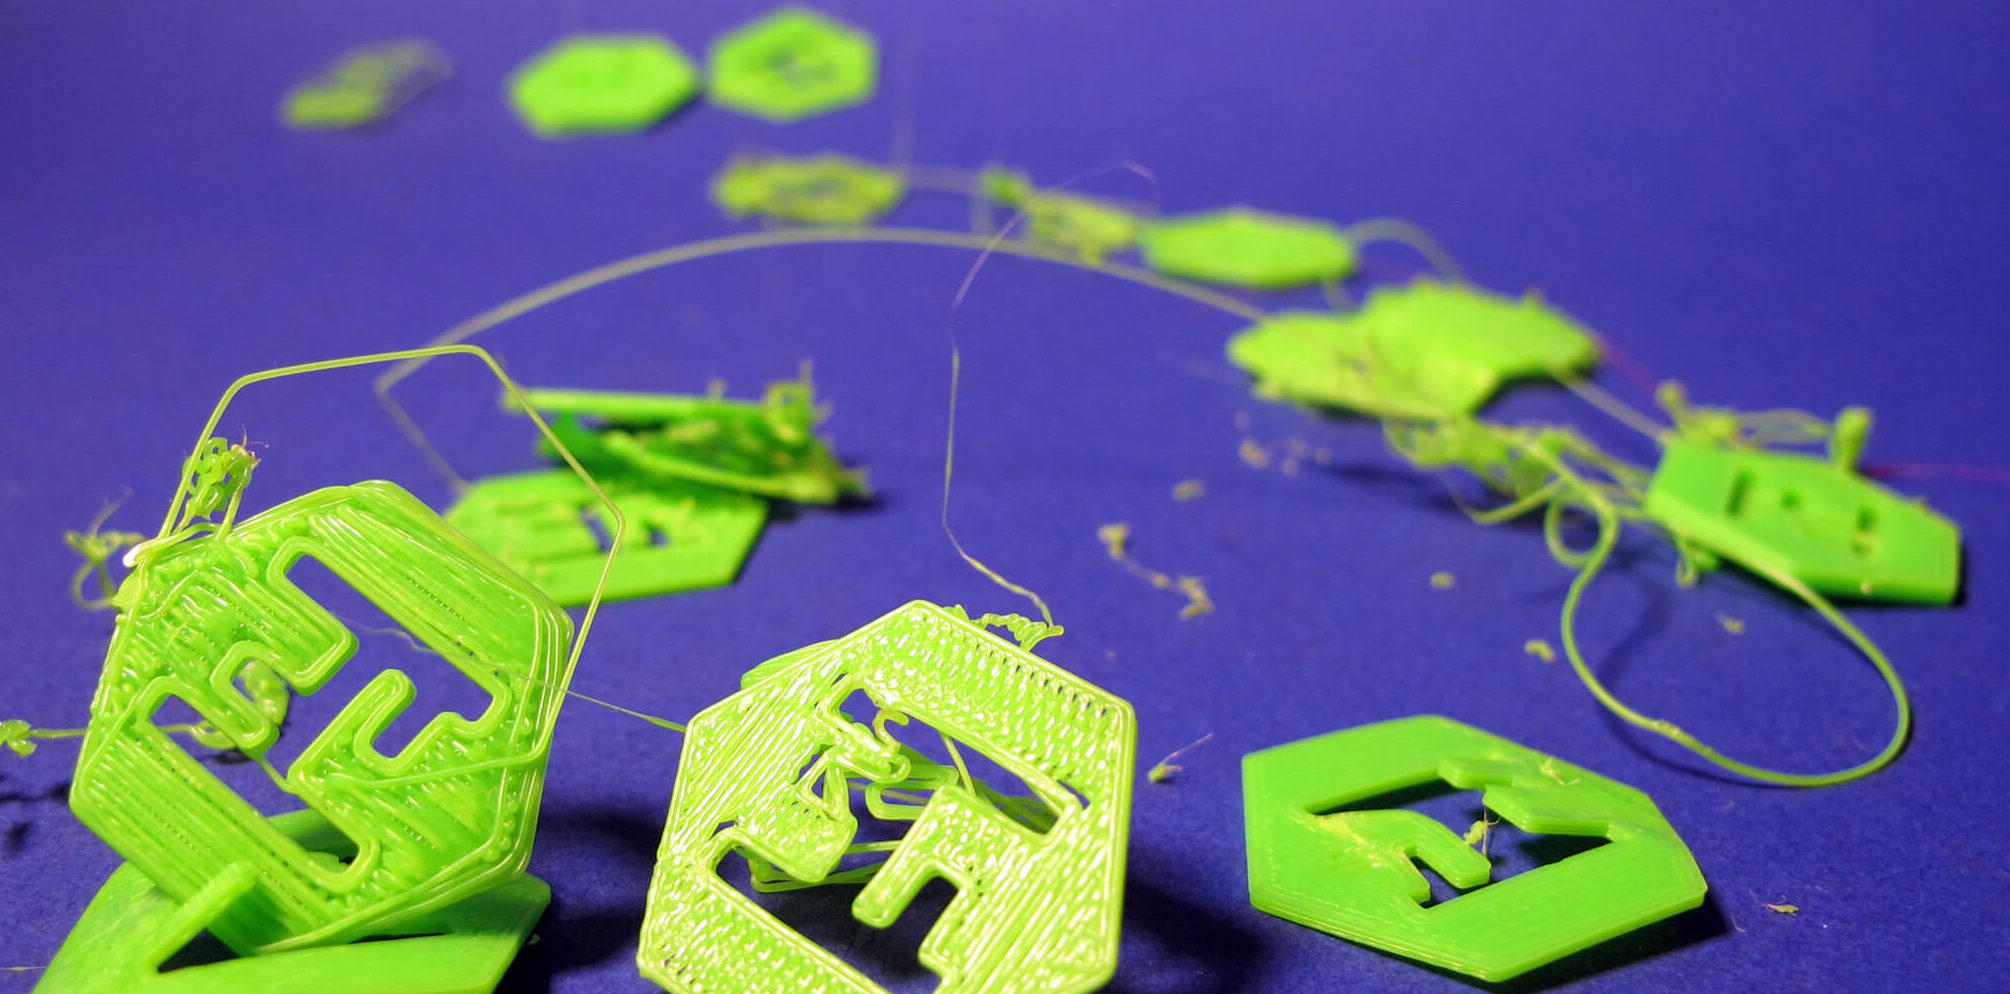
If your filament is old or absorbs too much moisture it can cause problems during your print job. You can check out our easy guide to store your filaments correctly and prevent common problems like snapping and stripping. And if the problem is indeed with the filament then change the filament and run a test print to see if there are improvements in the supports. Alternately, avoiding buying cheap which will tend to break more easily.

Increase the support density

Supports that are thin will be more prone to breaking and falling apart. So to make your supports stronger, go into the slicer settings and increase the support density.  This will make your support sturdy but on the other hand, it will be tougher to remove them from your 3D print.

Tighten the grub screws
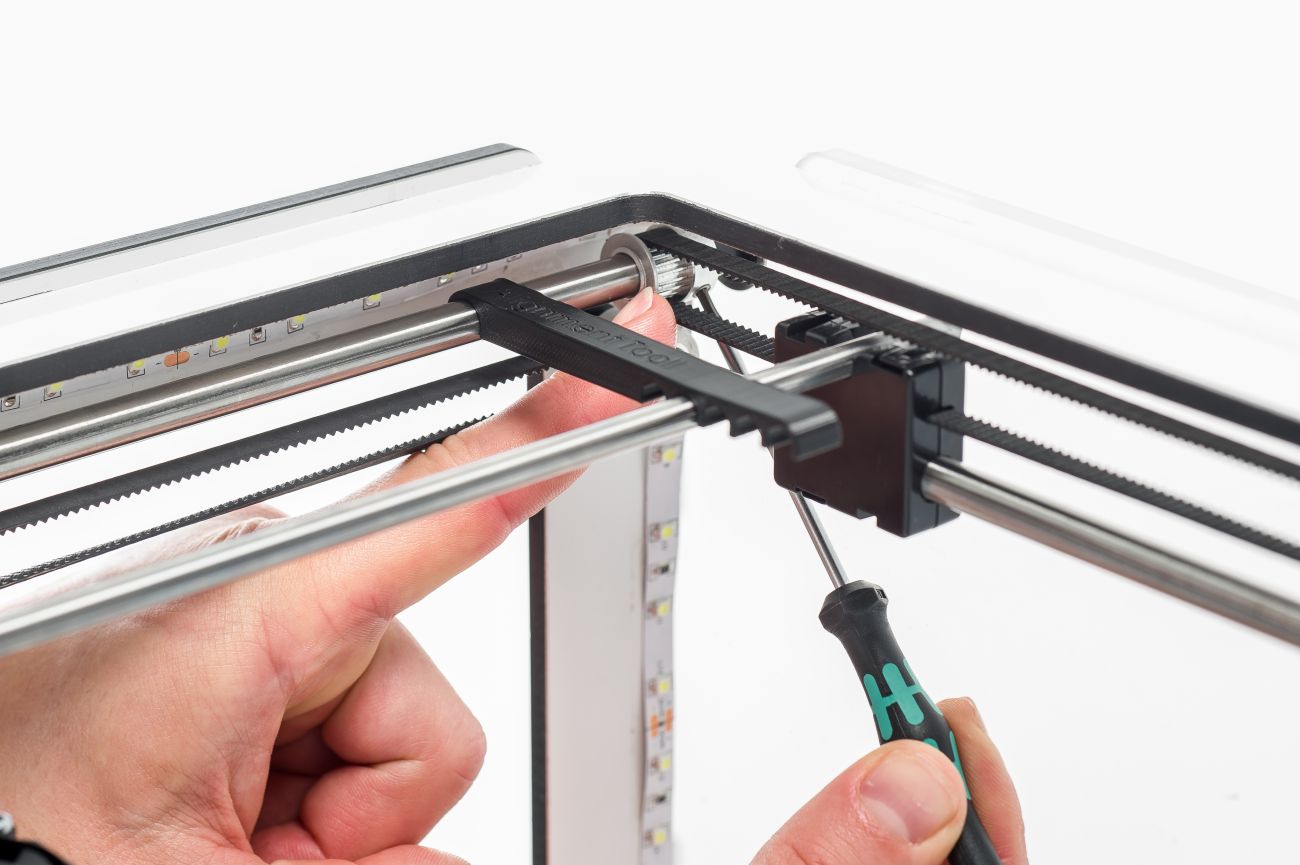
If the pulleys are not secured there will be many shifts and vibrations. This can shake the print and cause the supports and other parts of the print to wobble. To fix this problem, use an Allen key and tighten all the grub screws.

Credits: ultimaker.com, formloabs.com

Monday, March 12, 2018

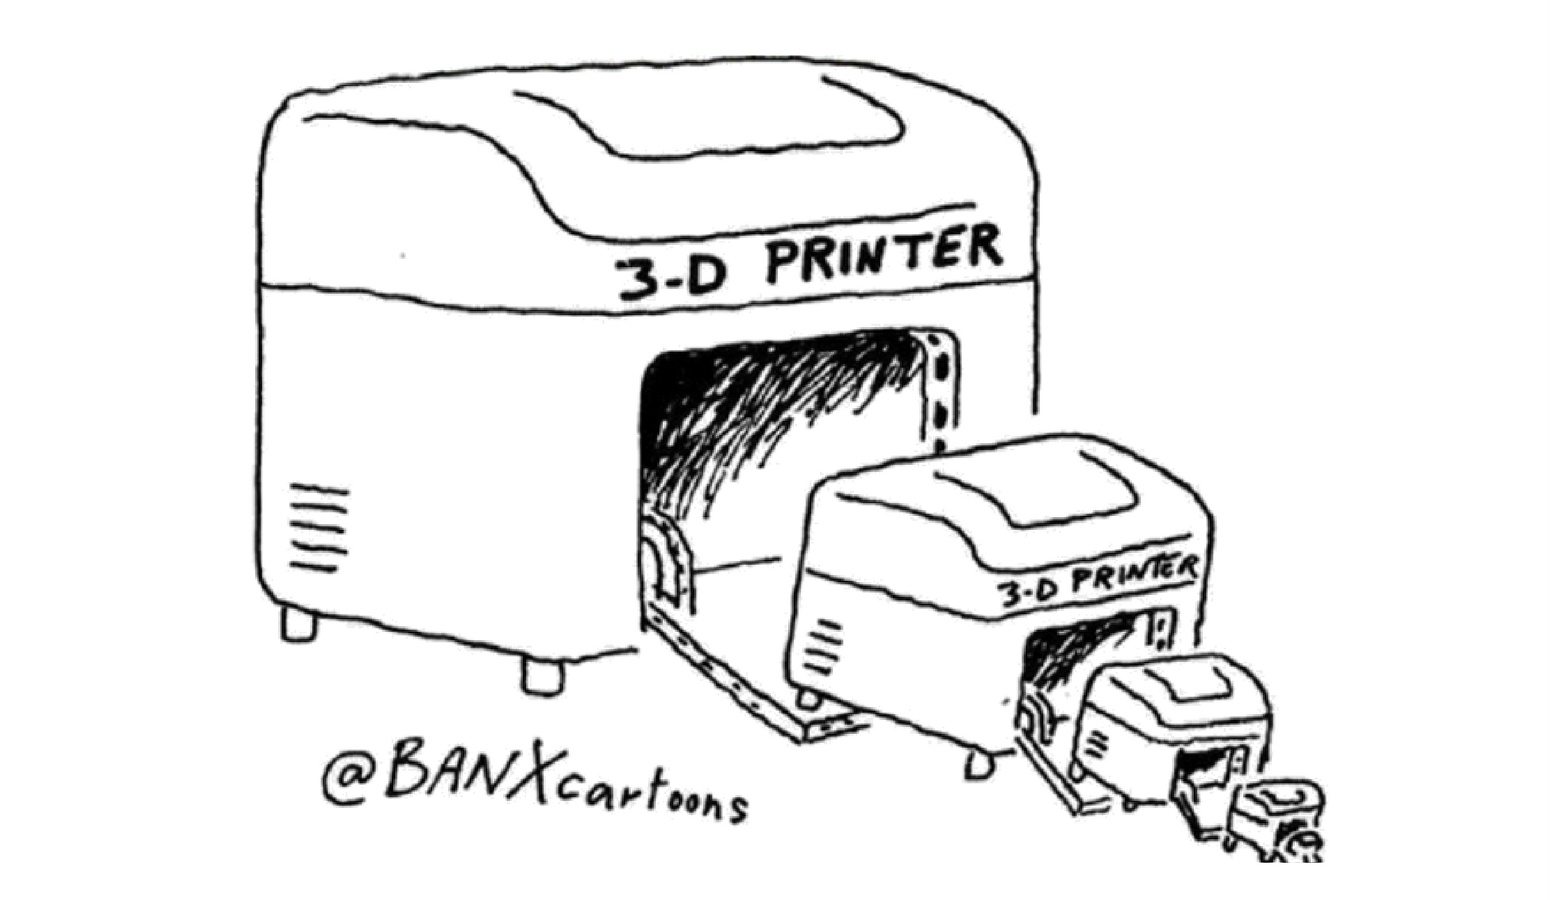
Can you 3D print a 3D printer?

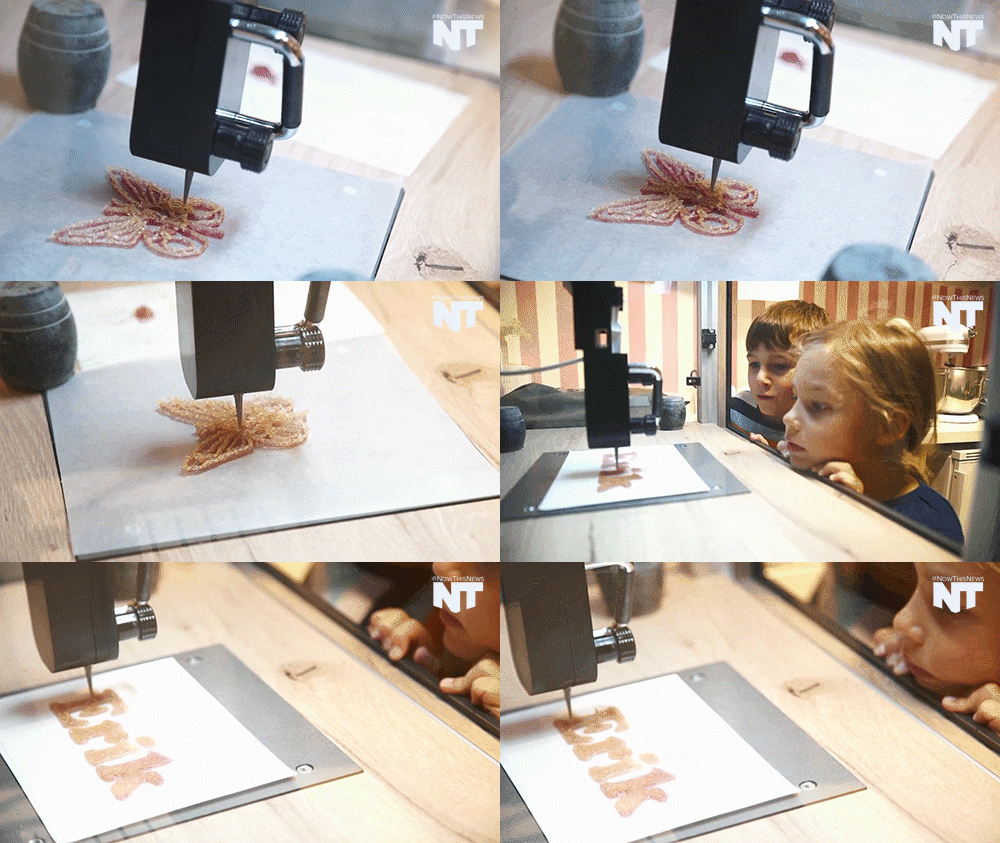
3D printers can pretty much print just about anything. It’s even possible to 3D print your very own gummy candy now. So it only makes sense that we should be able to 3D print a 3D printer itself, right? Well, the answer’s a bit more complicated than a simple yes or no. But let’s takes a look-

From prosthetic arms and organs to 3D printing an entire house, it’s safe to say that 3D printing has come a long way and changed our lives like never before.

However, one question that we’re all curious about is Can you 3d print a 3d printer?

Is It Possible?

Most of it- Yes! A 3D printer can print out most of the parts that you will need to build your own 3D printer. The structural components that make up a 3D printing machine can be printed and assembled even though the process itself would be time-consuming. But 3D printing the electronic parts is certainly more complex.

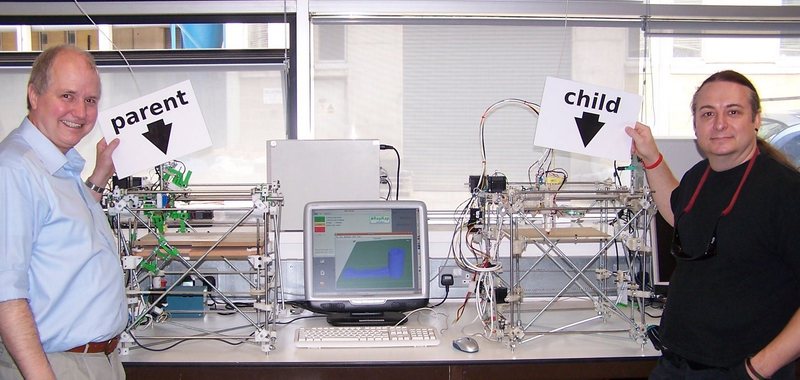
Reprap- The 3D printer that prints itself!


RepRap was the first ever self-replicating 3D printer designed for the purpose of 3D printing another one! Developed in 2008 by Dr. Adrian Bowyer, RepRap can print more than 50% of the components required to assemble a whole new 3D printer and the best part? It’s open source and freely available so anyone can make one! In addition to this, RepRap uses FDM technology which means the 3D printed parts can easily be made using the popular ABS and PLA filaments.

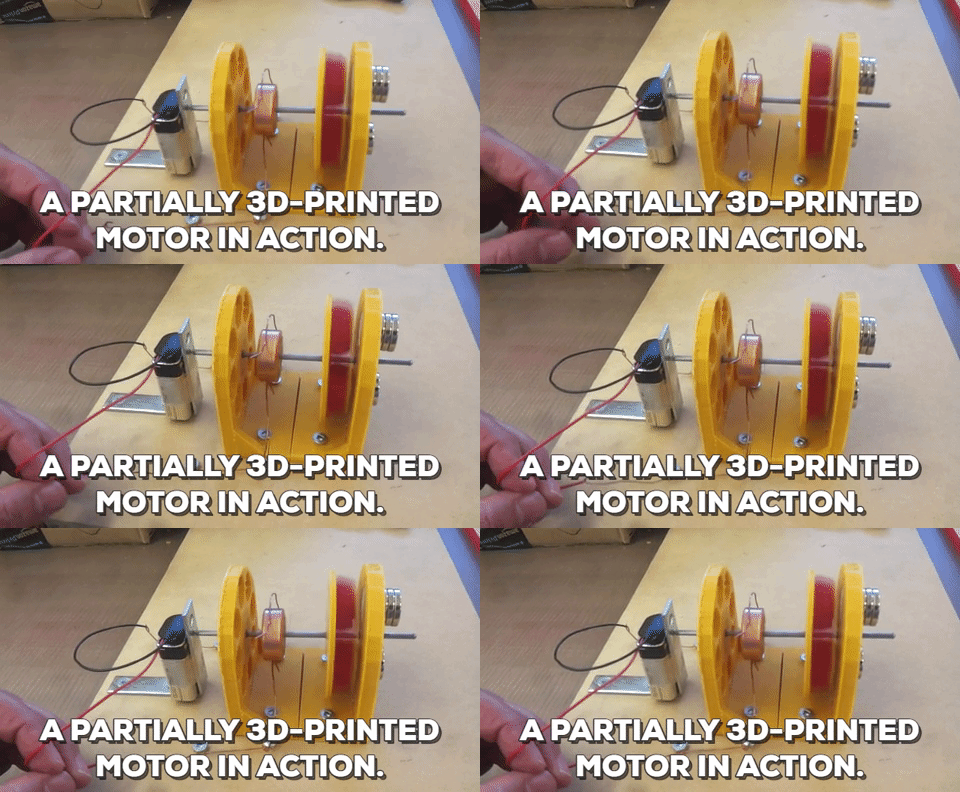
However, some of the electronic and metal parts especially a fully functioning motor are still hard to 3D print though there have been several attempts.

This means that although you can print most of the parts of a new 3D printer, we’re still not all the way there. 3D printing an entire motor and other mechanical parts are not something that can be done easily even if we use metal and other materials.

The good news?

Since 3D printing is an ever-evolving industry, we’re sure it’s only a matter of time that we print a fully functional 3D printer complete with the electronic and mechanical parts.

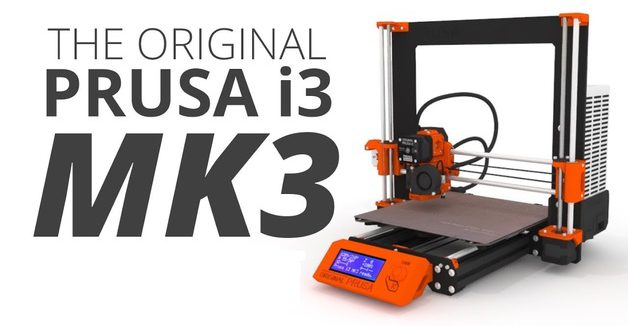
But until then, we can use RepRap! And since it’s an open source project free for all to use, you can build a 3d printer right from your home. In fact, Reprap’s Prusa i3 is one of the most used 3D printers in the world!  And with a comparatively lower cost and easy-to-assemble 3D printer kit, it’s easy to see why.

Apart from this, you can even check out Geeetech’s very own Prusa I3 A Pro 3D printer which is a great DIY kit and super easy to assemble!

Credits: reprap.org, space.com

Friday, March 2, 2018

DIY: 3D Print your own Bluetooth Speaker

If you have access to a 3D printer, a bit of maker prowess, and a love for sound, you can build your own 3D Printed Mini Bluetooth Speakers.

Create your ultimate 3D  Printed speaker box

Coder and tinker Yasthil Bhagwandeen shares a new Instructables project on how to build your very own 3D Printed Mini Bluetooth Speakers, now that is really cool. 3D Printing technology is discovering new ways to make things simpler and productive and so even an audio gear is not an exception.

 https://youtu.be/5IMl47iG-28

With companies like print+ and V-Moda using 3D printing to offer a modification to consumers, the technology could soon become a valuable part of the audiophile’s sonic experience.

Yasthil Bhagwandeen takes a DIY approach with his new project, showing how to print your own mini Bluetooth speakers. The coder and Tinker shows the full process of the project right from trials, failures, designs to the finished final successful project.

What will you need?

3D Printed mini blue tooth speakers need a handful of components and tools.

COMPONENTS

TOOLS

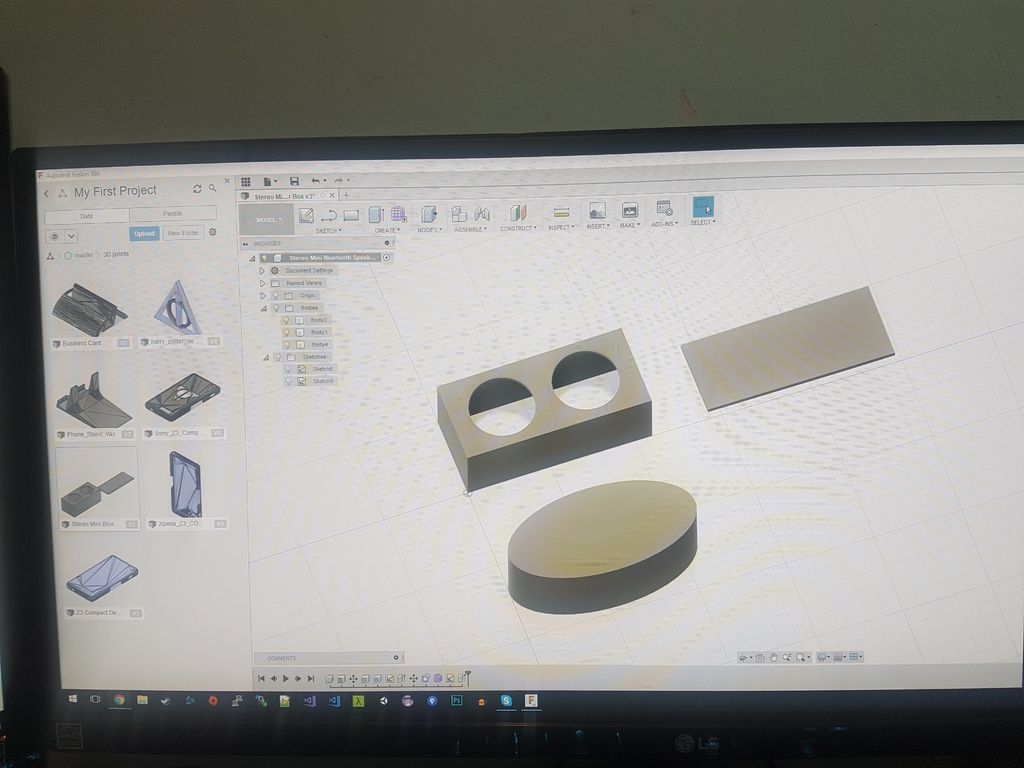
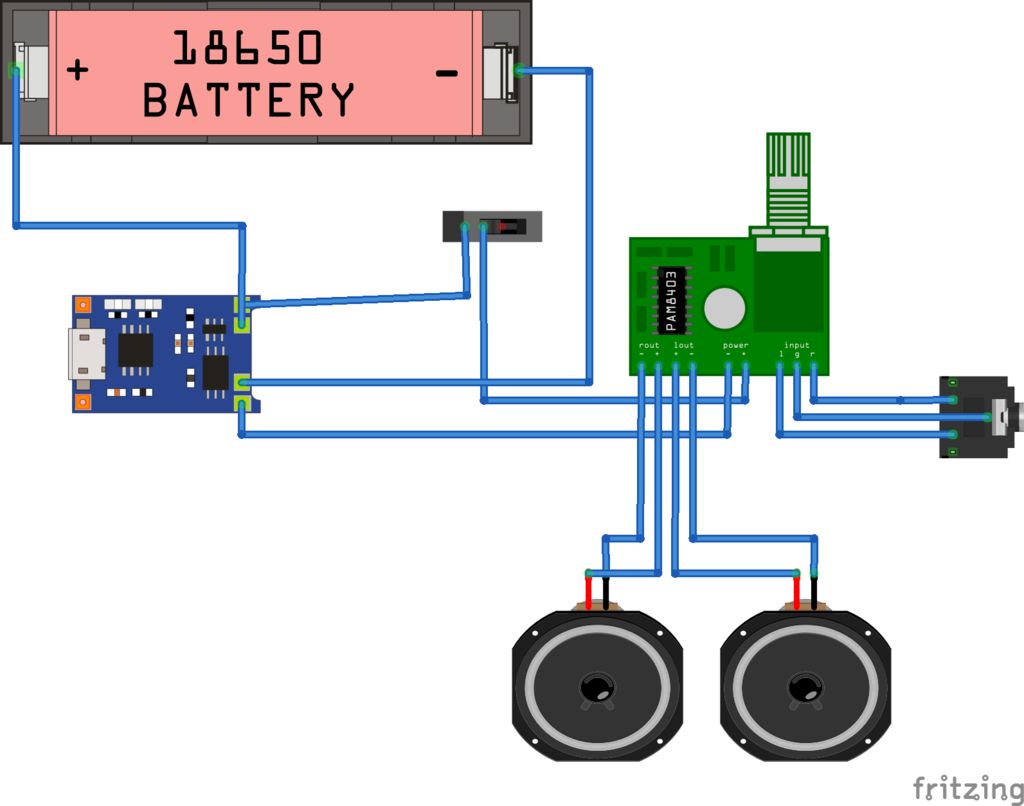
Design the Speaker Box The software used is Fusion 360 and you can get the STL files from Thingiverse. Make sure that you use the vernier calipers correctly as the measurements are important so that the electronic component can be assembled properly in the box so that there is no noise and disturbance in the quality of the sound. Print it out: Bhagwandeens version of mini Bluetooth speakers uses a Anet A8 and the filament used is CC Tree PLA  of 1.75 mm, layer height of 0.32 mm and 50 percent infill. The 3D model for the speaker box, designed by the tinkerer on Fusion 360, is a relatively quick 5 hour 3D print. He also shares the initial mistakes and subsequent redesign that came with developing this project. Obstacles included incorrect measurements, which made it difficult to fit in the speakers, as well as forgetting to print holes for the switch, jack, and micro USB slot. Eventually, Bhagwandeen overcame these issues and was able to build his speakers. Before going to the further step of soldering the maker recommends to test the electronic components and check whether they are working properly.Then start with the soldering which has to be done accordingly to the below schematic diagram.   After the soldering process simply uses the hot glue gun to assemble the electronic elements into the 3D Printed speaker box. The speaker enclosure is designed in such a way that it is easy to open and shut the box without any problem.

The speaker isn’t extremely loud, but it does produce a fair amount of volume. It’s an intermediate project that does require some time and maker skills, but it also seems like a nice undertaking for a beginner looking to get familiar with soldering, or even a more experienced maker who wants a fun and useful project for the weekend. Either way, you can bring your favorite sounds right to your own DIY speaker box and get speakers of your own designs and you can even customize it.

So start with 3D Printing right away and know about the latest trends of the industry with Geeetech.

credits: all3dp,instructables.com
Friday, February 23, 2018

Best 3D Rendering Software you need to have…

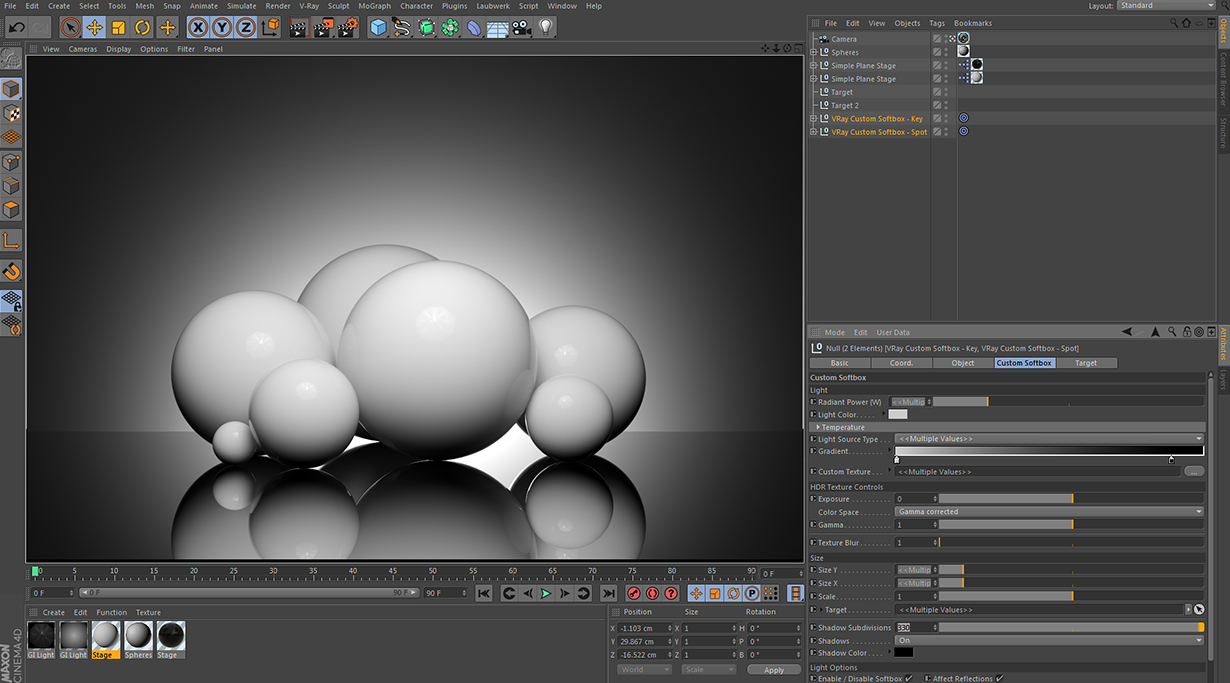
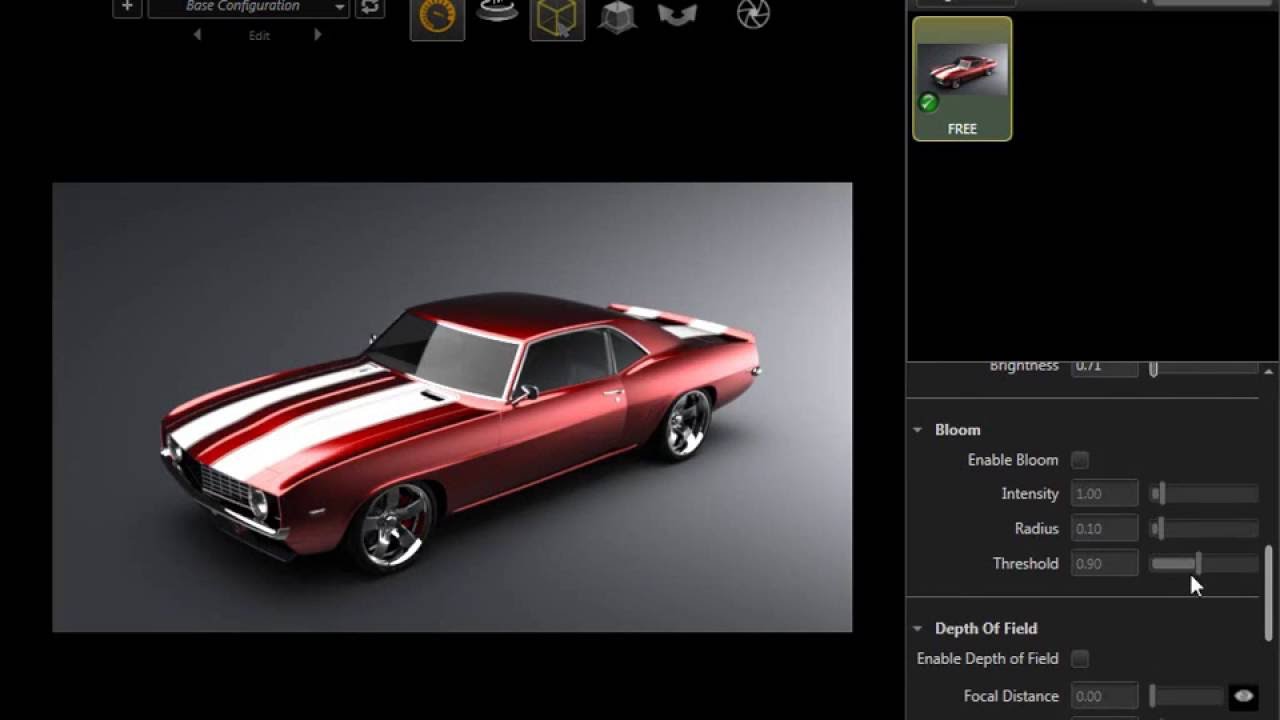
Rendering involves giving life to your 3D designs by adding the simulation of shadows, realistic lighting,  atmosphere, texture, color and optical effects such as the refraction of light or motion-blur scene on moving objects – or the rendering might not be realistic at all, and could be designed to appear as a painting or abstract image.

Rasterization and Raytracing are the methods of rendering which makes it more important. Raterization is for real-time graphics such as computer games and raytracing is a higher degree of quality than rasterization. This technology attempts to recreate the physical process.

Unbiased and Biased Rendering:

The common terms you get hit by when you are using rendering software are unbiased and biased rendering.

Unbiased 3D rendering programming endeavor to compute physically exact images. That implies they follow back the way of a light beam in a numerically correct way, without making any easy routes. This technique can bring about longer render times. Hence, fair rendering is seldom utilized for energized films. Rather, it is found in graphic designing and architectural visualization, since render time doesn’t have that much effect on the venture’s calendar.

Biased 3D rendering programming, thusly, is produced for productivity. While calculating the ways of light beams, they deliberately cheat to chop down the render time. In particular, this implies they insert between outlines or apply the blur. It takes some skill to finetune a biased renderer to deliver a persuading result. Be that as it may, on expansive scale movement or embellishments ventures, it is worth to go the additional mile as far as cash and time are saved.

The basic software that you can use for 3D Rendering are:

V-Ray

Since it has best quality and speed, it is known in the market as one of the best software for rendering, V-Ray is a one-sided raytracer that can outfit both a CPU and a GPU (RT) utilizes brute force and path tracing calculations. You can think that it’s coordinated into a vast cluster of 3D displaying suites. It is accessible enough that beginners or enthusiasts can try it and also has an advanced version for the professionals to make their designs of amazing quality.

Price: $750

Hardware: CPU/GPU

OS: Windows, macOS, Linux

Clarisse

A 3D rendering engine and has many credits for itself, like the new Star Wars movie.You can learn Clarisse for free with the Personal Learning Edition. The renders made with the PLE are limited to 2560×1440 resolution and may not be used for commercial purposes.

The rendering capacities of Clarisse are exceptionally cutting-edge. For example, it encourages the coordination of rendered pictures and arrangements from another 3D rendering programming with profound picture yield. To separate it, Clarisse yields outputs depth data for each pixel.

Price:Free / $999-$2,899

Hardware : CPU/GPU

OS: Windows, macOS, Linux

Solidworks Visualize

Rendering just doesn’t give stunning visual effects but also tries to bridge the gap of an emotional response from prospective customers and stakeholders of engineering projects.Subsequently, it underpins Solidworks’ own particular configurations, as well as CAD information from Autodesk Alias, Rhino, SketchUp, and numerous others. It is an unbiased 3D rendering software which offers an instant progress preview.

When you need to composite complex effects it can output multiple render passes which comes in handy.The intuitive interface of Solidworks Visualize enables even non-specialists to create photorealistic renders that can be used in marketing campaigns. Also, it provides tools that facilitate the animation and scene-setup of mechanical parts.

Price: $1830

Hardware: CPU/GPU

OS: Windows

RenderMan

In the event that you have seen any Pixar motion picture, at that point you have just seen the energy of its homegrown 3D rendering programming, RenderMan. Pixar broadly spearheaded numerous systems that are these days industry rehearse. For instance, RenderMan was the first to incorporate multi-bounce beam traced global illumination.

One of the later augmentations to this 3D rendering programming is an estimator for forefront quality way followed subsurface diffusing. Its intuitive controls for the diverse layers make it simple to rapidly accomplish a reasonable and engaging look. Additionally, moving volumes can be rendered in unparalleled quality on account of twisting volume obscure.

Hair and hide are a critical benchmark for the nature of any renderer. In RenderMan, they can be taken care of productively with its propelled hair shading calculation. Be that as it may, this immense list of capabilities can be awkward for single craftsmen. It takes a group to tame this mammoth!

Price: $495

Hardware: CPU

OS: Windows. macOS, Linux

This software will help you out in making your 3D Prints more better and visually appealing. There are many other rendering software that we have not mentioned here which are pretty easy to use and give better results.

Thus rendering your designs is important while 3D Printing.

Credits: youtube.com,all3dp, cgmeetup.net,3stools.info,3dcoat.com
Monday, February 19, 2018

Troubleshooting: No more gaps and holes. Here’s how you can fix pillowing!

The 3D Printing Problem-

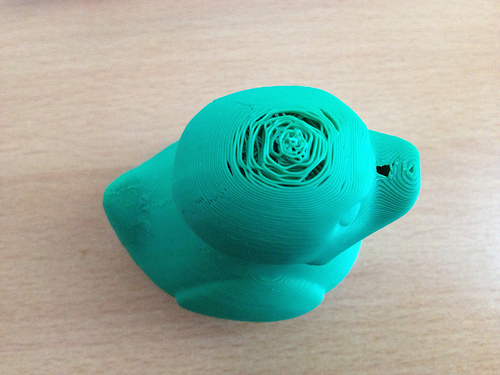
Your 3d print may have seemed successful while printing it but once its finished you notice gaps and holes in the outer layers. This is known as pillowing and though it is frustrating after spending hours on a print, there are some easy ways to prevent it from happening again!

Why does it happen?

There are a number of reasons why these gaps and holes form on the 3d print. If the top layer itself isn’t thick enough and then pillowing is more common as well as if there isn’t sufficient cooling of layers.

Luckily with a few adjustments and changes in your print settings, you can avoid it from occurring again.

How To Fix It:

1. Use a cooling fan

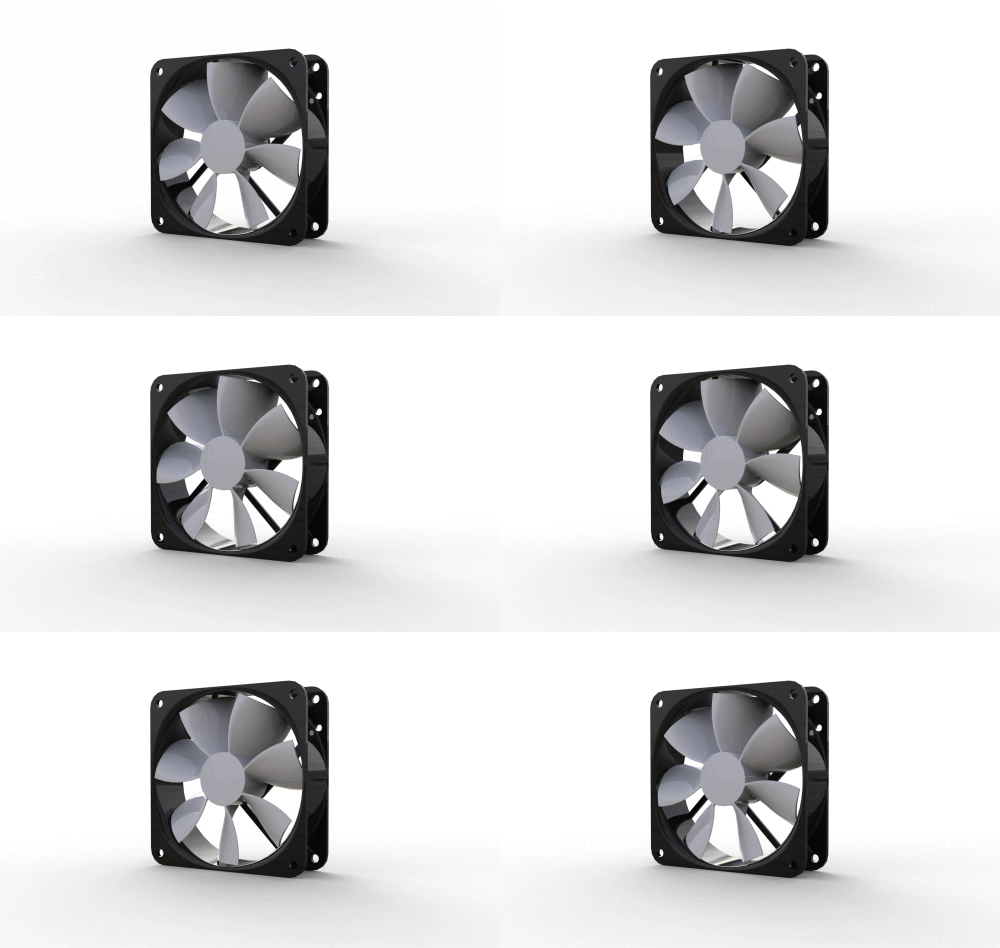
You may have the optimal settings but if your layers don’t cool properly it could contribute to pillowing. Use a fan with settings set to low for the initial layers and after the first few layers, the fan speed can increase. If you are using a cooling fan already here are a few things to check for-

  • Position– Check if your fans are positioned correctly so that maximum airflow is aimed towards your print.
  • Fan Speed- Without proper cooling, the material will tend to curl up at the places where it crosses the infill lines and forms gaps in the top layer. For best results, ensure that the fans are running at the maximum fan speed as per the cooling settings.

2.  Increase Thickness of Top/Bottom layers

Since pillowing occurs on the top or outer layer, the best solution is to increase the thickness of this layer. A layer that is too thin at the top will be more prone to gaps and holes. Increasing the thickness will seal or close the “gaps” that are otherwise seen when pillowing takes place.

Ideally, the top/bottom thickness should be at least 6 times that of the layer height. For example, if your layer height is 0.1mm then the Top/Bottom thickness should be set to 0.6mm and you can even take it up to 0.8mm to make it full proof.

To edit these settings, check the advanced section of your print application, under the ‘Bottom / Top Thickness setting’.

3. Increase infill percentage

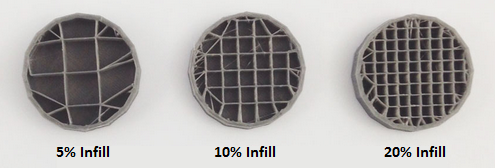
Apart from increasing the top/bottom thickness, check your infill settings as well. If the fill density is set at a default 5-10%, you should increase it to at least 20% and retry the print.

4. Use another filament size

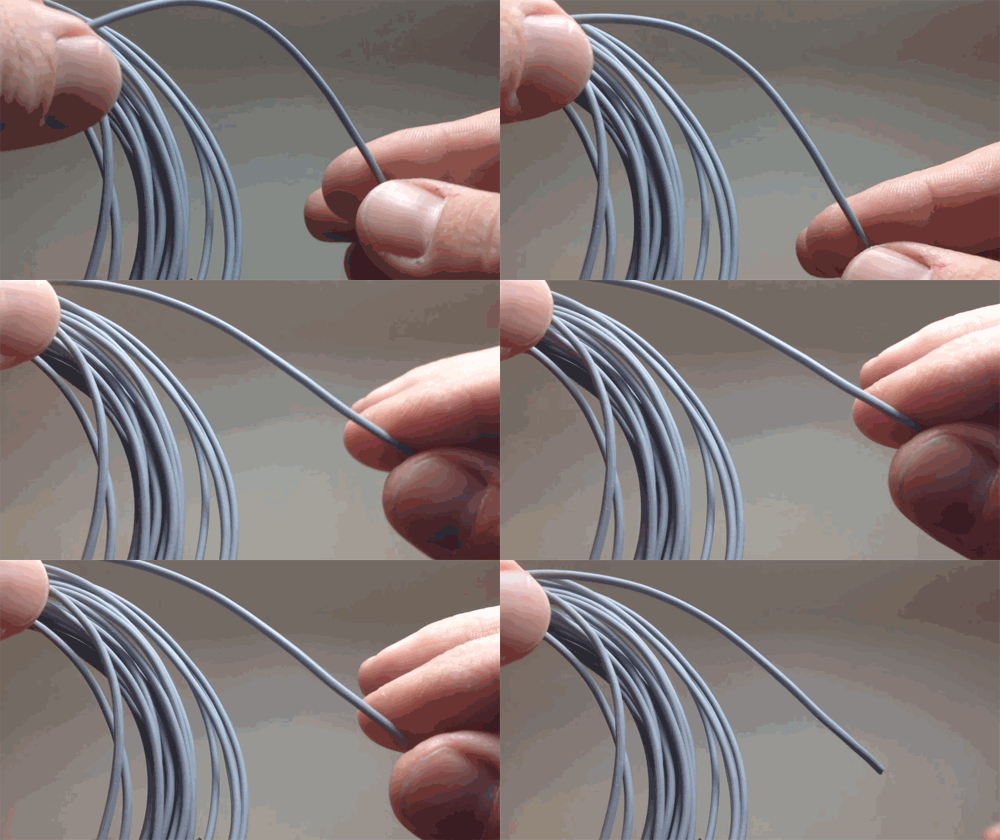
If all else fails then consider switching to another filament size. The gaps and holes you see during pillowing could simply be from your filament. It’s a common problem seen in filaments of 1.75 mm. You can avoid the problem by switching to a filament of size 2.85mm as it will allow for better control and higher extrusion rates on wider nozzle diameters. Run a test print to see if the problem is solved!

Image credits: creators.vice.com, 3ders.org, bootsindutries.com, 3dprintingindustry.com, grabcad.com
Monday, February 12, 2018

Your favorite memes can now be 3D printed!

Memes are everywhere! We love some, hate some and we’ve definitely considered 3d printing some as well. But for something as viral as memes, there aren’t many printing files available online. So if you’re a meme-lover like us and you’re looking to print(or buy) some cool memes then take a look below!

3D Print your own:

Thanks to 3D printing enthusiasts all over the world, we were able to find some interesting designs you can find on Thingiverse!

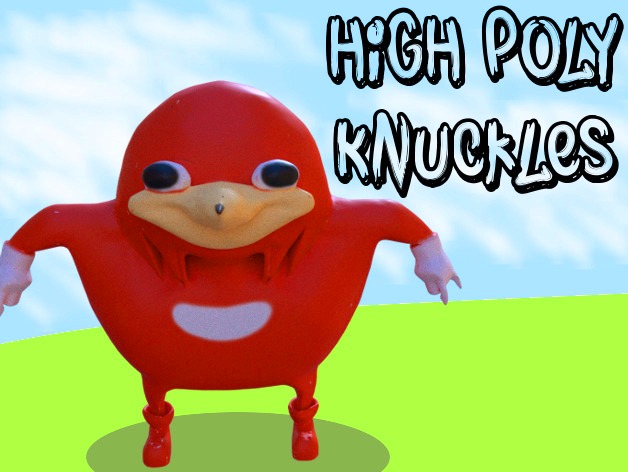
Ugandan Knuckles

Thanks to the world of VR chat, Ugandan Knuckles has become an internet sensation and we want our own! If you are still searching for da wae to print out this tiny figure then we have it here for you. Made by user ideawizard you can find the print files on Thingiverse here

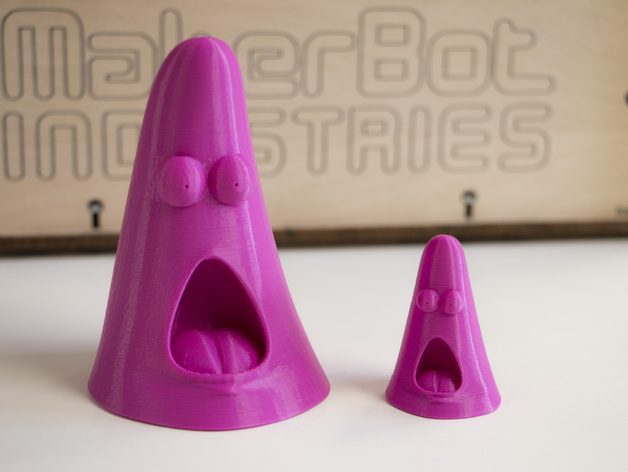
Surprised Patrick

Thanks to designer Fargo3DPrinting, you can now print out Patrick and his iconic surprised face which went viral and led to some of the funniest memes! However, this gif remains our favorite:

You can find the design on Thingiverse, available here.

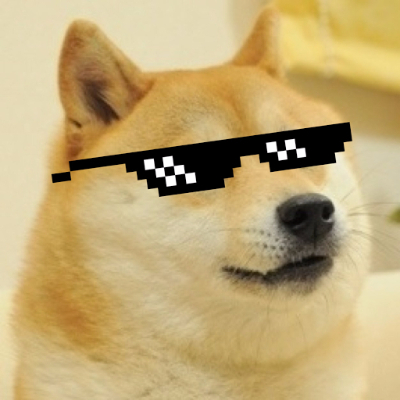
Deal with it Glasses

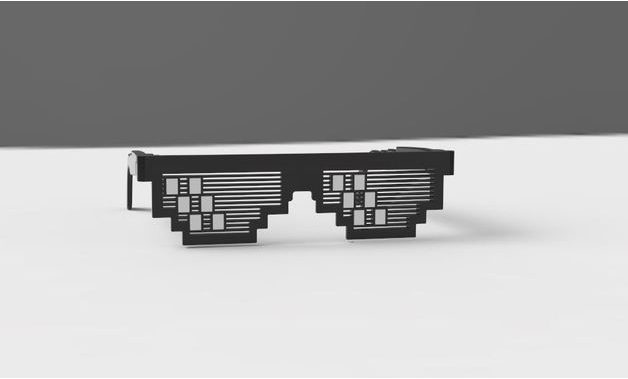
You may be cool but are you as cool as a doge wearing 8bit glasses? The famous “Deal With It” meme was so popular that people decided to design and print the glasses so that they too could wear it! And luckily, you can make your own pair to flaunt around thanks to designers on Thingiverse!

Created by Aubrey Ortiz, this design is easy to print and you can tweak the size a bit to adjust to the size of your head. Get it here.

Meme Faces

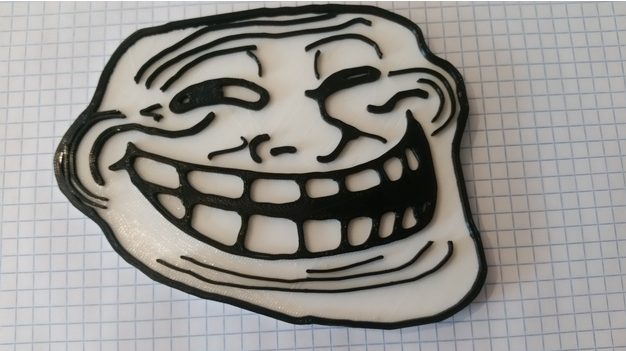
Your meme collection just isn’t complete without the famous meme faces that started off the whole meme trend in the first place. This troll face, for instance, created by Garrett Kearney is easy to print and you can follow the instructions here.

Buy your own:

If you can’t seem to find the STL files for your favorite meme or don’t have a 3D printer to make your own then Shapeways is the place for you. There are many more memes that you can find on Shapeways so if you’re looking to own a 3d printed version of your favorite meme then why not buy one? Here are some of the cool memes that you can find-

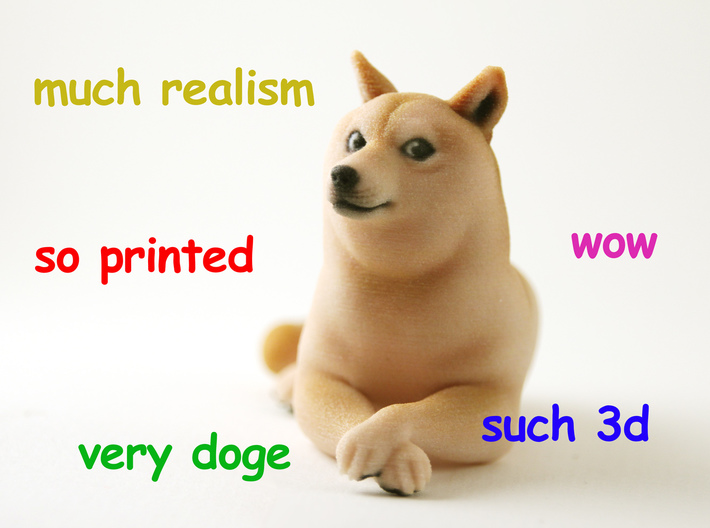
Doge 

We all want our very own doge and if you’re willing to spend $20 then you can buy this cool model here. The detailing and precision by Ryan Kittleson on this doge had us blown! Amaze!

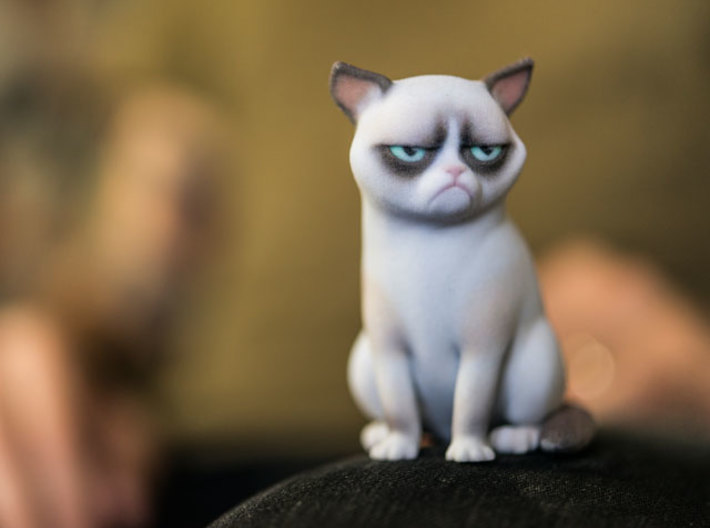
Grumpy Cat

Grumpy cat hates everything. Except for this 3D print. Because it’s so cool! And you can get yours here for $25!

You can find all these memes and much more on Shapeways here. Happy printing! 

Credits- thingiverse.com, shapeways.com, giphy.com
Friday, February 9, 2018

3D Print Your Own Raspberry Pi 3 Cases!

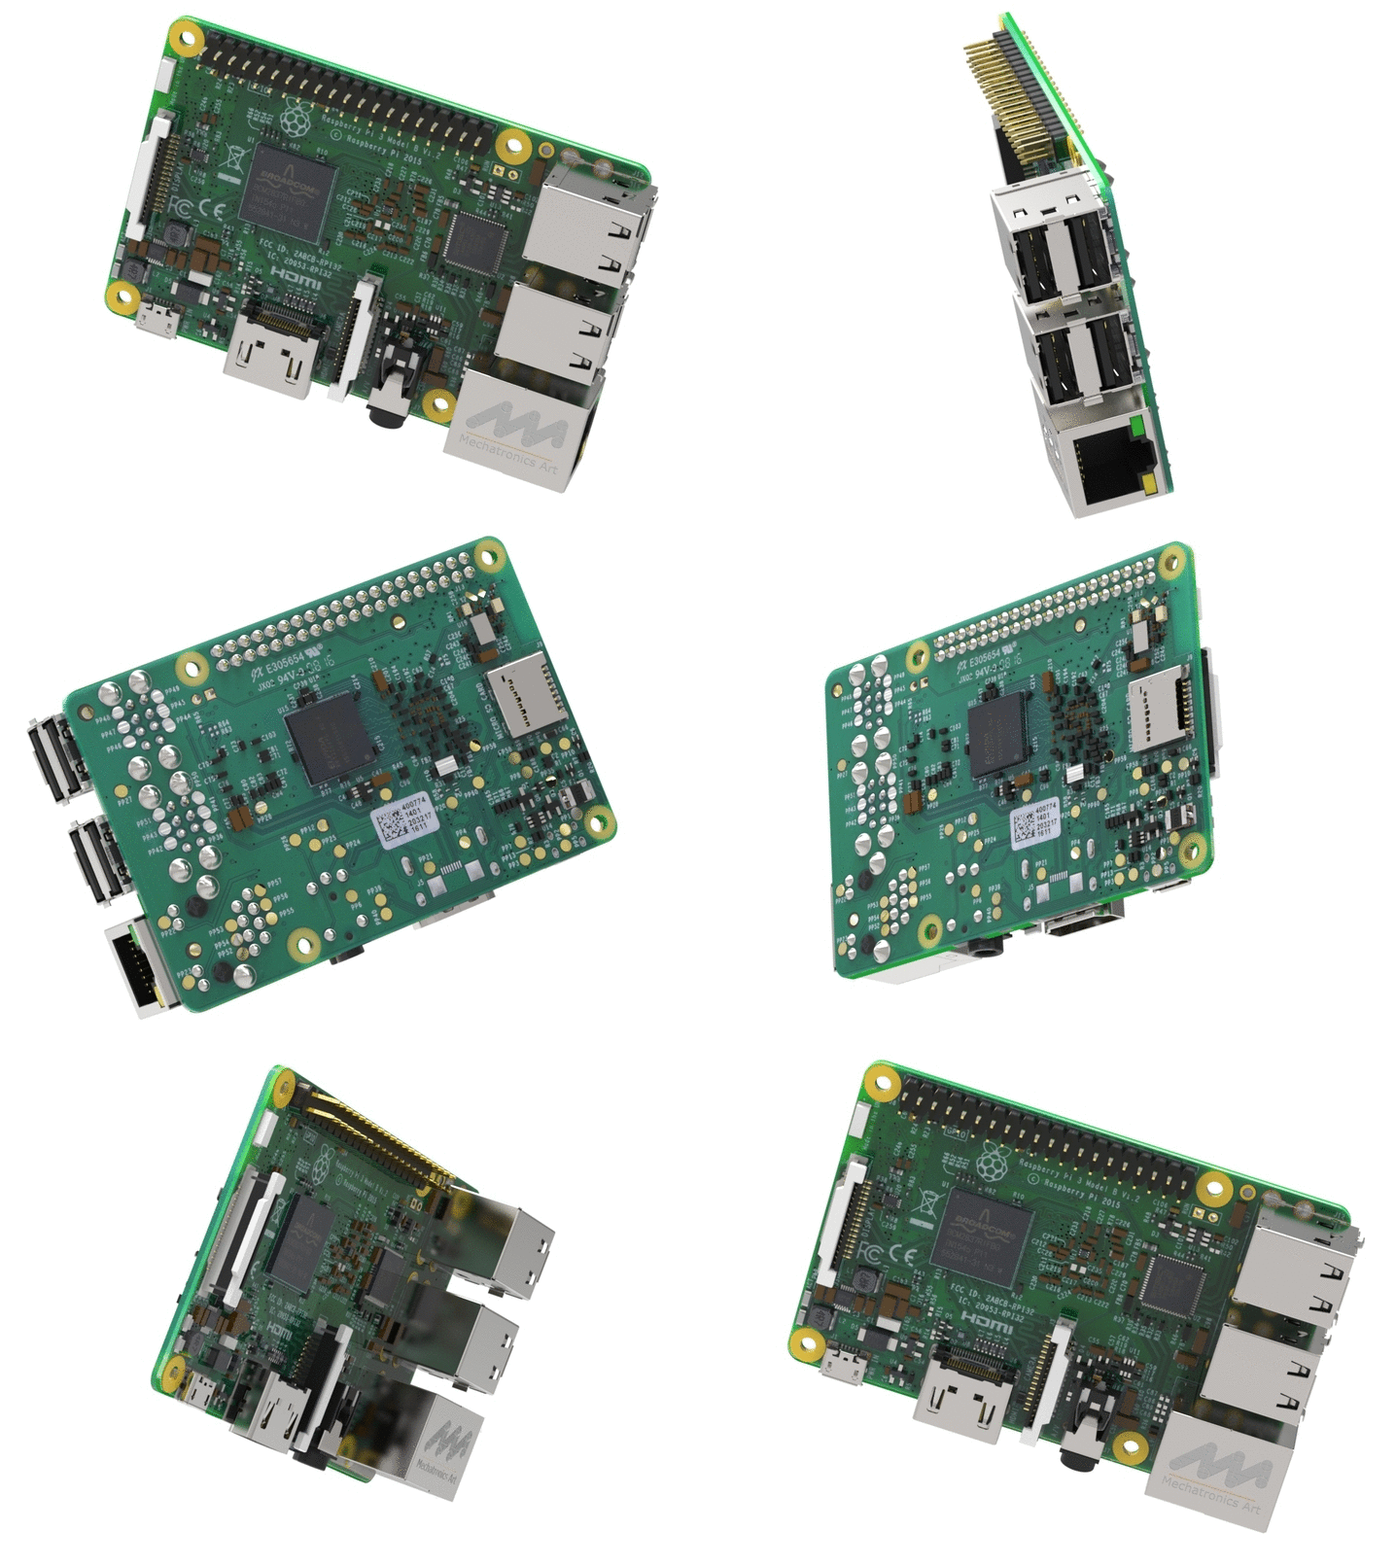
You probably know what Raspberry Pi is but if not, don’t feel too left out! This cool looking circuit board is a microcomputer first developed for schools to make computer science and programming more fun and affordable.

Developed by the Raspberry Pi Foundation, these single-board computers can plug into a computer monitor or TV, and let you explore the world of computing and even lets you learn how to program in languages like Scratch and Python.

So if you own a Raspberry Pi and a 3D printer then why not just print your very own case? We promise you, these innovative designs will steal your heart! Take a look-

Raspberry Pi case with VESA mounts 

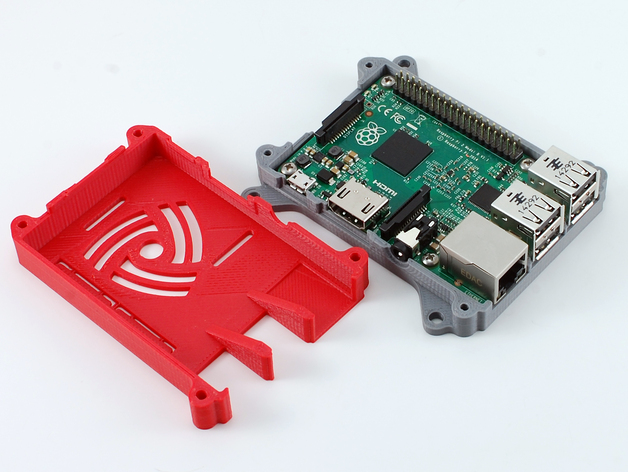
Not only does this case look really nice but its super efficient too. The design itself is easy to assemble and can be screwed together. Apart from this, there’s an access slot for Pi camera, VESA mounting tabs, and a rotary engine vent design. Created by brilliant designer 0110-M-P you can find the Thingiverse files here

Pacman case

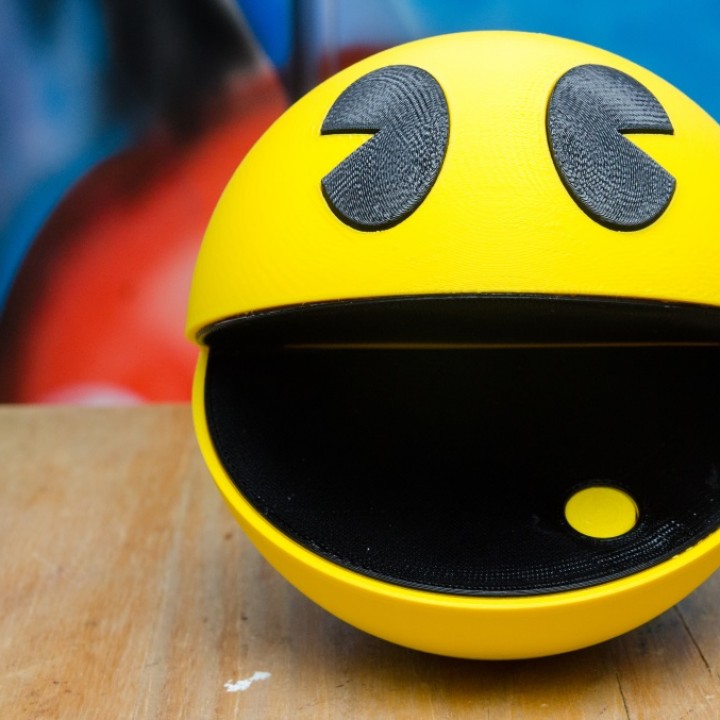
Bring back the nostalgia of the good ol’ Pacman days with this funky Pi enclosure designed by Darren Furniss. The bright color itself is enough to liven up any workspace and you can easily mount your Raspberry Pi 3 within. Instructions and print files are available on MyMiniFactory here but don’t forget to use supports for the bottoms half!

Pi 3 Sleeve

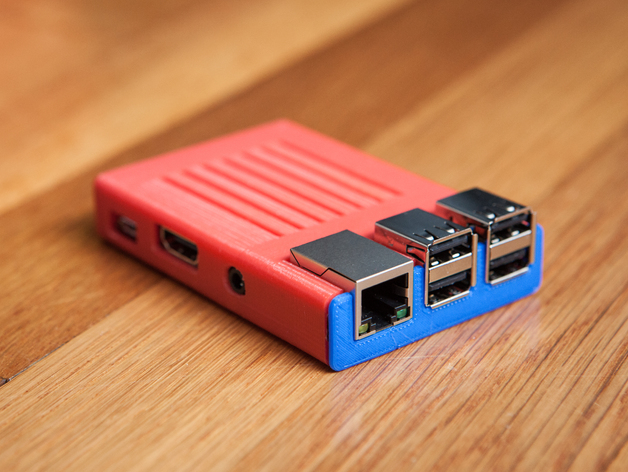
We’re big fans of this simplistic Raspberry Pi sleeve designed by Walter Hsiao and you can print it out in any color you like. Initially designed for the Pi B+, it works well for the Pi 3 and even Pi 2. Just make sure to check the dimensions and tweak the setting wherever necessary. You can find the directions and print files for this case on Thingiverse here.

Thor’s Hammer

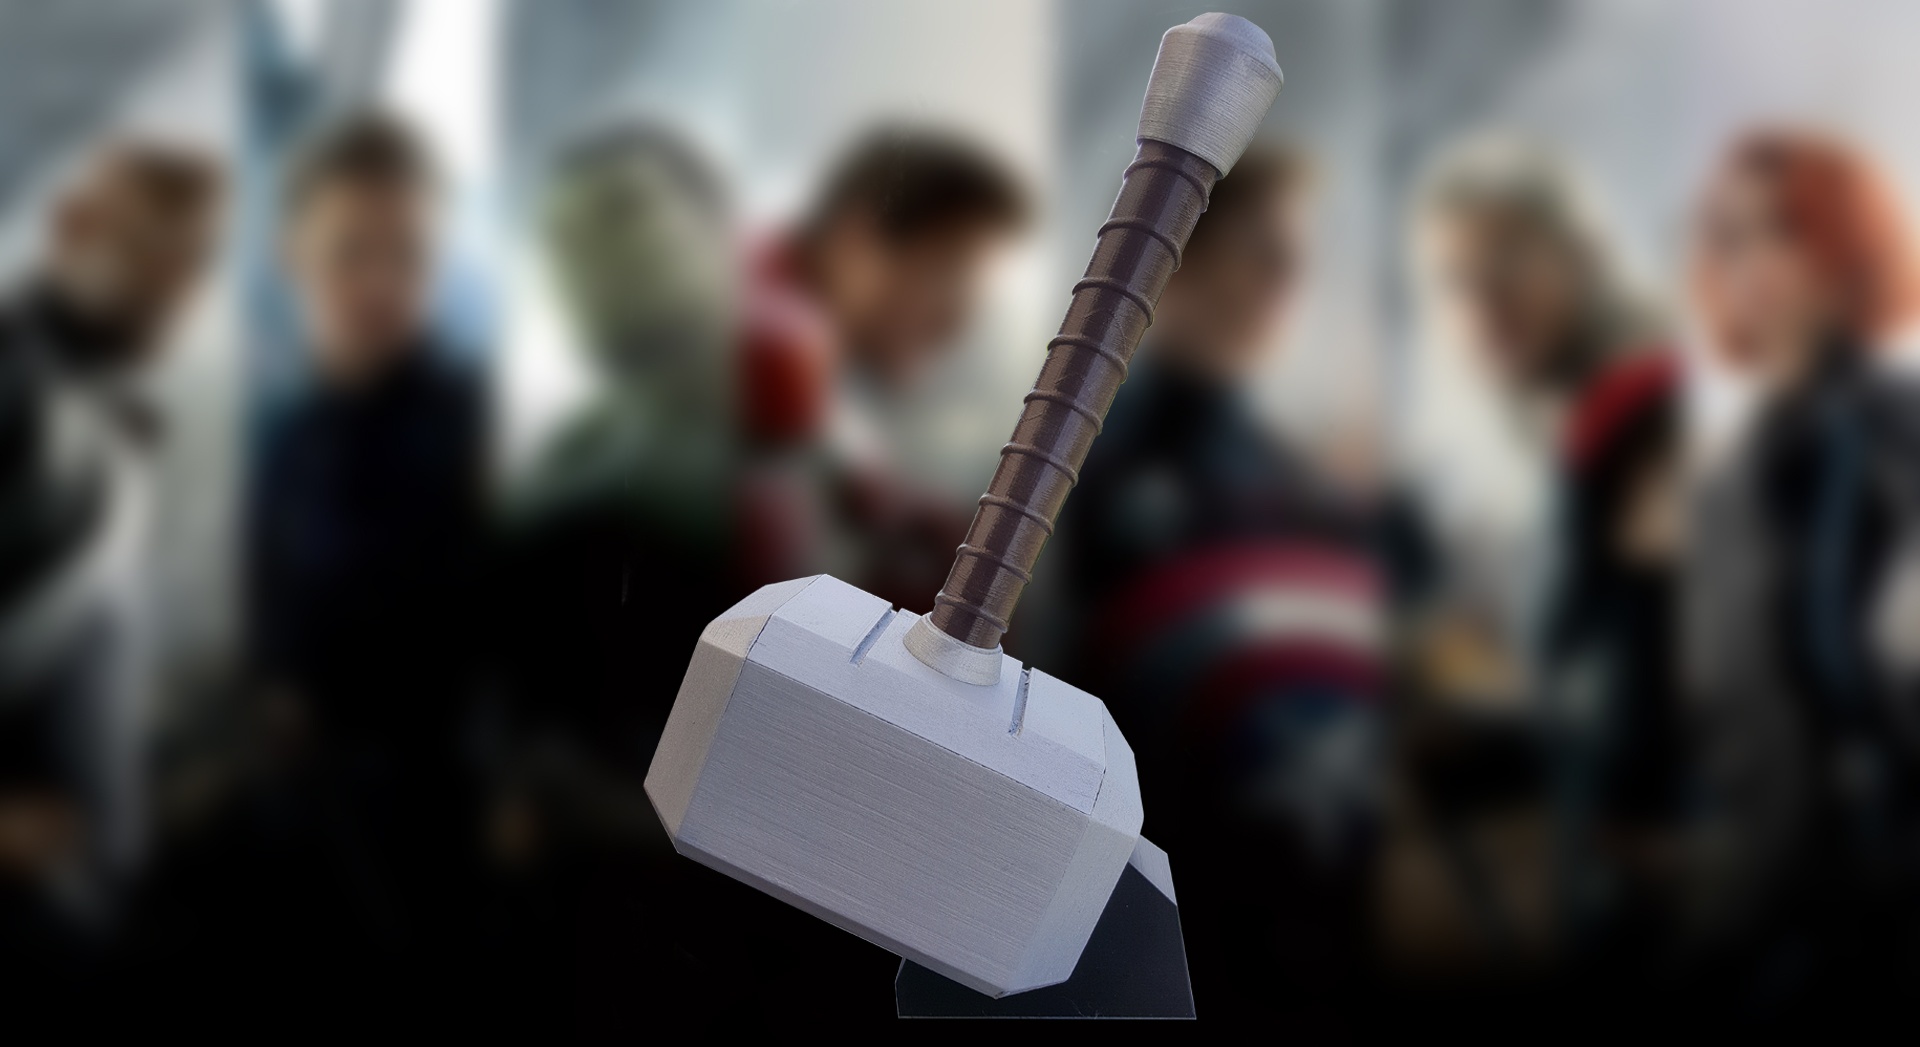
You could settle for an ordinary case OR you could get Thor’s legendary hammer to encase your precious Raspberry Pi! It may look fancy but this case is easy to print and the perfect piece for any Marvel fan. 

Another awesome design by Darren Furniss, get this print on MyMiniFactory here. You can even print out the stand on which the hammer rests to complete the look.

TARDIS Raspberry PI 3 case

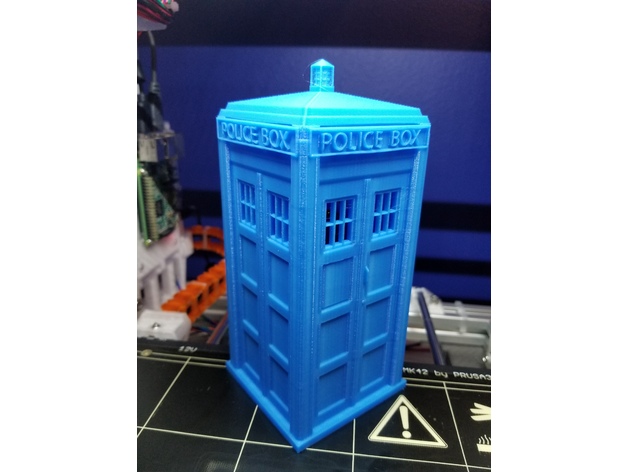
Any Dr. Who fans? How about a classic TARDIS for your Rasberry Pi? Creator Jason MK2 isn’t just a 3d printing enthusiast but also a really cool dad to have designed this case for his son. You can customize the design and cut out holes wherever necessary so that USB cables and such can pass through. You’ll even find 4 holes in the rear which you can use for screwing the piece together. Available on Thingiverse check out his design here.

 SNES Mini

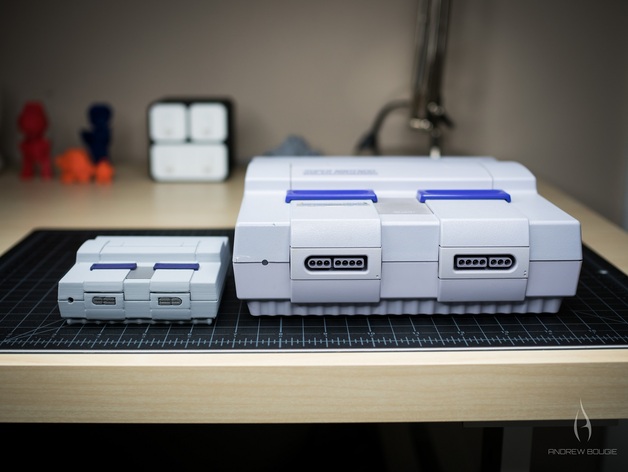
If you couldn’t get your hands on a SNES Mini, its fine. You can still print out this brilliantly designed case by Andrew Bougie. But what’s even cooler is installing a games emulator like RecalBox or RetroPie and playing all your favorite games like never before. The instructions and print files are all available on Thingiverse as well as a license to print and sell but don’t forget to credit the awesome creator! Find Andrew’s design here.

RPI3 2600 

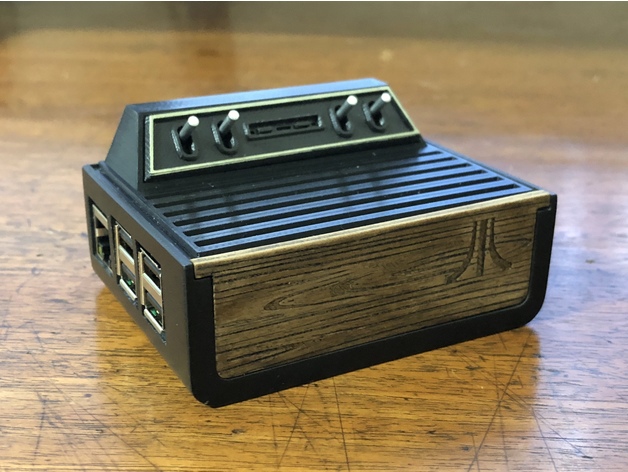
Inspired by the Atari 2600 gaming console, creator Haunt Freaks made his very own Pi 3 enclosure complete with the original Atari logo! The accurate vintage design brings back sweet memories for many whose first console was the Atari 2600 and now you can print your very own!  The print files for this design are available on Thingiverse here.

Raspberry Pi Case

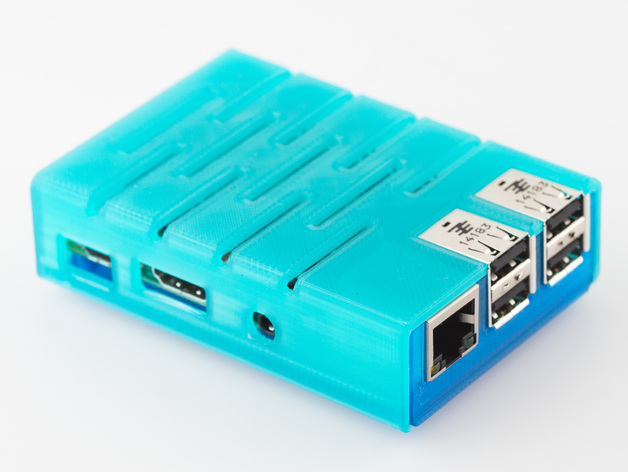
If you’re leaning towards something minimalistic then don’t miss this cool design by creator Walter Hsiao. A perfect fit for the Raspberry Pi 3, this case can be printed in two parts which snap together with no screws needed. And if you want to modify the print you can even add some vent holes in the bottom for airflow for cooling. Find this print on Thingiverse here.

Deathstar Pi 3 enclosure

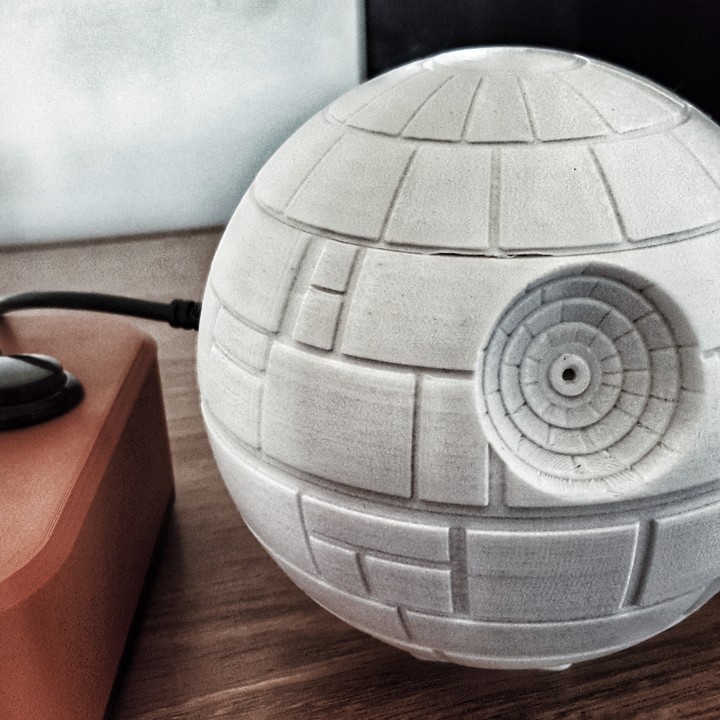
Last but by no means the least, is this Star Wars inspired Deathstar enclosure created by Darren Furniss. The case itself is spacious enough to mount a fan within the upper dome so you won’t have to worry about it heating up. Apart from this, there are additional vents, an option for the Pi camera and a stand that compliments the design and prevents it from rolling around. Get this awesome print on MyMiniFactory here.

Looking for a 3d printer so that you can start your own 3d printing adventures? Why not take a look at our Store for some sweet deals?

Credits: thingiverse.com, myminifactory.com, grabcad.com

Tuesday, February 6, 2018

Need a 3D print? These sites will print your design for you!

Just because you don’t own a 3D printer doesn’t mean you can’t experience the joys of 3D printing! And if you’re wondering how then its high time we talk about 3D printing services and how cool they are!

Essentially, a 3D printing service or company will print your design for you and deliver it right to your doorstep.

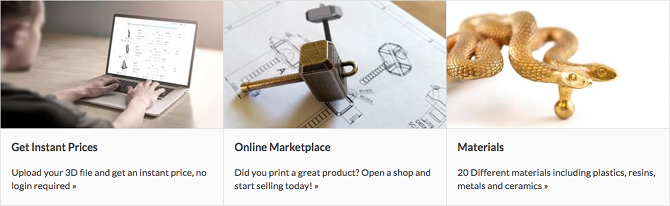
All you need to do is upload your model design, STL files, scans or even physical items that you wish to be 3D printed. Apart from this, there are a variety of models available that you can choose from. Alternatively, if you’re looking to sell your designs then you can consider listing your services as well.

We’ve compiled a list of some of our favorite 3D printing services that you absolutely must check out-

1. Shapeways

Technologies: SLS, SLA, Binder Jet Steel, Wax casting, Material Jetting

Materials: Plastic, Metal, Ceramics, Sandstone, Wax

One of the most popular 3d printing services, Shapeways is perfect for both 3d printing enthusiasts as well as newbies. You can either upload your STL files and custom designs or opt for their professionally designed items and customize them to your liking.

2. i.materialise

Technologies: FDM, SLS, SLA, Casting, CeramicJet, Colorjet, DMLS, Indirect Metal Printing, Polyjet

Similar to Shapeways, i.materialise lets you upload your designs and have them printed out for you. For designers, they can either sell their 3d print designs via the gallery on the i.materalise online store or embed them into their website.

Materials:  Plastic, Metal, Ceramic, Wood, Resin, Sandstone

3. 3D Hubs

Technologies: FDM, SLA, SLS, Jetting, Metal Sintering, Paper, PolyJetting, CFF, Wax Casting

Materials: Plastic, Metal, Paper, Resin, Stone, Wax

Rather than 3d printing your object for you, 3D Hubs lets you connect with professionals who own a 3d printer and will print your design. It’s even more convenient as you can find someone living in your area itself who offers 3d printing services, upload your STL files and instantly connect with them to get an estimate.

The company makes sure all transactions between the “hubs” and customers are performed properly. You can find these 3D Hubs all over the world mainly in Europe and the US but also in Australia, Asia, Africa, Russia, and South-America.

4. Sculpteo

Technologies: FDM, SLS, SLA, DMLS, Casting, CLIP, ColorJet

Materials:  Plastic, Metal, Ceramic, Resin, Full-color, Wax

Sculpteo offers a large variety of materials and 3D printing technologies to choose from. From art pieces to jewelry and interior decorations, you can find something that you love and even take it one step further and customize it. Like the other online sites, Sculpteo too offers hobbyists and professionals to open up an online storefront and sell where they can sell their designs.

When asked about his views on 3D printing, the founder of Sculpteo, Eric Carreel says “Soon, instead of buying things that are made in large quantities at factories, we will buy objects made in quantities of just one, specifically for us”. And if you take a look at Sculpteo, you’ll feel the same!

3. MakeXYZ

Technologies: FDM, SLS, SLA, Material Jetting

Materials: Plastic, Resin, Nylon

What sets MakeXYZ apart from other online services is that it offers you a handy little perk. You can either upload your files and have them printed or you can choose to allow an experienced Makexyz print manager handle the process for you. For newbies especially, this tool gives you a very smooth experience.

Apart from this, you can upload your files in a variety of formats like stl, obj, zip, step, stp, iges, igs, 3ds and wrl. The site also includes a “Find 3D Printers” list that includes the printer’s name, location, and his/her 3D print capabilities.

3D printing services are also a great way to test out 3d printed objects before buying your own 3d printer. And if you love the experience and can’t wait to buy your own then take a look at our Store.

Credits: imaterialise.com, makexyz.com, sculpteo.com, 3dhubs.com, shapeways.com

Wednesday, January 31, 2018

We bet you didn’t know these 3D printed accessories even exist!

The sky is the limit when it comes to creativity, and 3D printing is no exception to this. You may have a unique idea in your mind and if you can find the right tools then you can 3D print your design and share it with the world too. Today we’re going to take a look at some of the fun and quirky accessories designed by people all over the world!

Wearable Planter Jewelry

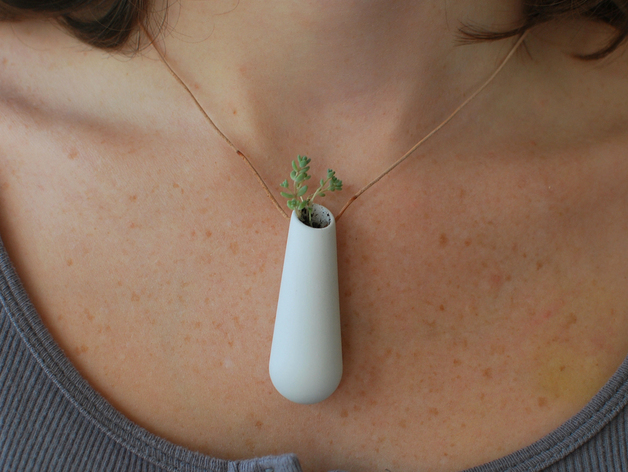
Love plants? You can now take your precious plants with you wherever you go thanks to these unique jewelry planters made by Colleen Jordan. The pendant itself is a miniature vase with holes through it which you can attach a cord. So simple yet so creative!  You can make your very own Vase pendant thanks to files available on Thingiverse here.

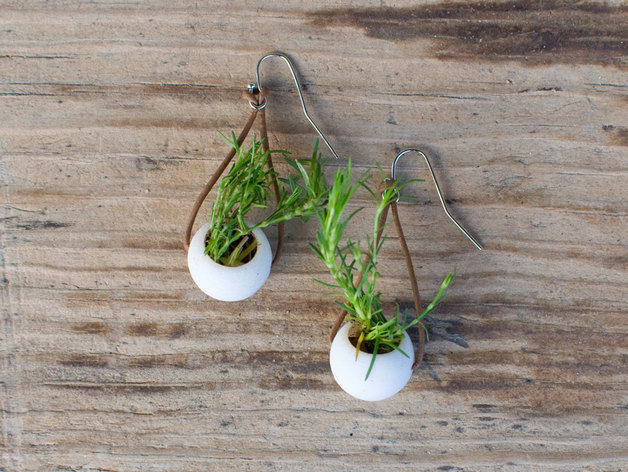
And if you’re looking for a pair of earrings to match then Colleen has you covered with these tiny beads that can be used as mini planters. Just print it out, add your plant and take your lil’ buddy with you on your adventures! Find these wearable planter beads here.

Neckties

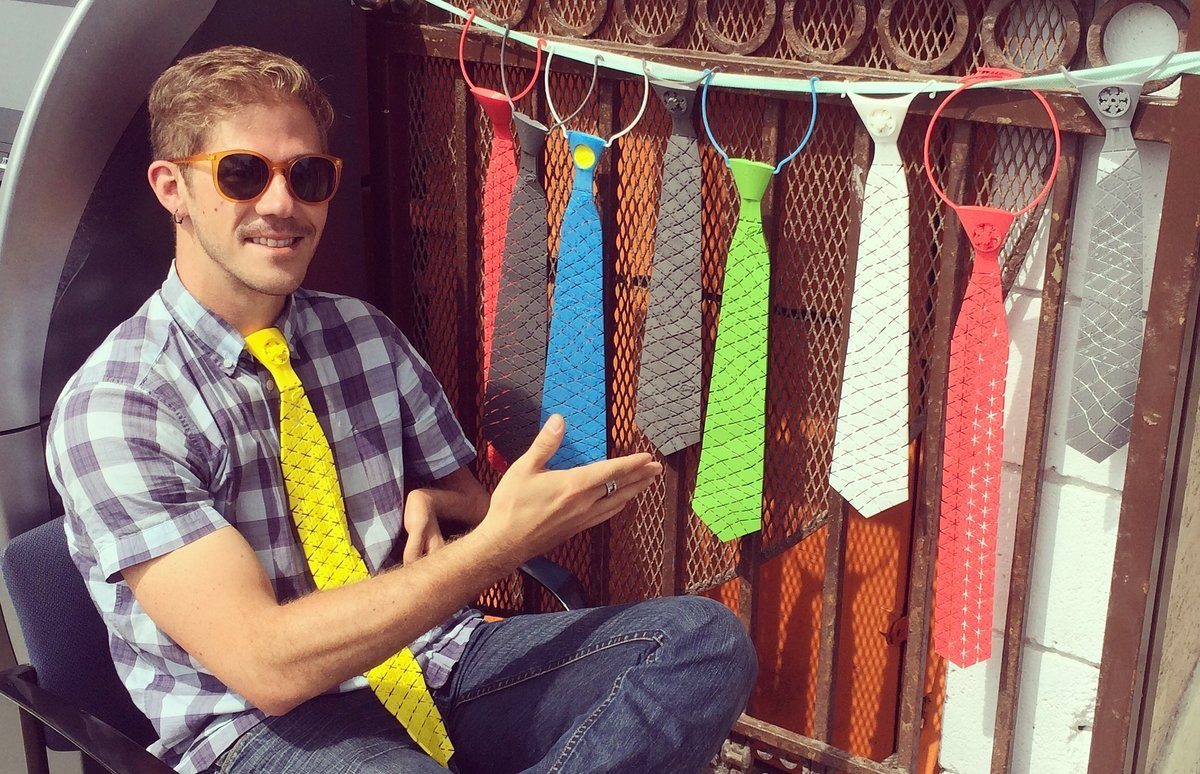
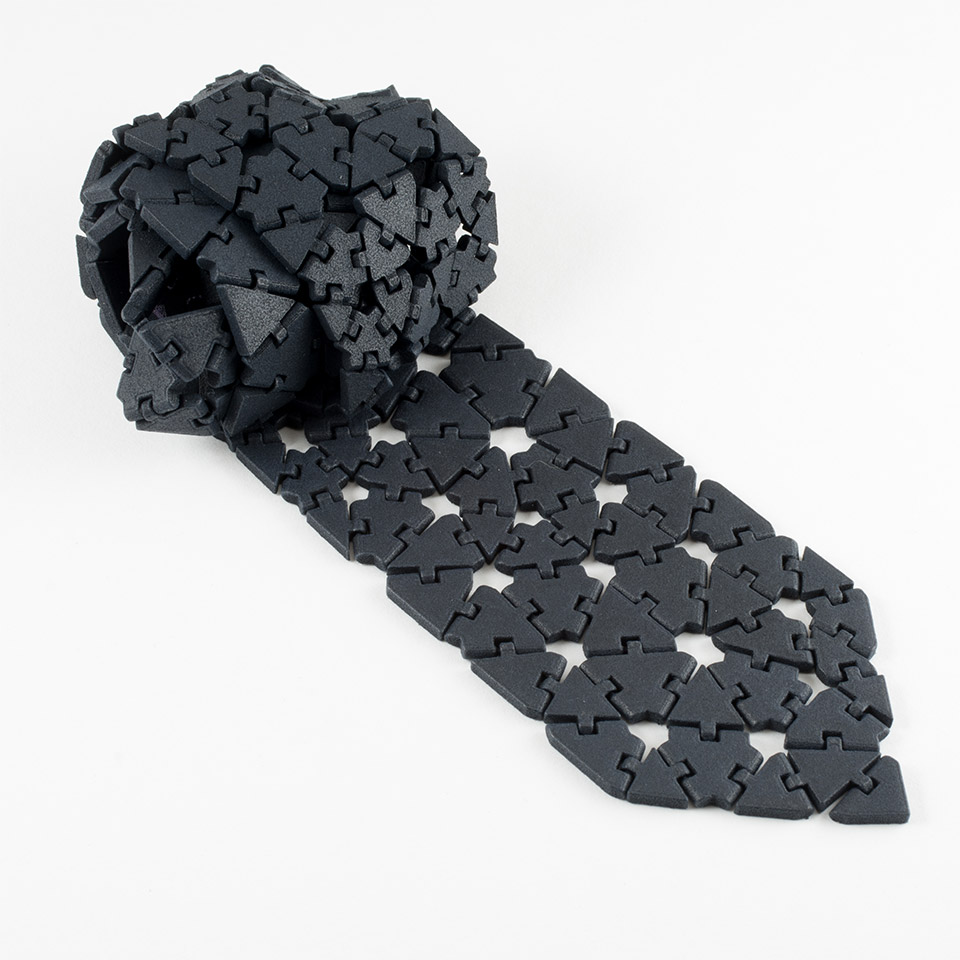
While 3D printed clothing hasn’t taken over our closets yet, we’ll admit we’re pretty fascinated with the concept. And one thing we can’t wait to try are these 3d printed neckties that are quirky, cool and definitely a topic of conversation.

What’s so special about them? For starters, you don’t have to struggle with tying that tricky knot. All you need to do is slip them on. The tie itself is made from pieces of PLA linked together in such a way that they’re flexible but also very durable. Creator Boris Rabinovich even put them to the test by tossing them in the washing machine but they returned unscathed!

Tapestry Eyeglasses

3D Printing your eye-glasses are cool but how about taking making it a fun art project too?

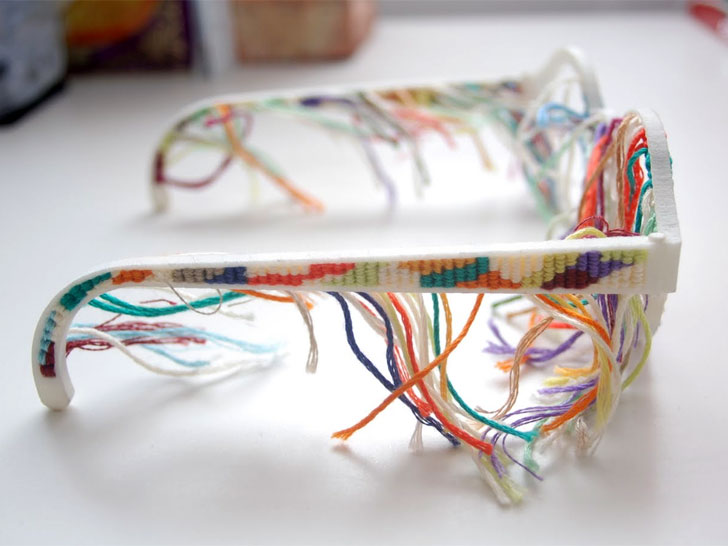
Chloe McCormick and Nicholas O’Donnell-Hoare collaborated to create these cute and quirky eye-glasses which can be customized to suit your need! All you need are your favorite colors of yarn.

There are holes included in the frame of these eye-glasses so you can weave your own pattern using different colored yarn. A pair of glasses and a fun DIY project all in one, we really want to try these out.

Geometric Jewelry

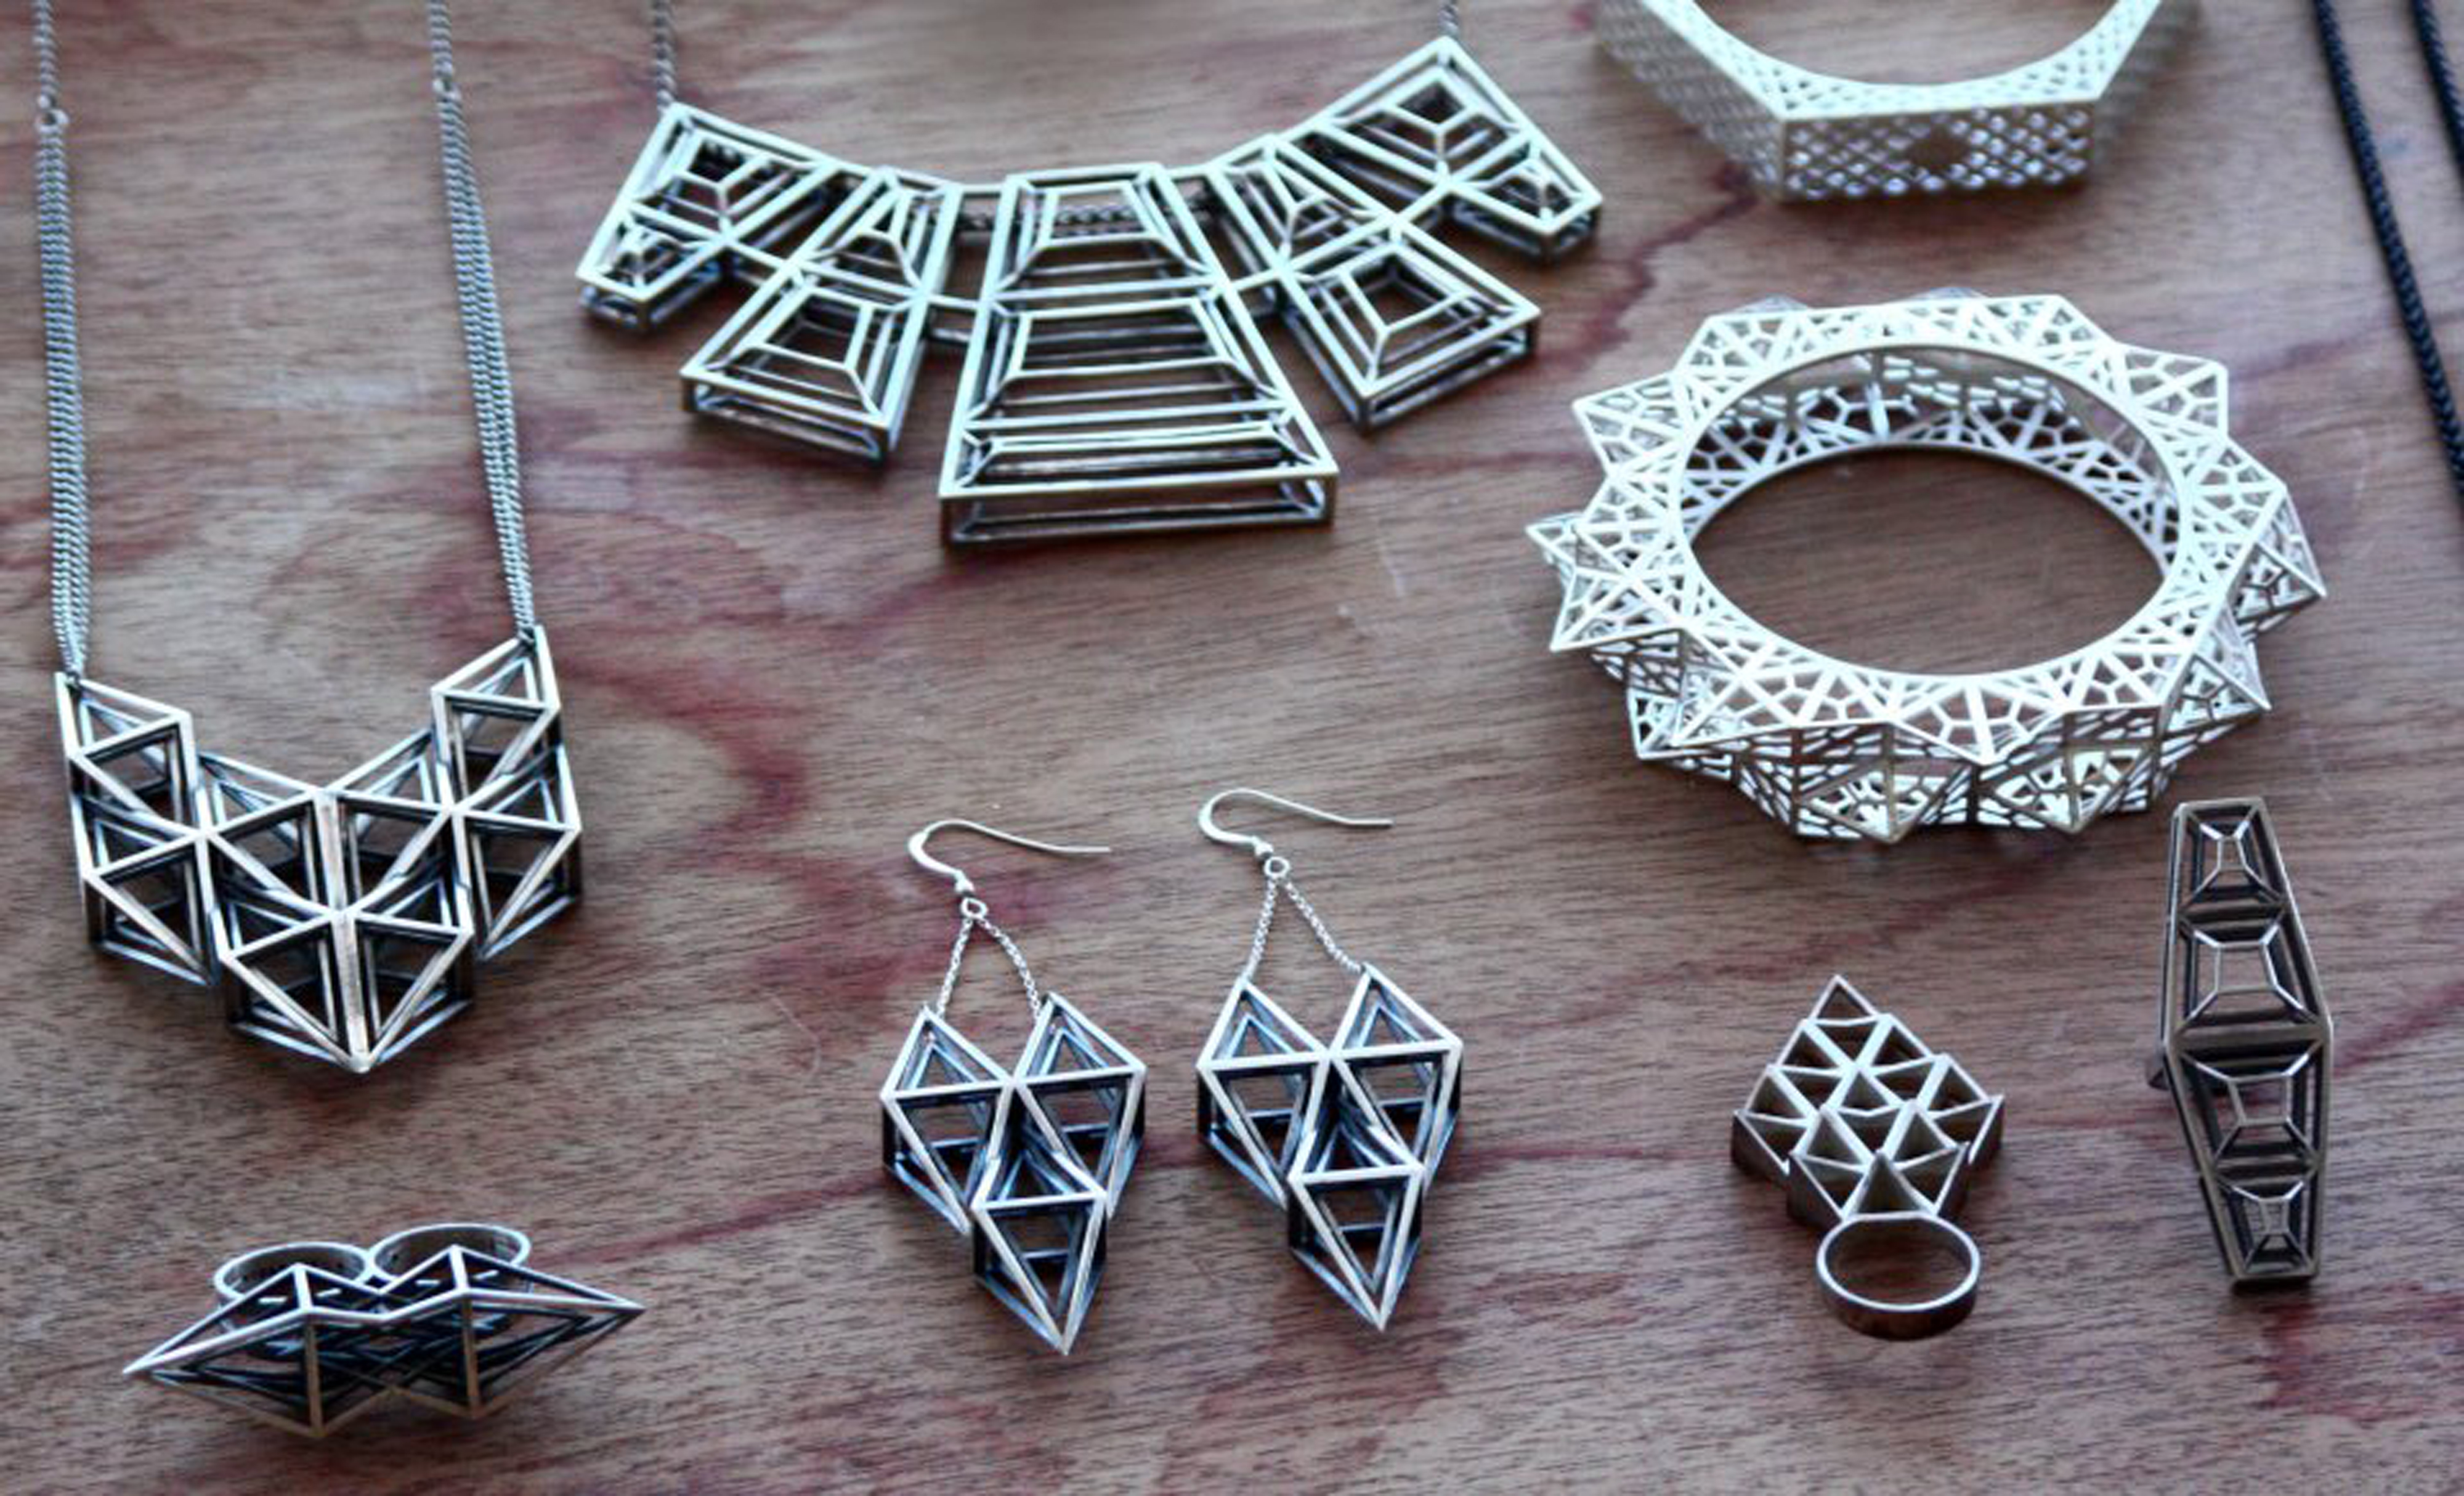
As stunning as it looks, whats really impressive about 3D printed jewelry is you can print out these designs not only in PLA and ABS but also in metals which is really revolutionizing the way we look at jewelry.

Traditional gold and silver designs are now making way for geometric patterns that are minimalistic yet stunning to look at. In fact, they almost like jewelry of the future!

Bowties

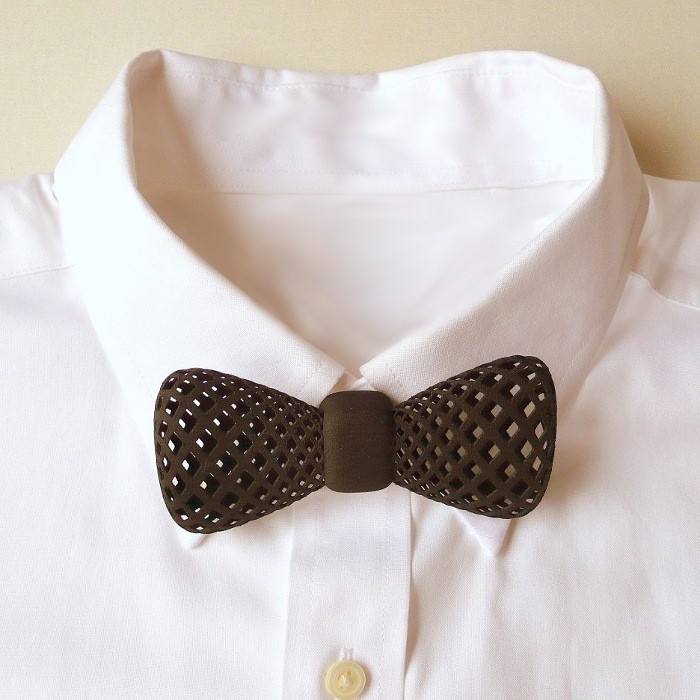
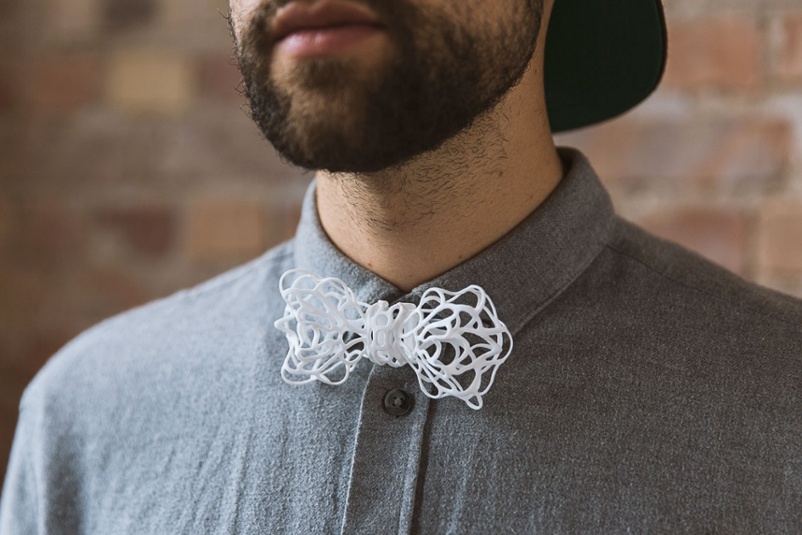
If your friends and family didn’t know just how much you love 3d printing, then they definitely will once you turn up to an event wearing this. These intricate bow ties are much easier to wear than their traditional counterparts but we’re not complaining.

Since 3d printing is all about unleashing your creative ideas the possibilities are limitless. Check out Thingiverse for some quirky designs or buy one online. You can even sit down and design your very own design and flaunt your love for 3d printing!

Cufflinks

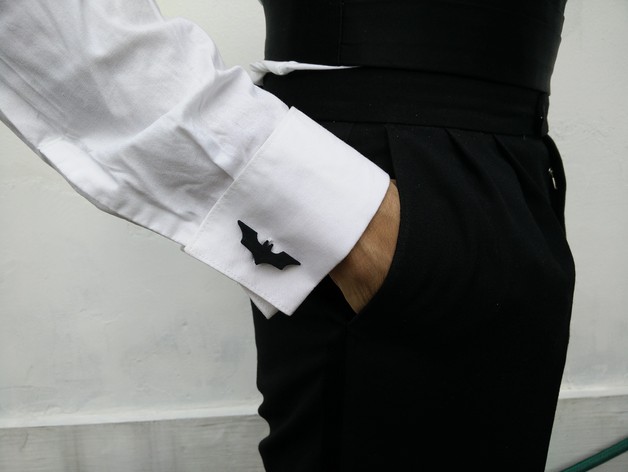
One of the most magical moments as a 3D printing enthusiast is when you realize you can 3D print literally ANYTHING onto the most mundane objects and breathe life into them all over again. And these Batman cufflinks are the perfect example. Luckily you can print your very own thanks to the files available on Thingiverse. Find them here

Credits: thingiverse.com, inhabitat.com, my23skidoo.wordpress.com, meltewerk.com