Showing posts with label 3d printing design. Show all posts

Wednesday, March 21, 2018

The “Plastic Smoothie”- Now You Can Utilize The Leftover Filament…

3D Printing is becoming more sensitive to plastic pollution that is created while printing the objects.

The biggest environmental issue that comes along with 3D Printing is the leftover plastic filament or spool after printing your  3D object.

Throwing away the filament in the trash is the only option you are left with as there are broken pieces of it and joining them is a costly process as there comes a  filament fuser or joiner which many enthusiasts have already experimented making. The below video explains how with the help of easy tools you can join the filaments.


There are many methods to recycle the filament and use it the next time, but the method shown in this article is more interesting and leads you to better 3D objects.

Designer Agustin Flowalistik shows us how to recycle 3D printing waste by creating a Plastic Smoothie, which can 0be used with a laser cutter to create vibrant objects. 
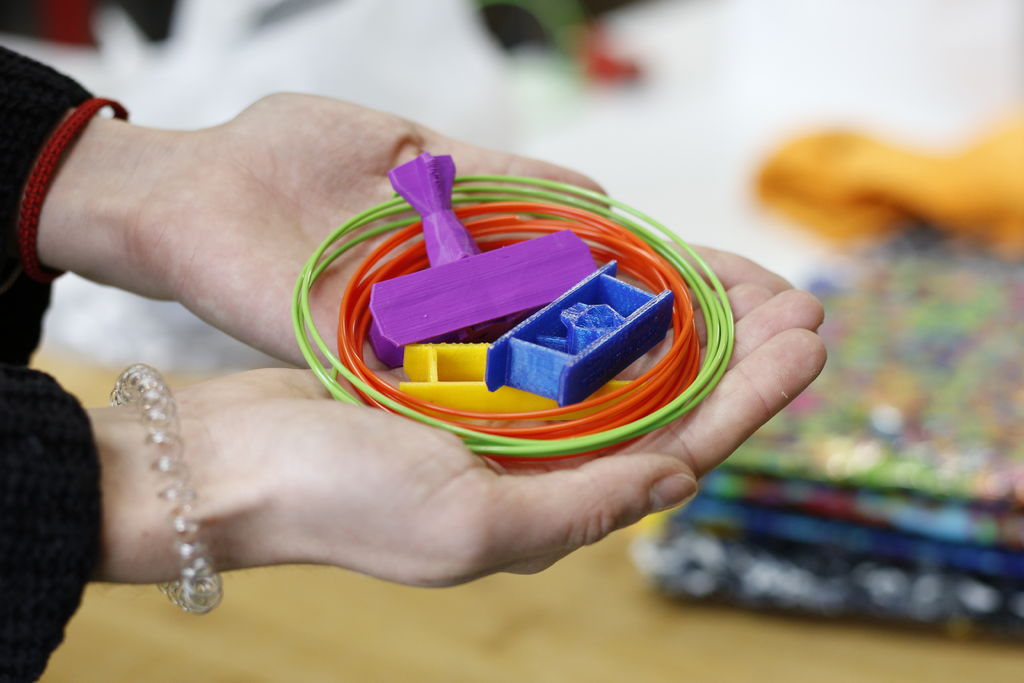
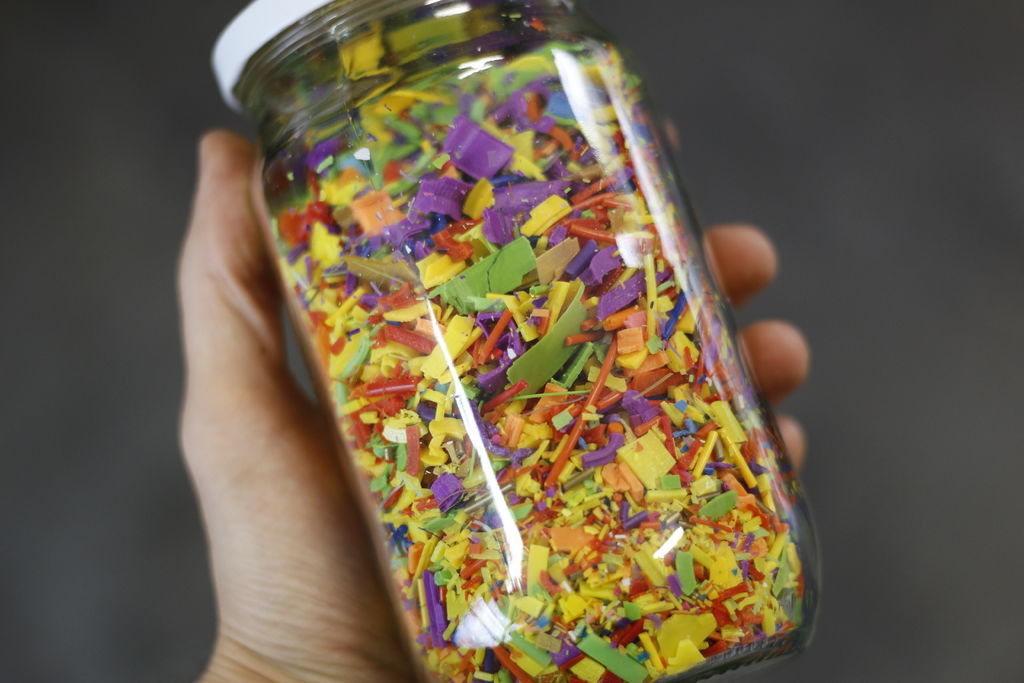
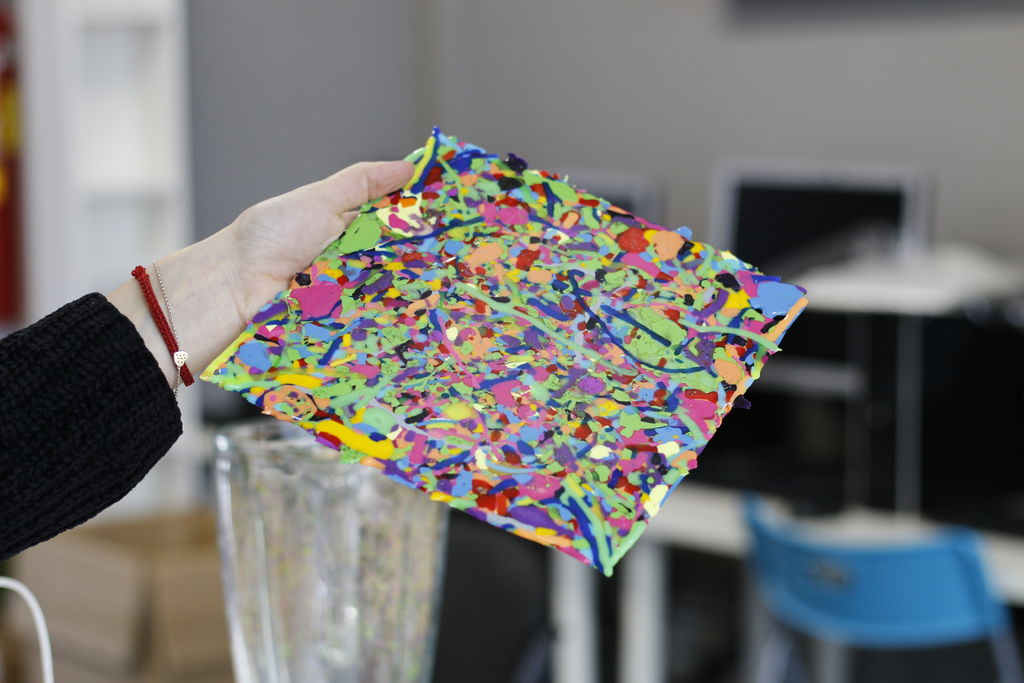
Agustin Flowalistik came up with an easy and cheap way to recycle failed designs and leftover filaments by making a concoct of a Plastic Smoothie. He uses the kitchen appliances and laser cutting technology you can create new objects with the endless array of color. After collecting all the leftover filament and making it into a finely shredded plastic scrap, melt the colorful mess of plastic in an oven.With this freshly baked sheet of recycled PLA, you can get creative using a laser cutter and a bit of vibrant imagination.

We give a brief overview of the “Plastic Smoothie” project below so you can get what the project is about. He shared it on Instructables and was developed with the help of non-profit TecnoLab La Rueca Asociacion  to increase the quality of life and well-being of disadvantaged communities. You can know more about how to effectively use plastic by controlling pollution here- Worry Not!! You Can Now Reuse Waste Plastic For Your 3D Prints.

Philosophy of the project

Picture of Laser Cutting

Affordable:  Electrical appliances are used for most of the projects as it is cheaper to use

Accessible: the machines used should be easily available in online stores.

Open: It’s an open source project and anyone can be a part of it.
What do you need?

The first thing that you need is an abundance of PLA filament scraps and failed prints.Also, an access to a laser cutter that you will find on Fablab or a local makerspace. If you want to know more about laser printing read here 3D Laser Printing is different from what you think.

There are other supplies needed for starting the plastic smoothie project, this is the checklist:

Flowalistik shares some tips to make this project affordable, like using an old blender if you have any as if you start using it to shred plastic you won’t use it for making juice.Before using failed prints make sure to break them before blending them.You won’t want your blender to get damaged. He uses PLA for the project as ABS contains impurities.

Putting it all Together
The first step is gathering and blending your PLA filament, you can take the opportunity to decide the colors and textures you want to create. After the recycled plastic is shredded up, take an over. Flowalistik uses oven paper on the base of the tray, bending the corners to avoid any molten plastic from spilling oven tray and start baking.
After experimenting the maker found that the best results by melting the small plastic bits at 190-200 C for 20 – 25 minutes. After the plastic straps are melted, you need to quickly remove them and flatten them out on the wooden panels. Perform the pressing procedure quickly as the melted plastic cools down. Keep the oven paper on the plastic and add as much weight as you can onto the wood panels, and you’ll have a perfect sheet of recycled PLA.

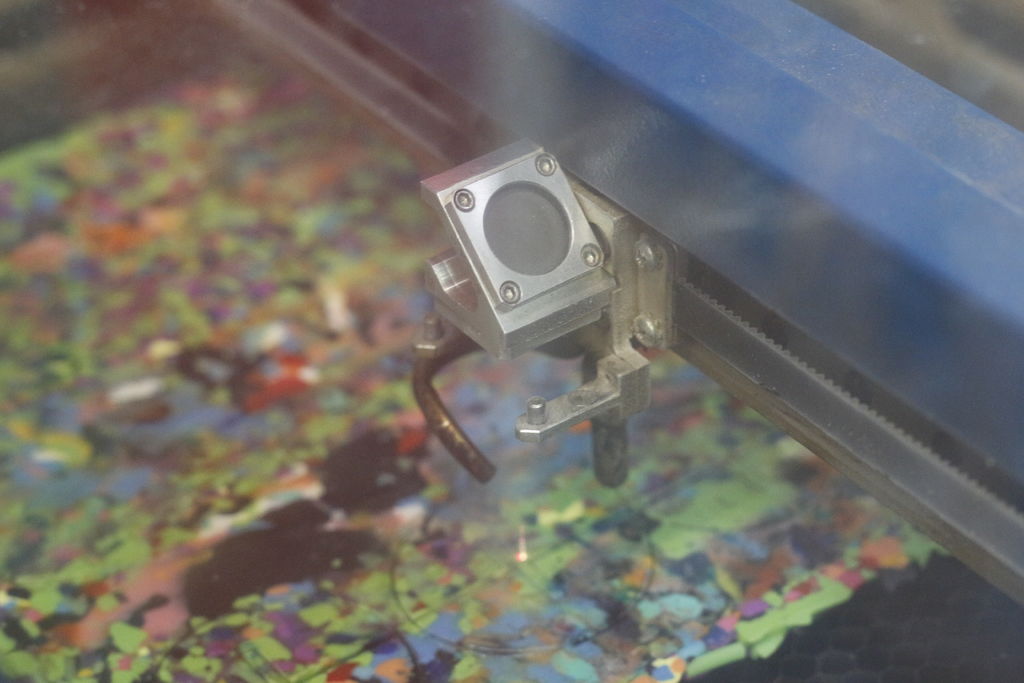
Finally, Flowalistik uses an Epilog Laser Mini 18 40W laser cutter to cut the 3mm plastic panels. You can use the same settings as you would for a 3mm sheet of acrylic. The designer adds that he had to increase the power of the laser in order to make the engraving more apparent.

You can learn more about the Plastic Smoothie project and the laser cutting process on Flowalistik’s Instructables post. If you want to continue supporting the designer and his intriguing projects, head on over to his Patreon page.

Plastic pollution is what we are dealing with every day and thus we have to take every possible step to stop it. So do join the “Plastic Smoothie” project and get rid of all the plastic extras and failed prints.

Geeetech enlightens you on such projects which will help you save the environment.

Credits: instructables.com,all3dp.com

Tuesday, March 20, 2018

Top 10 3D Printed models if you love video games!

As an avid gamer, there will be loads of intricate figurines and memorabilia from your favorite video games that you will want to add to your collection. And if you’re someone who owns a 3D printer, then you can very well make your own models!

So in today’s Top 10 list, let’s take a look at some of the coolest 3D printed models if you love video games!

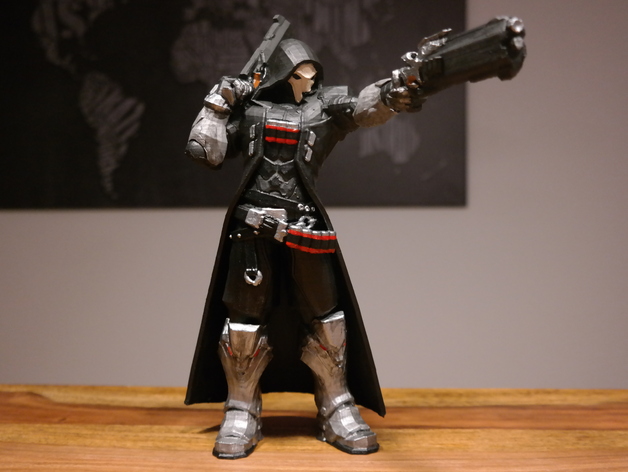
Overwatch- Reaper

Thanks to the amazing 3D printing community it’s super easy to download and print just about any gaming model. And since Overwatch is so popular it’s not at all hard to find a 3D model of your favorite avatar.

If you’re wondering which watch models on Thingiverse happens to be the most popular(and the one with the most amount of makes) its shockingly not Tracer, but in fact- Reaper. And if you too want to print your own then you can find it on Thingiverse here.

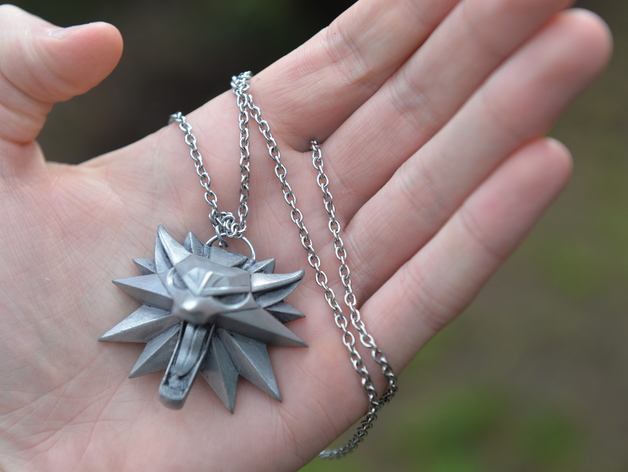
Witcher- Wolf Medallion

This Wolf Medallion may not vibrate like Geralt’s, but it definitely looks cool enough to pass off as the real thing! Designed by Daniel_W you can print out your own in silver PLA or paint it up after. Either way, it looks really cool and once you string it into a chain.


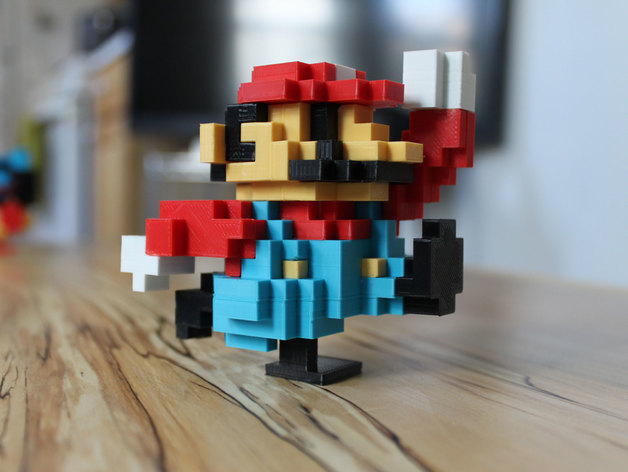
8 Bit Mario

There are so many Mario models to choose from but this 8-bit version by jakejake is hands down our favorite. With 26 pieces to print, assembling this 3D printed Mario is a fun little puzzle all on its own. But once you’re done putting it all together, the final result is well worth it. Don’t you think so? Find the STL files and all the instructions for this design here.

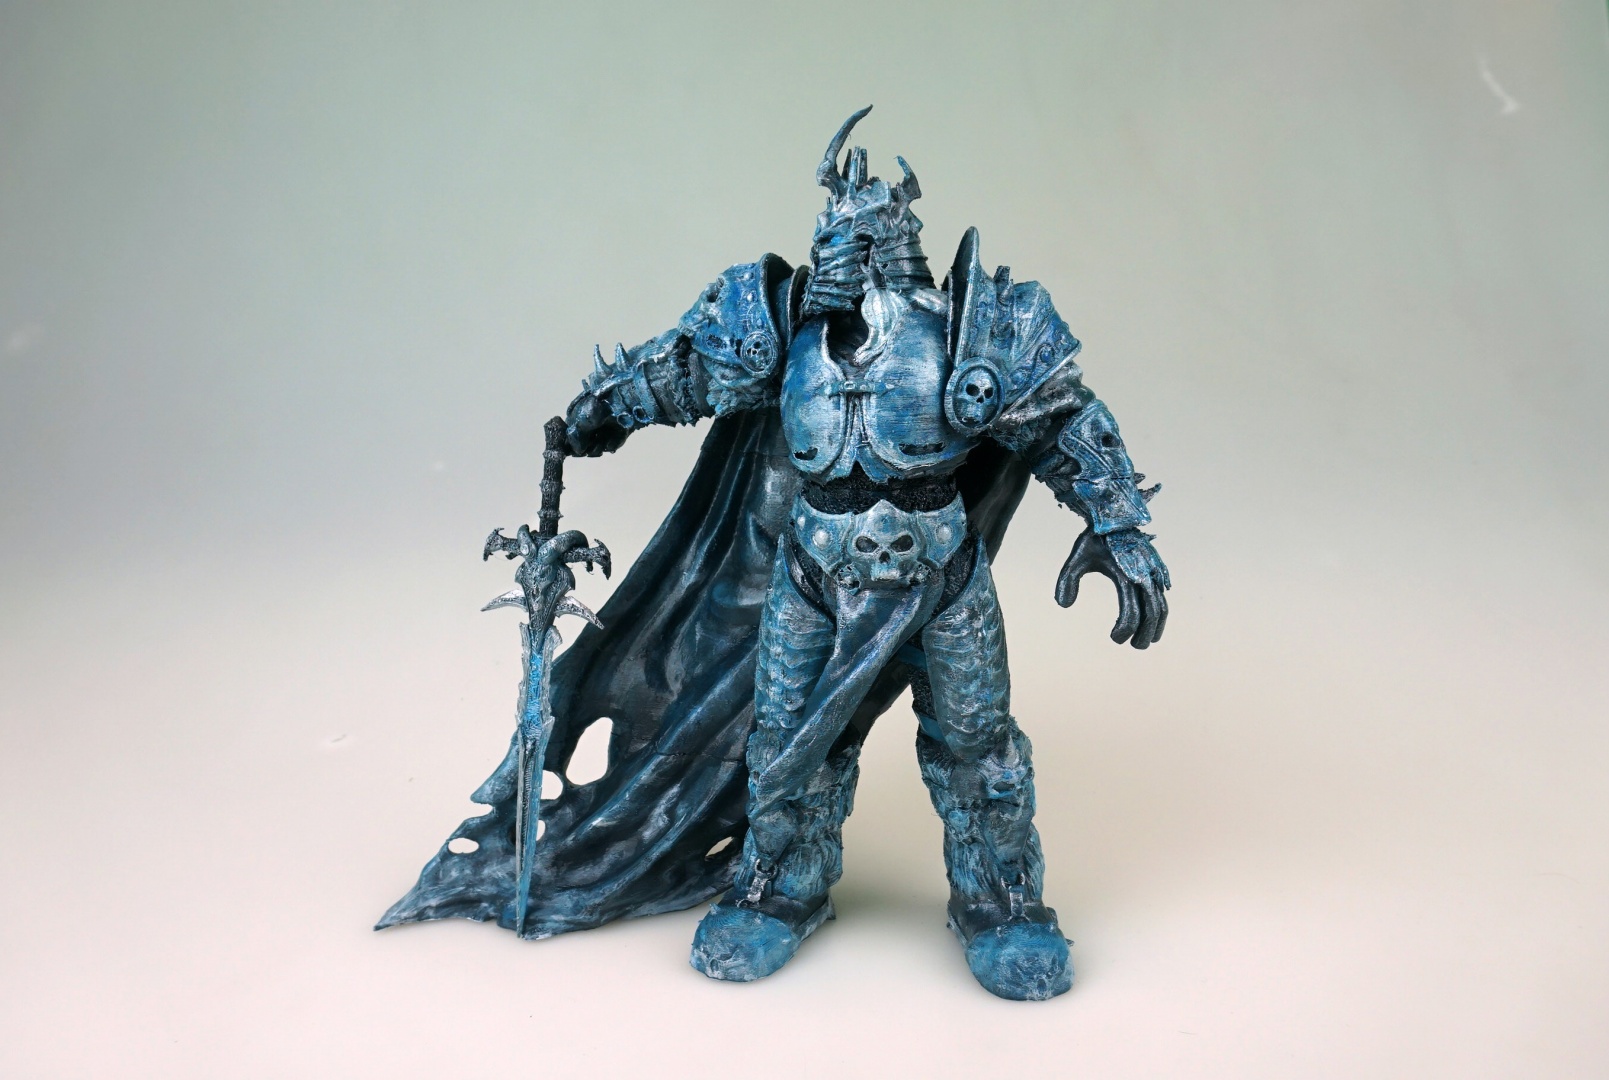
World of Warcraft- The Lich King

If you’re a fan of  World of Warcraft then you’ll agree that with a world so massive, there are plentiful characters that you can 3D print. However, we had to include the ice cold Lich King- Arthas Menethil because there’s nothing more badass than a figurine of Arthas wielding the Frostmourne! Made by Matthew McKeown you can find this design on MyMiniFactory here.

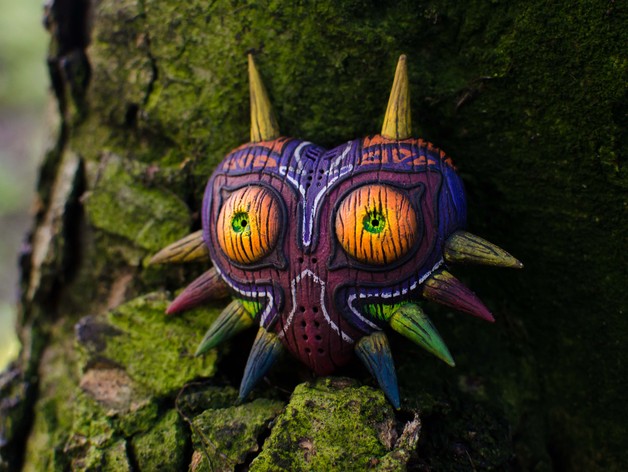
Legend of Zelda- Majoras Mask

We could probably make a whole list solely on all the awesome Legend of Zelda printables available out there. But if we’re going to pick just one then it has to be this fantastic design of Majoras Mask made by WeeMadSausage.

The design itself is intricate, vibrant and beautiful. You don’t have to use a wood filament but using it does add a certain charm to the mask, making it more realistic.


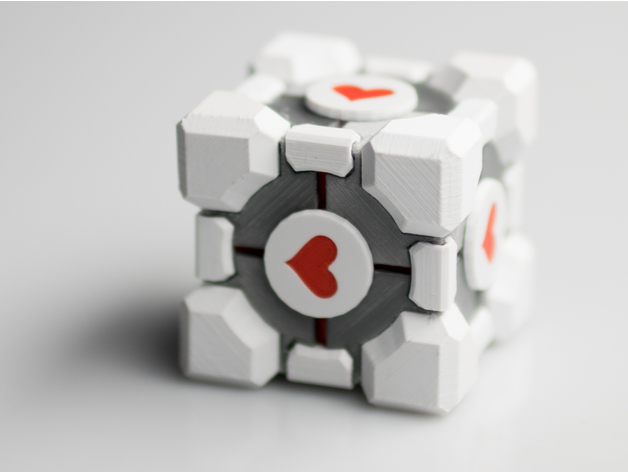
Portal- Companion Cube

Doesn’t this 3D printed Companion Cube look like it came straight out of the Portal game? Created by Ellindsey this model consists of 40 different 3D printed parts that are designed to snap together well enough that you won’t even need any glue!

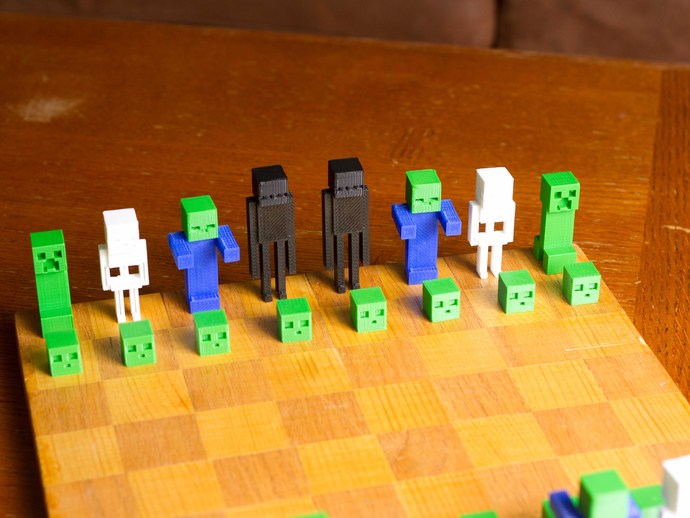
Minecraft- Chess Set

What do you get when you merge the world of Minecraft with chess? A creative and aesthetic design by PotatoFi that is sure to rekindle your curiosity in the game of chess. And even if you don’t intend to play, it makes for a great showpiece too. You can download the STL files for this print here along with the instructions and tips from the maker.

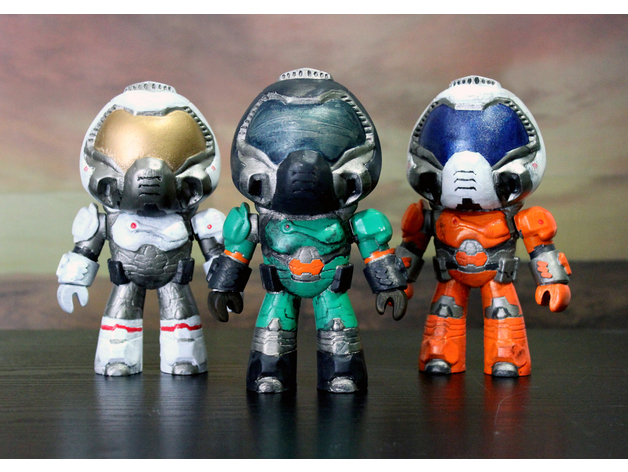
Doom- Electronic Doomguy models

After taking a look at these adorable figurines you may find it hard to believe that Doom is a brutally intense game where you’re killing demons but nevertheless, we love these models made by zembacraftworks. Oh and they’re electronic too! Check out Zemba Craftworks easy tutorial so you that you can make your own!

Mortal Kombat- Sub Zero Mask

You too can be as cool as Sub Zero(get it?) once you 3D print his mask! Designed by Geoffro you can use this mask as a prop or even as cosplay. Just be sure to credit the designer! Find the print files here!

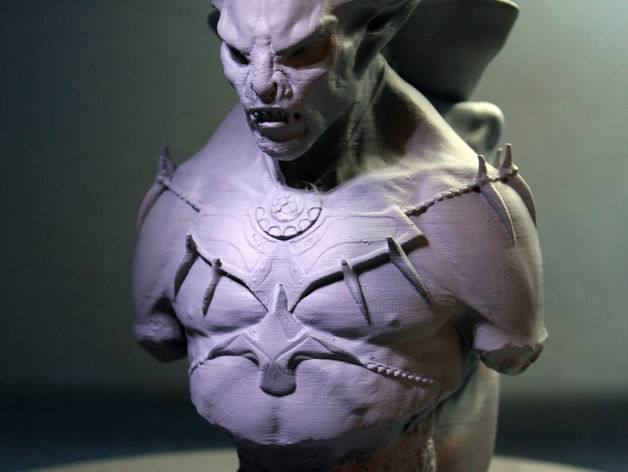
The Elder Scrolls V:  Vampire Lord Bust

Create your very own eerie Vampire Lord Bust from Skyrim thanks to designer Vsions and his stunning 3D printed model. There are two parts to this model- the main bust and some small horns which can later be assembled. Follow the instructions and STL files available on Thingiverse- here

Need a 3D printer to get started? Go check out our Store!

Credits: thingiverse.com
Friday, March 16, 2018

Troubleshooting: What to do when your supports fall apart?

As you continue to model and 3D print various objects, you’ll find that many of them will need support structures to hold the design up. And the more complex the object, the more crucial it is to design a good support structure.

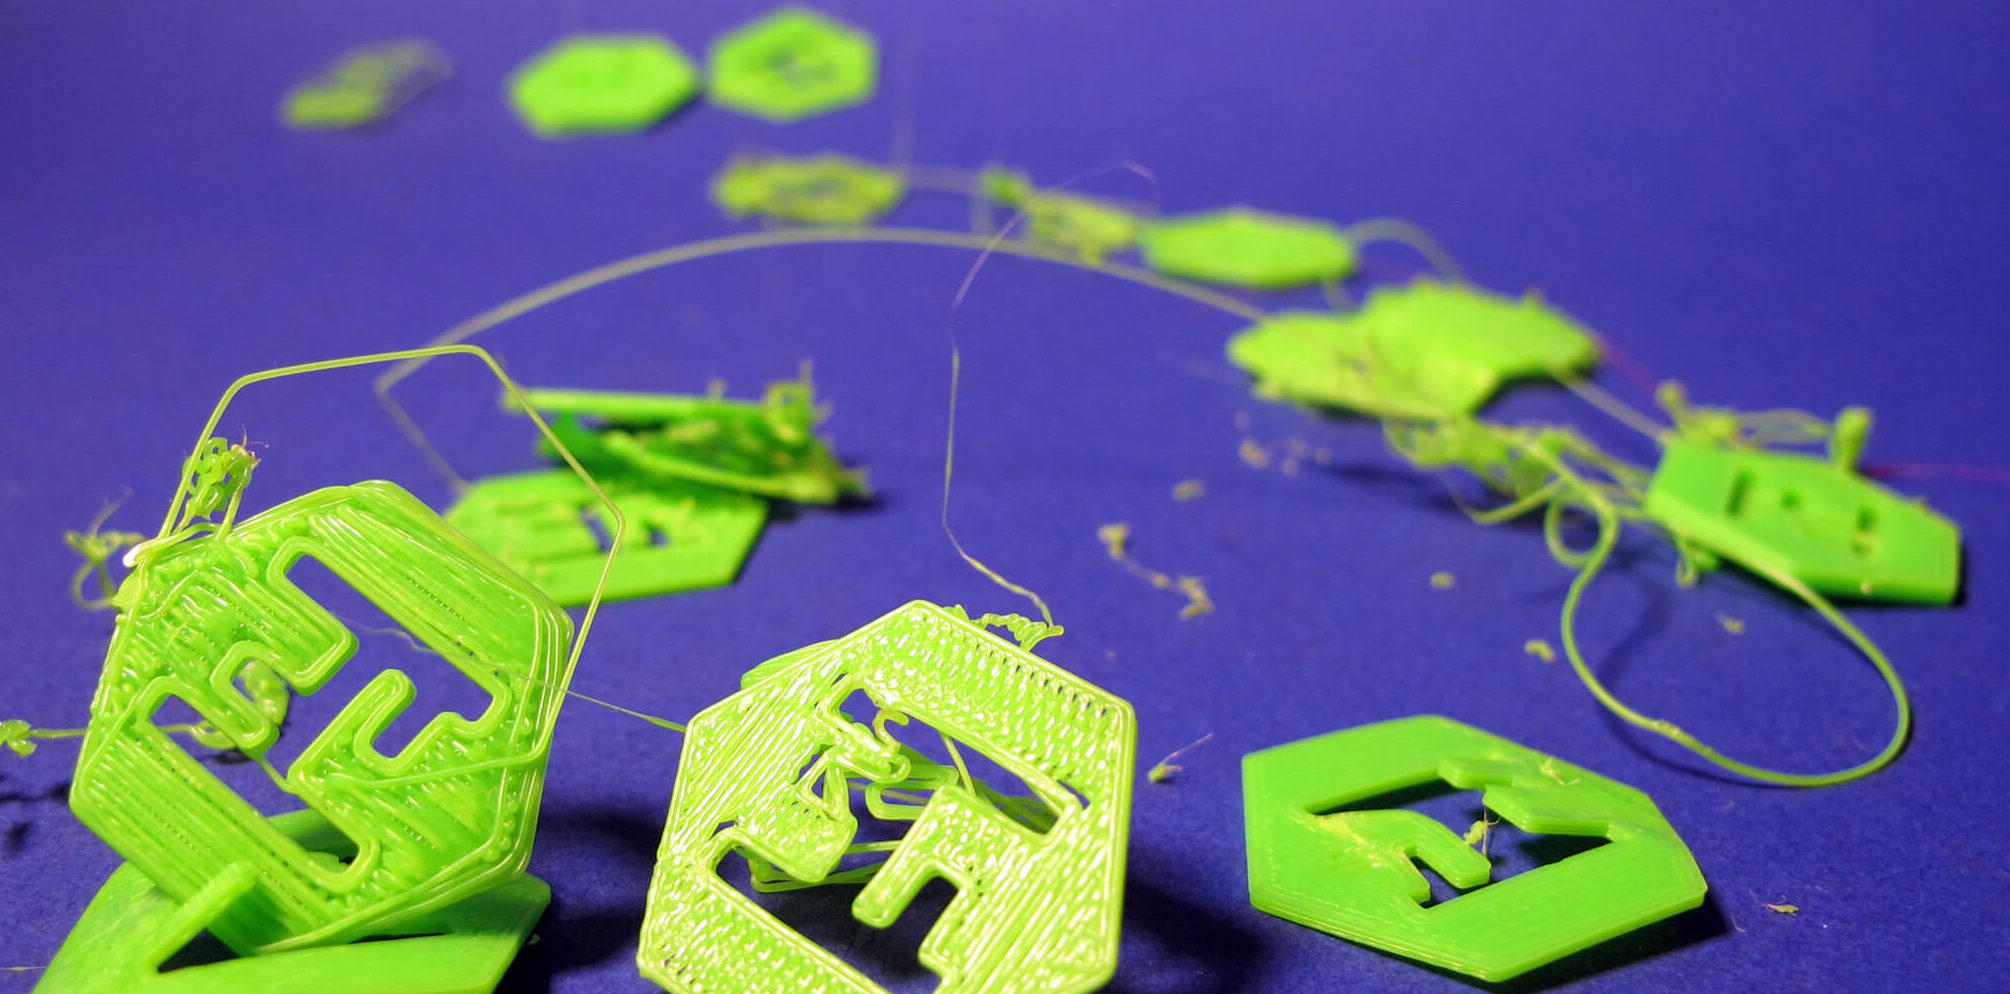
However, on some occasions, you may find your support fail to do its job resulting in a failed or messy print.

The 3D Printing Problem-

While printing your object, you’ll realize that your support doesn’t look as stable as it should. There may be gaps and it may even fall apart or crack in some places. Weak supports are also stringy and overall your print just looks like a hot mess(not in a nice way!)

Slicer Settings

Most of the time we tend to stick to the default slicer settings provided by the slicer applications. This may work for standard print jobs, but while printing more complex objects it is important to change these settings. For objects like supports, your default slicer setting will not always work. The more complex the object and overhangs, the more attention you have to pay to the slicer settings.

Type of support used

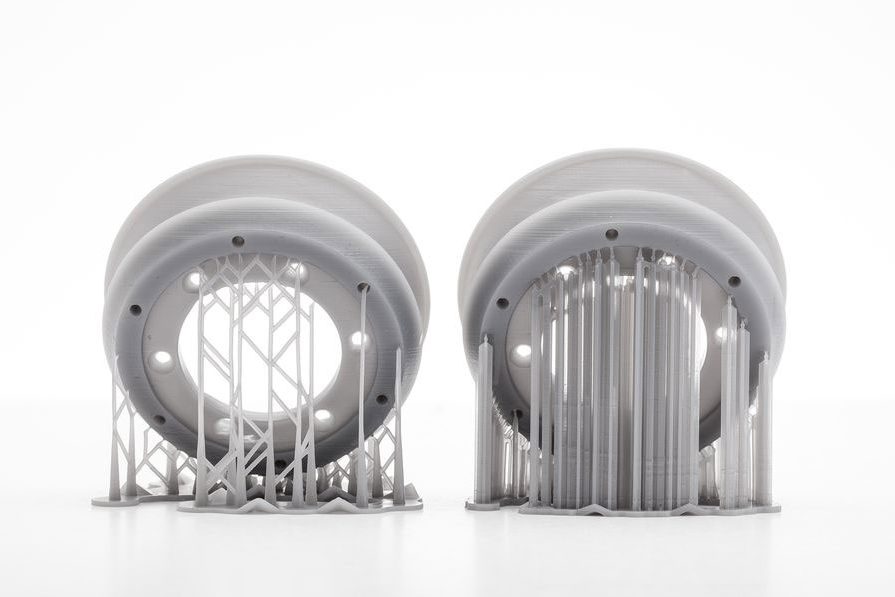
Thinner support structures are easier to remove but are not always strong enough and can break apart during your print process. On the other hand, stronger supports are denser but are much harder to pry off. At the same time, thinner supports may move easily if there are any sudden movements or vibrations from the 3D printer itself.

Many a time, tall and intricate prints will have delicate and thin supports so that they come off clean without ruining the print. Though this sounds good in theory, this kind of support doesn’t offer much stability to tall prints. Triangular and grid-shaped supports work better as they add additional structure under large overhangs.

Problem with the filament

Filaments that are old or cheap are weaker and tend to break more easily which is another reason why your supports don’t hold up. Old and expired filaments won’t bond easily to each other and the structure can tend to have more gaps and cracks.

Lastly, don’t forget to keep an eye on your printer. Many times, there are a few loose screws and nuts that can create vibrations during the print and if your support structures are not strong enough they will fall apart.

How to fix it?

Modify your support structures

Rather than choosing thin and delicate supports, opt for grid or block shaped supports that can easily take the weight of overhangs without breaking down. You can choose triangular supports for objects that do not have sufficient adhesion to the print bed starting out with a strong base.

Another cool thing to do is using water-soluble support material like PVA glue. In this way, you can increase the support density and make block shaped supports without having to worry about them coming off.

Ensure sufficient adhesion

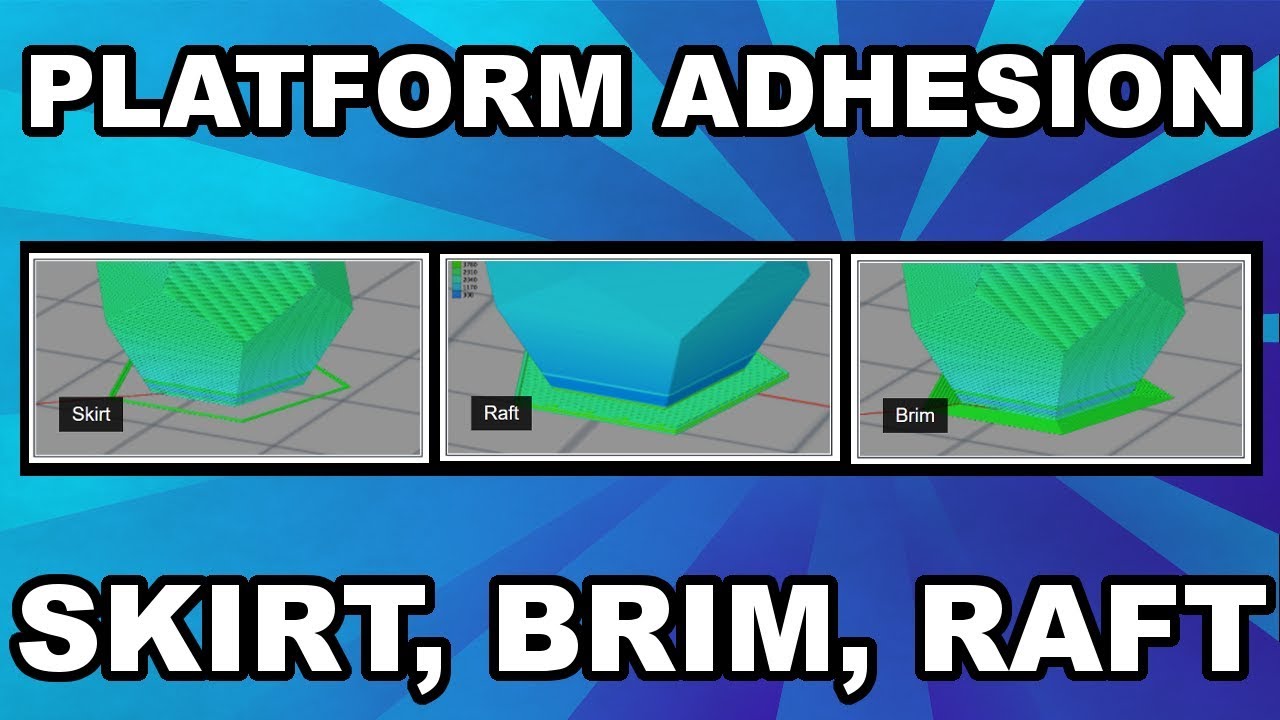
For a strong foundation, your 3D print must stick to the print bed. To increase this adhesion you can use the help of brims and rafts. Once your support has bonded to the print platform, it reduces the chances of it breaking or slipping off.

Use another filament

If your filament is old or absorbs too much moisture it can cause problems during your print job. You can check out our easy guide to store your filaments correctly and prevent common problems like snapping and stripping. And if the problem is indeed with the filament then change the filament and run a test print to see if there are improvements in the supports. Alternately, avoiding buying cheap which will tend to break more easily.

Increase the support density

Supports that are thin will be more prone to breaking and falling apart. So to make your supports stronger, go into the slicer settings and increase the support density.  This will make your support sturdy but on the other hand, it will be tougher to remove them from your 3D print.

Tighten the grub screws

If the pulleys are not secured there will be many shifts and vibrations. This can shake the print and cause the supports and other parts of the print to wobble. To fix this problem, use an Allen key and tighten all the grub screws.

Credits: ultimaker.com, formloabs.com
Tuesday, March 13, 2018

3D Laser Printing is different from what you think…
Everyone is getting familiar with 3D Printing and the new technologies that are evolving with its help. Businesses have started using 3D Printing for their product manufacturing or prototype designing thus it is an additive manufacturing method.

3D Printing is such a hot topic in the industry which intrigues almost every industry, right from fashion or food to architecture and more.
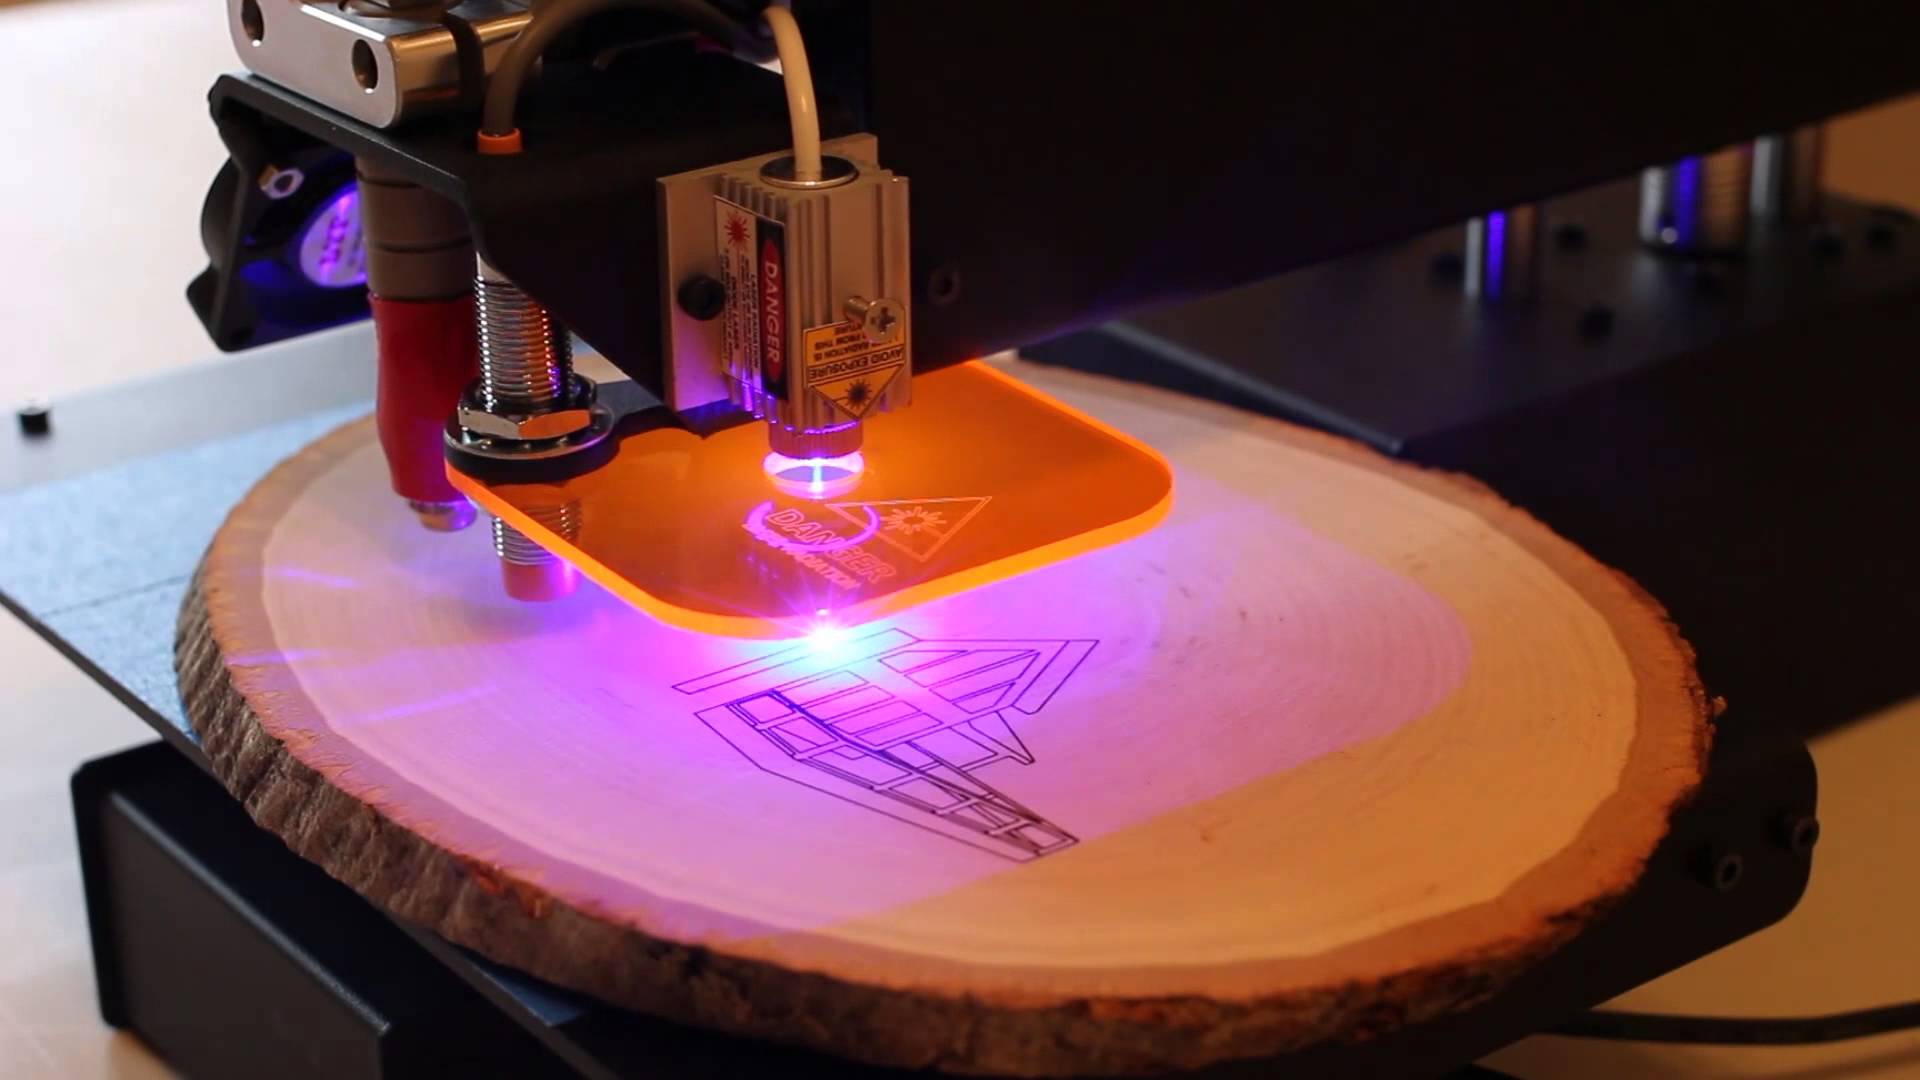
Whereas, Laser 3D Printing is where a laser beam helps to create a prototype or a product in a more precise manner. Thus it’s a whole new level of 3D printing itself. It provides a big help for the manufacturing industries to create exact prototypes.

What is 3D Laser Printing?

It is all about Subtractive manufacturing technology and laser added direct metal tooling, which helps to form complex parts using high power laser and metal powder. Unlike normal 3D Printing, 3D Laser printing uses a beam thinner than a human hair to print a whole new object. The laser beams have the power to cut, shape and engrave 3D Printed parts.

They have common working capabilities like CNC milling. But like CNC milling, the 3D laser printer doesn’t have a milling head. They are all in one printer yet with some limitations. These printers are expensive as they include a 3D printer, a 3D scanner, a laser engraver, and/or a CNC mill.

What is Selective Laser Sintering?

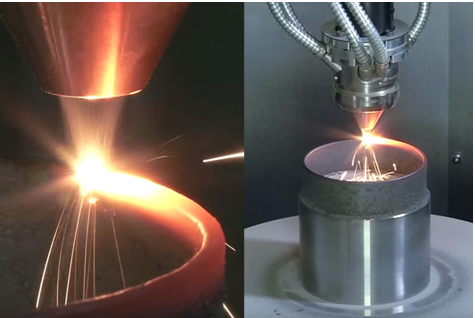
3D Printing being a vast industry, it has many processes which are still not that common or known just like 3D Laser printing, SLS. Selective Laser Sintering is a part os 3D Laser Printing is an additive manufacturing method. It’s a powder bed fusion method where nylon is transferred from the container holding fresh powder material onto the build stage in the process chamber with a recoating tool. A laser then selectively scans the thin layer of powder, sintering together powder particles in the shape of the cross-section of the first layer of the 3D part.

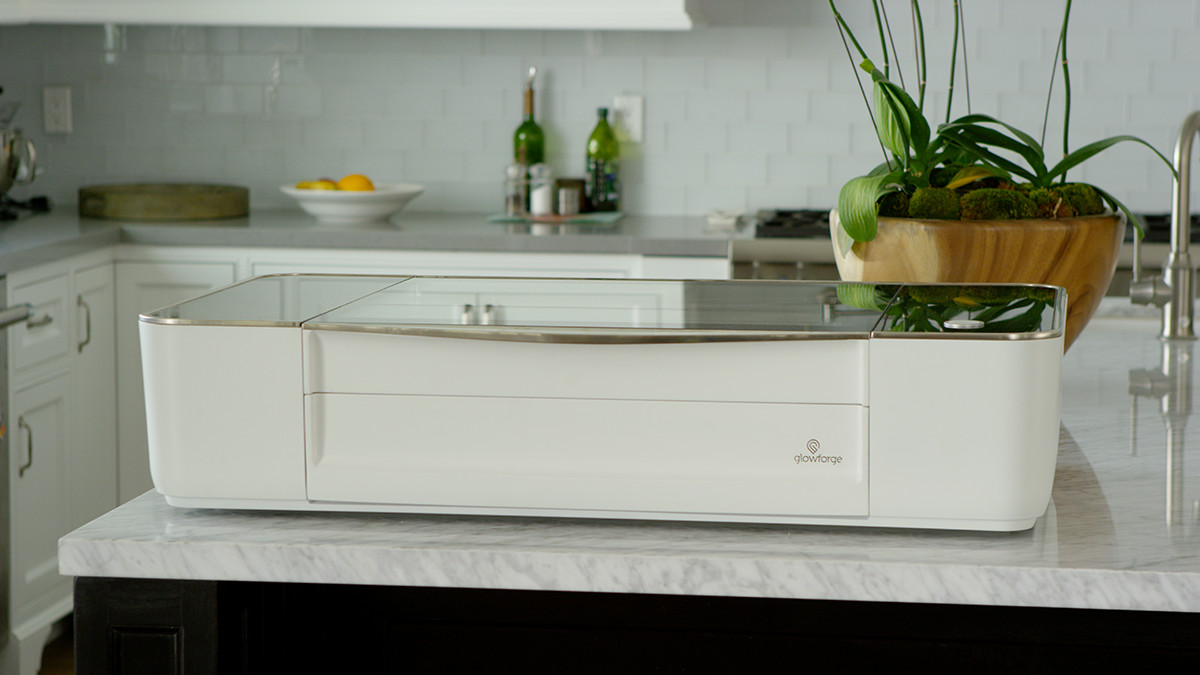
Glowforge is a magical printer- Best Printer

Dan Shipiro a former CEO of Google wanted to make the laser technology more usable. The aim of Glowforge- an all in one laser 3D printer is to create more beautiful things by giving the objects proper shapes and cuts. The company says it can cut wood, fabrics, leather, paper, linoleum, food, and even some plastics and also engrave metal and glass. It aims to help artisans and businesses to create innovative products just using one machine. The initial price of the printer with pre-order with discount is $3995 and thus is a cheap 3D Laser Printer.

Cost cutting is also something that the Glowforge developers are focussing on thus substituting the hardware components with sophisticated software. For a simpler design, there are no buttons on the Glowforge interface.Also, a camera inside the laser cutting chamber and image processing in the cloud will take the place of a motion planner which usually determines how the laser cuts the material.

There was a Glowforge Kickstarter project funded for a  month in 2015 which was very successful and lead to many people taking interest in a laser printer.

Conclusion:

3D laser printing is also becoming popular just like normal 3D Printing and is used for personal as well as industrial use. Many 3D printer manufacturers are creating Laser printers as they perform well and are all in one. Post-processing becomes easy with the Laser printers thus reducing your work.’

3D Laser Printing is a new wave in this Ocean of 3D Printing!!

Credits- all3dp.com,sharehack.com,youtube.com

Friday, March 2, 2018

DIY: 3D Print your own Bluetooth Speaker

If you have access to a 3D printer, a bit of maker prowess, and a love for sound, you can build your own 3D Printed Mini Bluetooth Speakers.

Create your ultimate 3D  Printed speaker box

Coder and tinker Yasthil Bhagwandeen shares a new Instructables project on how to build your very own 3D Printed Mini Bluetooth Speakers, now that is really cool. 3D Printing technology is discovering new ways to make things simpler and productive and so even an audio gear is not an exception.

 https://youtu.be/5IMl47iG-28

With companies like print+ and V-Moda using 3D printing to offer a modification to consumers, the technology could soon become a valuable part of the audiophile’s sonic experience.

Yasthil Bhagwandeen takes a DIY approach with his new project, showing how to print your own mini Bluetooth speakers. The coder and Tinker shows the full process of the project right from trials, failures, designs to the finished final successful project.

What will you need?

3D Printed mini blue tooth speakers need a handful of components and tools.

COMPONENTS

TOOLS

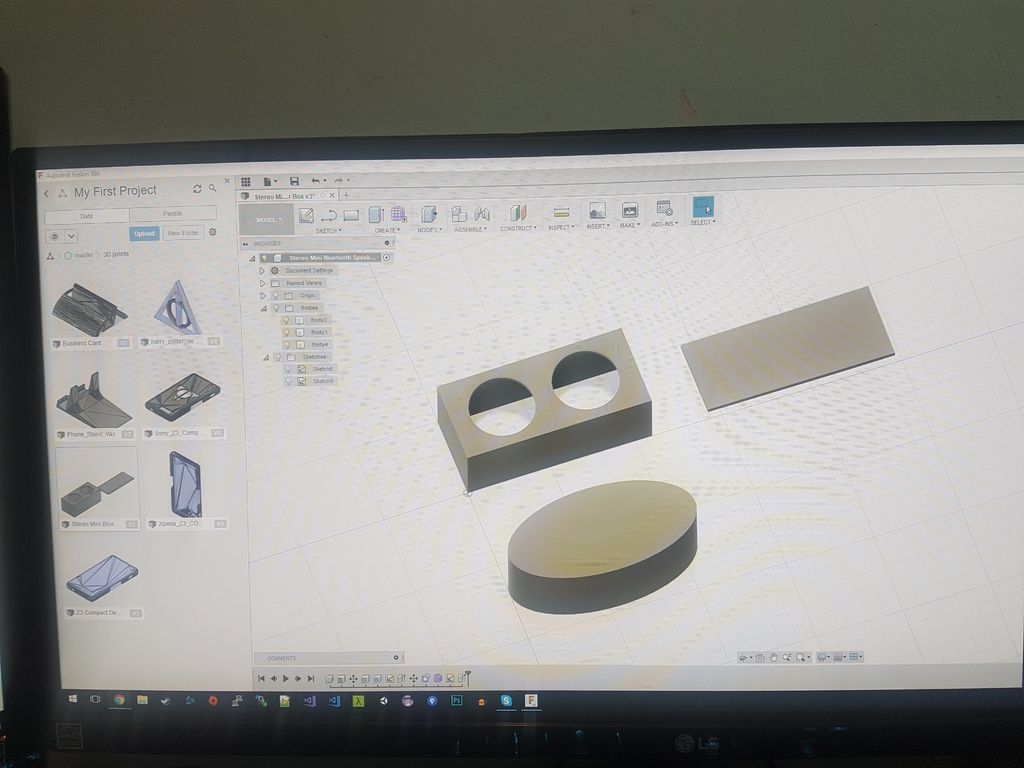
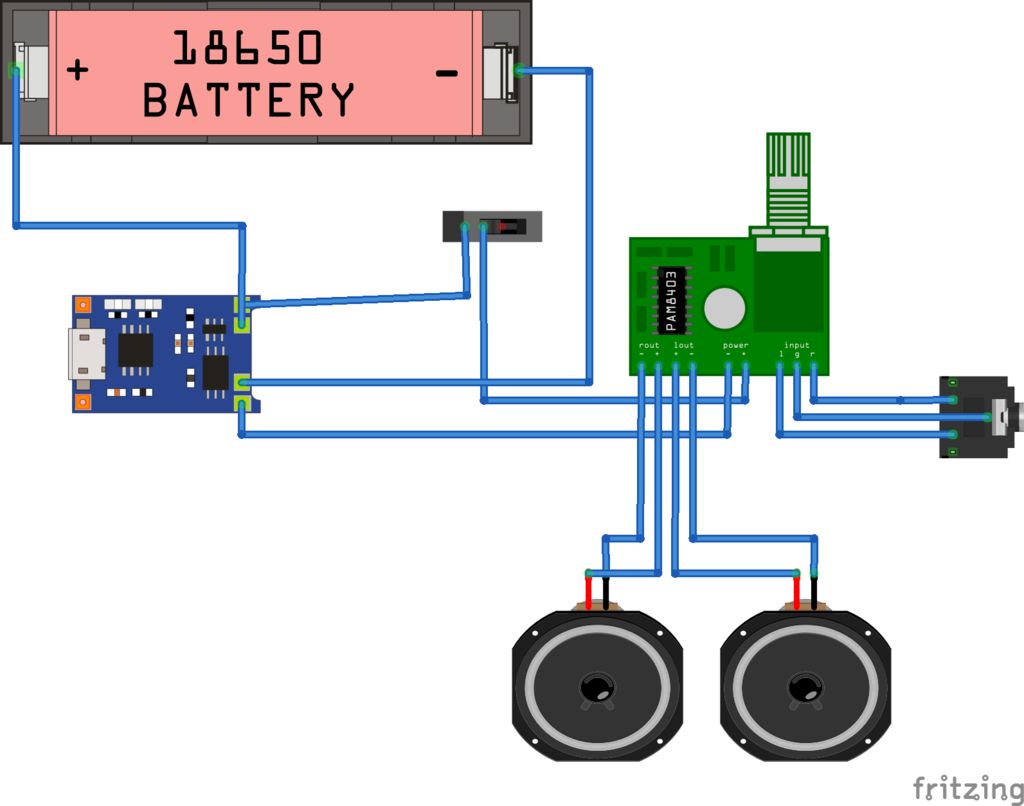
Design the Speaker Box The software used is Fusion 360 and you can get the STL files from Thingiverse. Make sure that you use the vernier calipers correctly as the measurements are important so that the electronic component can be assembled properly in the box so that there is no noise and disturbance in the quality of the sound. Print it out: Bhagwandeens version of mini Bluetooth speakers uses a Anet A8 and the filament used is CC Tree PLA  of 1.75 mm, layer height of 0.32 mm and 50 percent infill. The 3D model for the speaker box, designed by the tinkerer on Fusion 360, is a relatively quick 5 hour 3D print. He also shares the initial mistakes and subsequent redesign that came with developing this project. Obstacles included incorrect measurements, which made it difficult to fit in the speakers, as well as forgetting to print holes for the switch, jack, and micro USB slot. Eventually, Bhagwandeen overcame these issues and was able to build his speakers. Before going to the further step of soldering the maker recommends to test the electronic components and check whether they are working properly.Then start with the soldering which has to be done accordingly to the below schematic diagram.   After the soldering process simply uses the hot glue gun to assemble the electronic elements into the 3D Printed speaker box. The speaker enclosure is designed in such a way that it is easy to open and shut the box without any problem.

The speaker isn’t extremely loud, but it does produce a fair amount of volume. It’s an intermediate project that does require some time and maker skills, but it also seems like a nice undertaking for a beginner looking to get familiar with soldering, or even a more experienced maker who wants a fun and useful project for the weekend. Either way, you can bring your favorite sounds right to your own DIY speaker box and get speakers of your own designs and you can even customize it.

So start with 3D Printing right away and know about the latest trends of the industry with Geeetech.

credits: all3dp,instructables.com

Thursday, February 22, 2018

7 Magical 3D Printables for every Harry Potter fan!

There’s nothing like using 3D printing to make stuff you really love especially if you’re part of a fandom you cherish. And since 3D printing and Harry Potter are both pretty magical to begin with, it’s only fair that we made a list of some of the best 3D print ideas for Harry Potter fans. Take a look!

Deathly Hallows Rotating Pendant

Want to know the easiest way to spot a Harry Potter fan? You’ll probably see them wearing the Deathly Hallows symbol! And though there are many 3D printable designs online, we love this one by ecken which has a rotating center and you don’t even need to assemble it. Just print it out from Thingiverse here and spin away!

Elder Wand

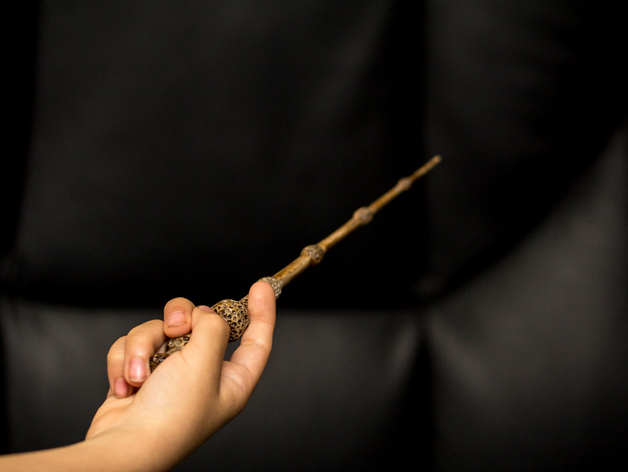
If you’re upset that you down own an Elder Wand till now then it’s time you 3D print your very own. You can even substitute your regular PLA for wood filament for an even more authentic look and then use a wood stain of your favorite color!

It’s hard to find a better 3d printable design of the famous Elder Wand than the one made by jakereeves and you can find his work on Thingiverse!

Harry Potter Glasses

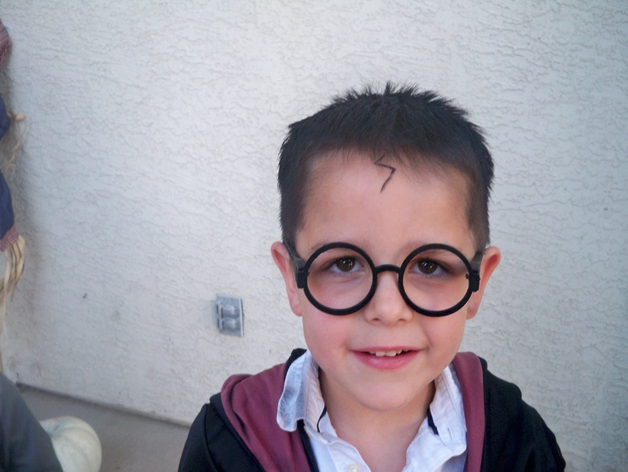
What happens when your Harry Potter Halloween costume turns up without a pair of glasses? You 3D print them! And that’s exactly what designer Tunell did for his son. Though these glasses are a bit smaller for an adult you can scale them to 1.25X for a perfect fit!

Get your very own Harry Potter Glasses on Thingiverse where you can print out the parts and assemble them easily.

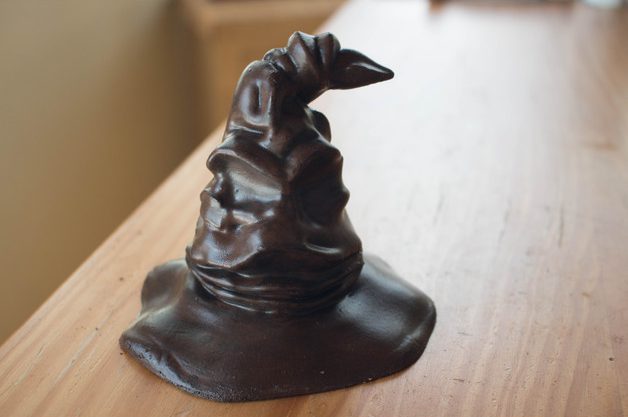
Sorting Hat

 “There’s nothing hidden in your head The Sorting Hat can‘t see, So try me on and I will tell you Where you ought to be.”

Wondering which house do you belong to? The Sorting Hat will tell you! And thanks to designer cerberus333 you can make one so you never miss out on the Sorting Ceremony!

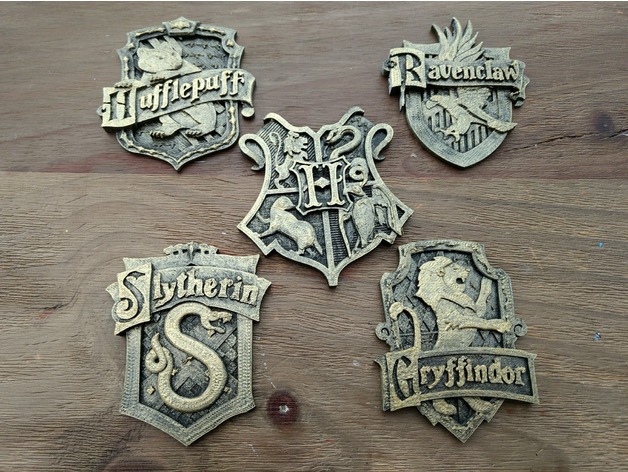
House Crest

Once you’ve been sorted into your house it’s only fair that you 3d print some house crests to flaunt your glory.  And luckily designer Imminentfate has created individual house crests for Gryffindor, Ravenclaw, Hufflepuff, and  Slytherin that you can turn into badges or keychains.

Additionally, you can also print the Hogwarts Crest made by 3dberd to complete your Harry Potter collection!

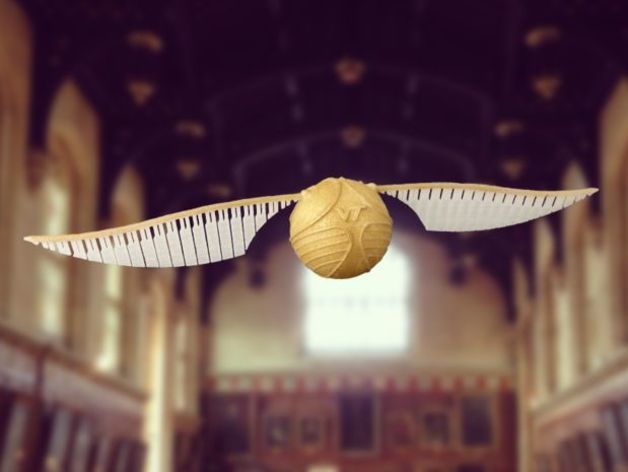
Golden Snitch (with a stand)

Made by designer Porda this Golden Snitch is perfect for every fan who never truly got to experience what Quidditch feels like!  It makes for the perfect addition to your collectibles as well as a really thoughtful gift for your friends who won’t stop talking about Harry Potter!

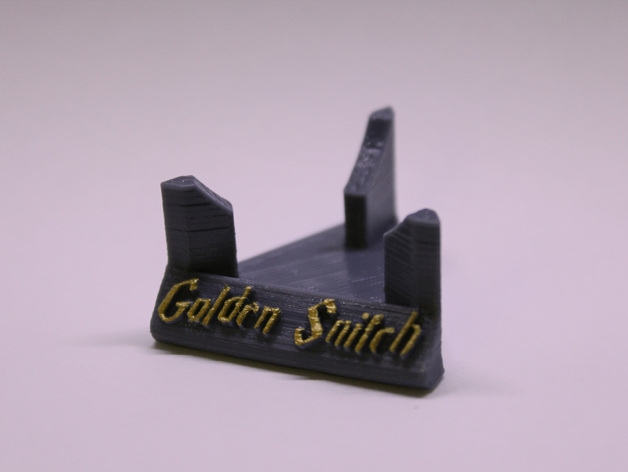
Don’t forget this Golden Snitch Stand made by designer Aaron D’mello which you can scale in size to fit your snitch model!

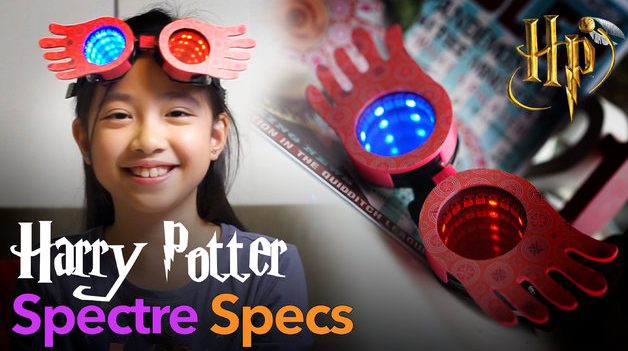
Luna Lovegood’s Spectre Specs

Luna Lovegood will always be remembered for her eccentric nature and quirky accessories, especially her Spectrespecs. And if you too want to spot a wrackspurts then you can 3D print your very own model of Spectrespecs that would make her proud!

Its hard to believe this amazing print design is PurpleOranji‘s first every 3D printing model! You can find these Spectrespecs on Thingiverse along with the print instructions and even a cool video to help you make your own pair.

Credits: thingiverse.com

Monday, February 19, 2018

Troubleshooting: No more gaps and holes. Here’s how you can fix pillowing!

The 3D Printing Problem-

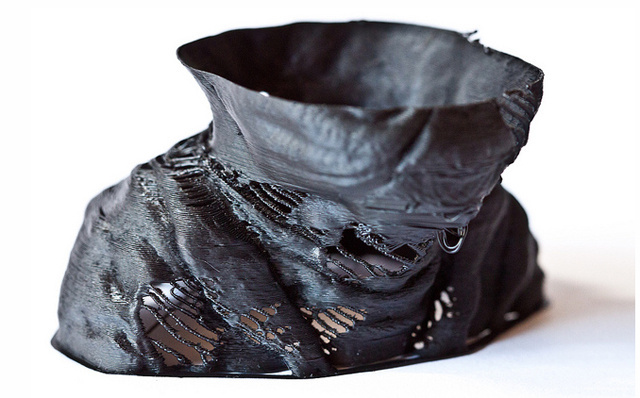
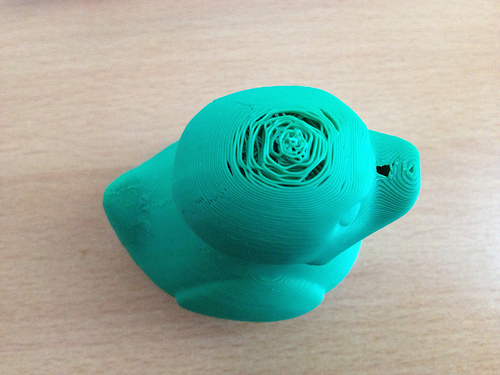
Your 3d print may have seemed successful while printing it but once its finished you notice gaps and holes in the outer layers. This is known as pillowing and though it is frustrating after spending hours on a print, there are some easy ways to prevent it from happening again!

Why does it happen?

There are a number of reasons why these gaps and holes form on the 3d print. If the top layer itself isn’t thick enough and then pillowing is more common as well as if there isn’t sufficient cooling of layers.

Luckily with a few adjustments and changes in your print settings, you can avoid it from occurring again.

How To Fix It:

1. Use a cooling fan

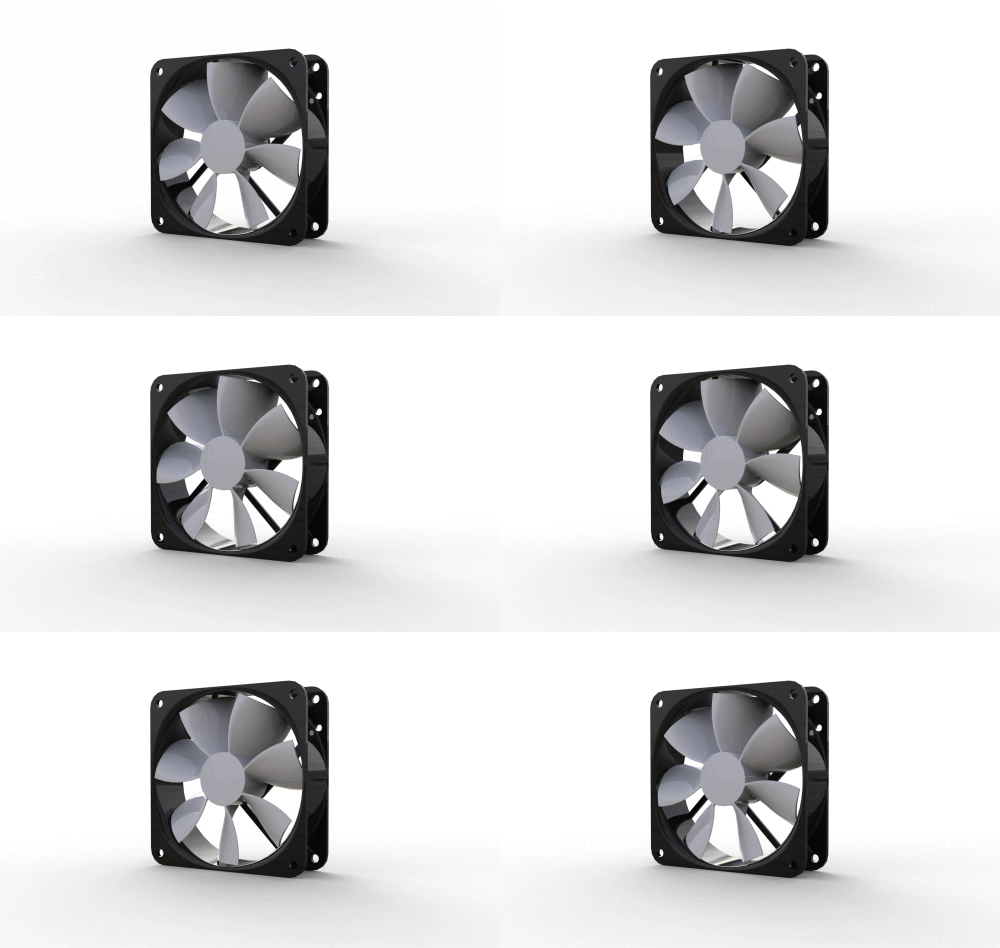
You may have the optimal settings but if your layers don’t cool properly it could contribute to pillowing. Use a fan with settings set to low for the initial layers and after the first few layers, the fan speed can increase. If you are using a cooling fan already here are a few things to check for-

  • Position– Check if your fans are positioned correctly so that maximum airflow is aimed towards your print.
  • Fan Speed- Without proper cooling, the material will tend to curl up at the places where it crosses the infill lines and forms gaps in the top layer. For best results, ensure that the fans are running at the maximum fan speed as per the cooling settings.

2.  Increase Thickness of Top/Bottom layers

Since pillowing occurs on the top or outer layer, the best solution is to increase the thickness of this layer. A layer that is too thin at the top will be more prone to gaps and holes. Increasing the thickness will seal or close the “gaps” that are otherwise seen when pillowing takes place.

Ideally, the top/bottom thickness should be at least 6 times that of the layer height. For example, if your layer height is 0.1mm then the Top/Bottom thickness should be set to 0.6mm and you can even take it up to 0.8mm to make it full proof.

To edit these settings, check the advanced section of your print application, under the ‘Bottom / Top Thickness setting’.

3. Increase infill percentage

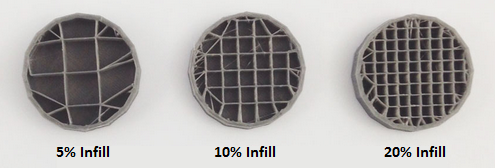
Apart from increasing the top/bottom thickness, check your infill settings as well. If the fill density is set at a default 5-10%, you should increase it to at least 20% and retry the print.

4. Use another filament size

If all else fails then consider switching to another filament size. The gaps and holes you see during pillowing could simply be from your filament. It’s a common problem seen in filaments of 1.75 mm. You can avoid the problem by switching to a filament of size 2.85mm as it will allow for better control and higher extrusion rates on wider nozzle diameters. Run a test print to see if the problem is solved!

Image credits: creators.vice.com, 3ders.org, bootsindutries.com, 3dprintingindustry.com, grabcad.com

Thursday, February 15, 2018

9 “Pawsome” 3D printed accessories that your pets will love!

You may have made yourself some really cool 3D printed memorabilia but don’t forget about your furry friends! Today let’s take a look at some fun 3D printed accessories that you can make for your pets-

Cat Armor

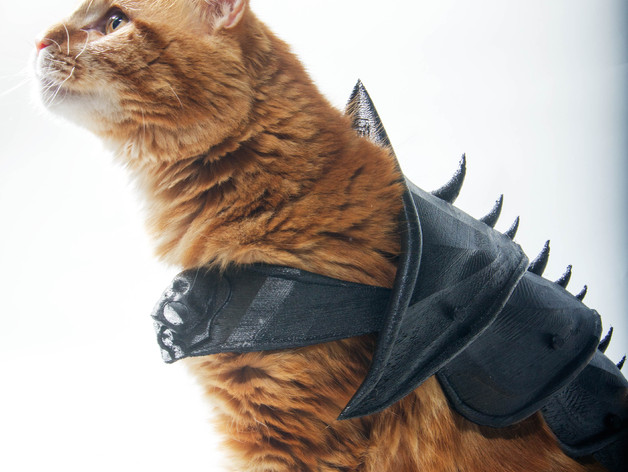
Made by user PrintThatThing, this is the perfect armor your badass kitty and also makes for great Halloween attire! The armor itself consists of many smaller printed parts that are moveable and don’t restrict your pet from moving around. Along with the armor, you can even print out a matching helmet to complete the look. Available on Thingiverse, find the print files and instructions here as well as a short video to help you with the process:

Wearable Antlers

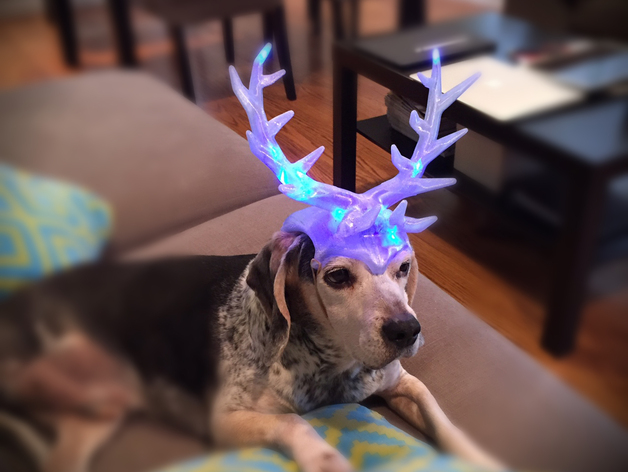
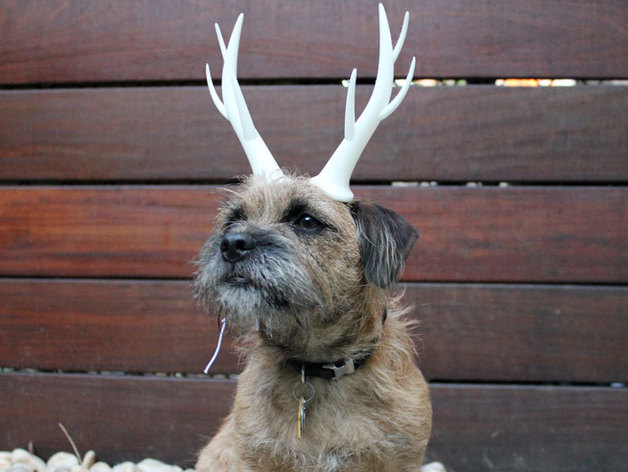
Another cute wearable is this antler made by creator Chad Ruble which can be worn by your pet dog, cat and even by you. All you need to do is print out the pair of antlers and slide a string through the holes. Want to print your own? Get them here.

There’s also a light up version made by Doodle_Monkey if you’re looking for something a bit more festive. Since the antlers can be printed hollow with clear filament, you can slide in some L.E.D. lights. Find the print here.

Space Helmet

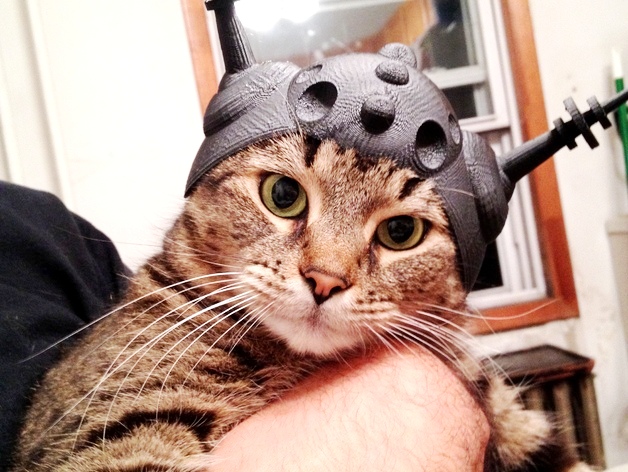
If your cat is gearing up for a space adventure then what it really needs is a cool helmet to make sure it’s all safe! And luckily we have the perfect one thanks to Thingiverse user TurnRock. You can scale the size to fit your own cat with the files available here.

Pet Collar

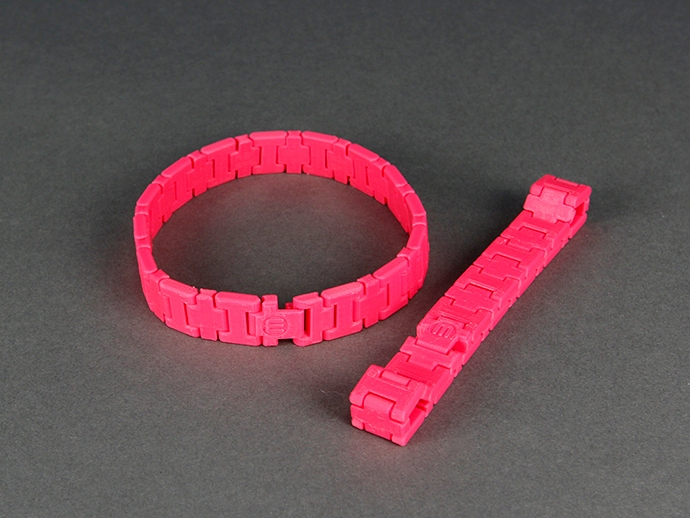
3d printing your pet’s collar is so much more fun than buying one and we’re really digging this design by Michael Kroner. Since the collar consists of individual pieces than join together you can easily make it for any size! Check out the cool design here. 

Bird Feeder 4.0

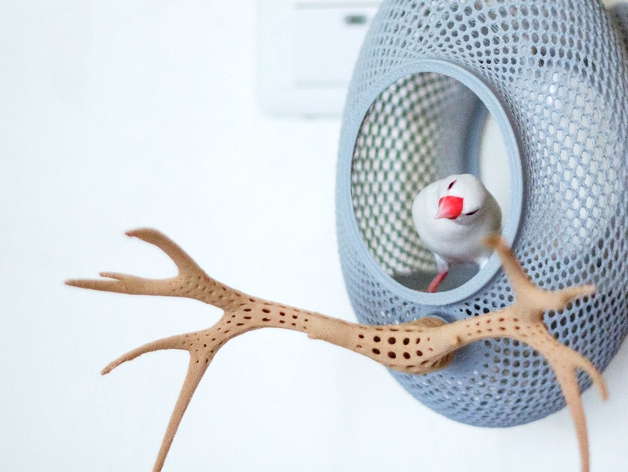
A birdhouse like no other, this one quite literally resembles a cozy little nest! The design itself is intricately and beautiful to look at and made by user Printednest on Thingiverse. Make one of your own with the files available here.

Bat Beagle Mask

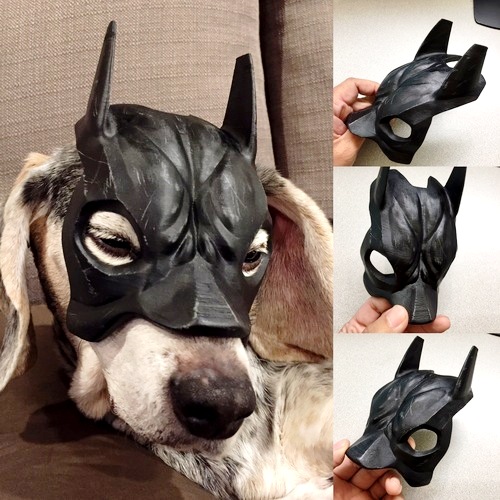
Bat dog is here to save the day! This design was made by Doodle_Monkey for his pet beagle but you can tweak the size to fit your pet once you have the right measurements! Get the print files on Pinshape here.

Pet Wheelchair

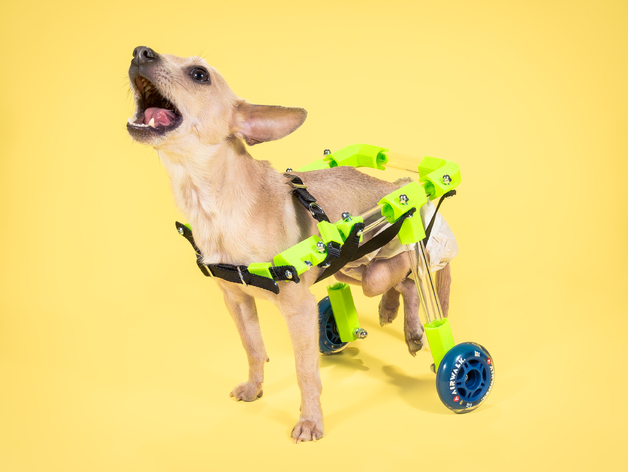
Since its hard to find an affordable and customizable wheelchair for pets, you can now 3D print your very own. Thanks to designer Rickee, you can find an in-depth explanation and step-by-step instructions so that you can make your own model right from scratch and help out your injured pet. What’s even better is that all the pieces can be customized as per the size of your pet for the perfect fit.  Find the Thingiverse files here.

Dog Bowl Water Bottle Carrier

This 3d model lets you carry your water bottle with you as well as turn it into a bowl for your furry friend! How efficient! Apart from that, there are tiny paw prints on the side which keep the bowl from rolling around. Yet another great design from Chad Ruble, this design is available on Thingiverse here.

Pet Feeder

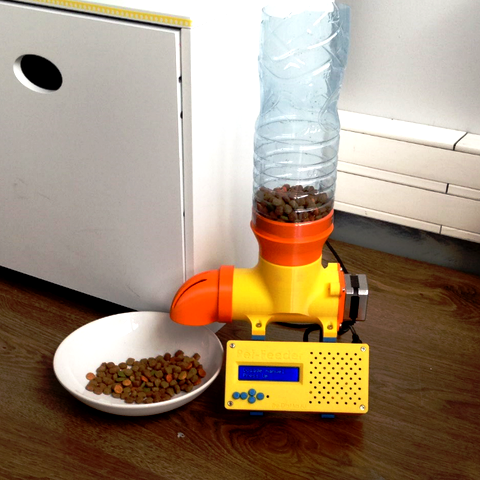
If you aren’t around to feed your pet, this 3d printed pet feeder will do your job for you. All you have to do is set a  fixed time and quantity of pet food! The design itself will take a while to assemble but you can find all the instructions on cults3d here.

Credits: thingiverse.com, pinshape.com, cults3d.com, youtube.com