Showing posts with label 3D printing. Show all posts

Wednesday, March 21, 2018

The “Plastic Smoothie”- Now You Can Utilize The Leftover Filament…

3D Printing is becoming more sensitive to plastic pollution that is created while printing the objects.

The biggest environmental issue that comes along with 3D Printing is the leftover plastic filament or spool after printing your  3D object.

Throwing away the filament in the trash is the only option you are left with as there are broken pieces of it and joining them is a costly process as there comes a  filament fuser or joiner which many enthusiasts have already experimented making. The below video explains how with the help of easy tools you can join the filaments.


There are many methods to recycle the filament and use it the next time, but the method shown in this article is more interesting and leads you to better 3D objects.

Designer Agustin Flowalistik shows us how to recycle 3D printing waste by creating a Plastic Smoothie, which can 0be used with a laser cutter to create vibrant objects. 
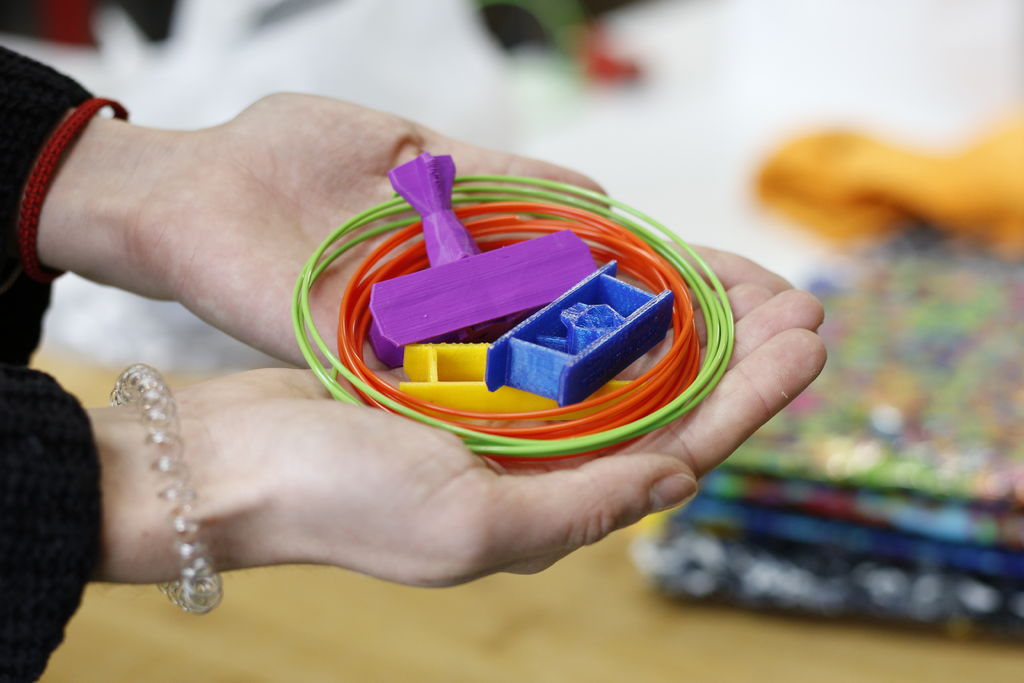
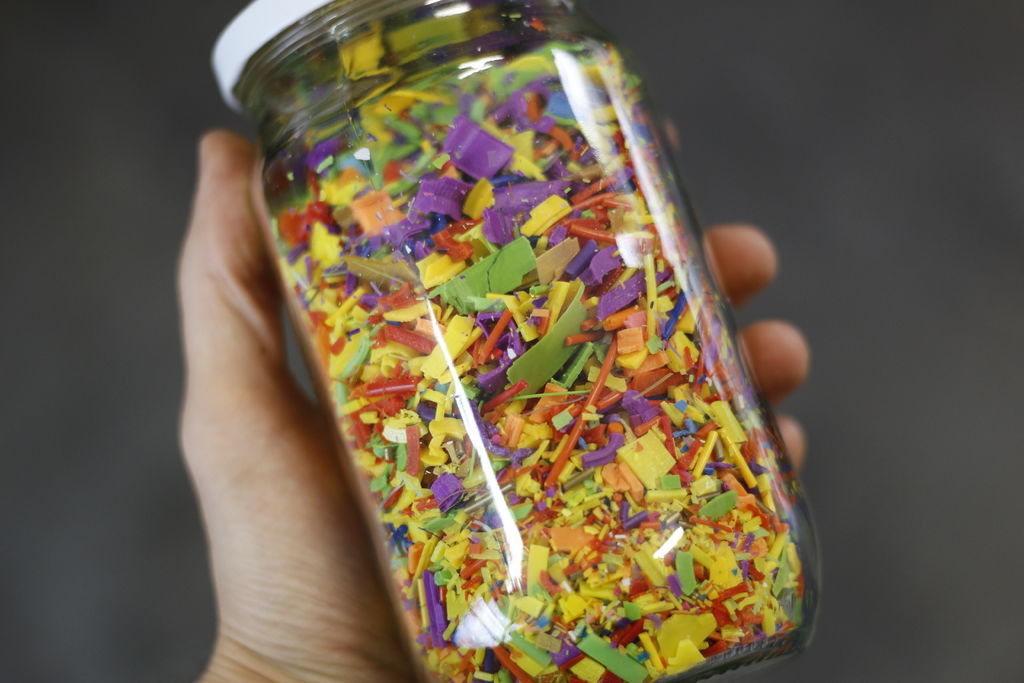
Agustin Flowalistik came up with an easy and cheap way to recycle failed designs and leftover filaments by making a concoct of a Plastic Smoothie. He uses the kitchen appliances and laser cutting technology you can create new objects with the endless array of color. After collecting all the leftover filament and making it into a finely shredded plastic scrap, melt the colorful mess of plastic in an oven.With this freshly baked sheet of recycled PLA, you can get creative using a laser cutter and a bit of vibrant imagination.

We give a brief overview of the “Plastic Smoothie” project below so you can get what the project is about. He shared it on Instructables and was developed with the help of non-profit TecnoLab La Rueca Asociacion  to increase the quality of life and well-being of disadvantaged communities. You can know more about how to effectively use plastic by controlling pollution here- Worry Not!! You Can Now Reuse Waste Plastic For Your 3D Prints.

Philosophy of the project

Picture of Laser Cutting

Affordable:  Electrical appliances are used for most of the projects as it is cheaper to use

Accessible: the machines used should be easily available in online stores.

Open: It’s an open source project and anyone can be a part of it.
What do you need?

The first thing that you need is an abundance of PLA filament scraps and failed prints.Also, an access to a laser cutter that you will find on Fablab or a local makerspace. If you want to know more about laser printing read here 3D Laser Printing is different from what you think.

There are other supplies needed for starting the plastic smoothie project, this is the checklist:

Flowalistik shares some tips to make this project affordable, like using an old blender if you have any as if you start using it to shred plastic you won’t use it for making juice.Before using failed prints make sure to break them before blending them.You won’t want your blender to get damaged. He uses PLA for the project as ABS contains impurities.

Putting it all Together
The first step is gathering and blending your PLA filament, you can take the opportunity to decide the colors and textures you want to create. After the recycled plastic is shredded up, take an over. Flowalistik uses oven paper on the base of the tray, bending the corners to avoid any molten plastic from spilling oven tray and start baking.
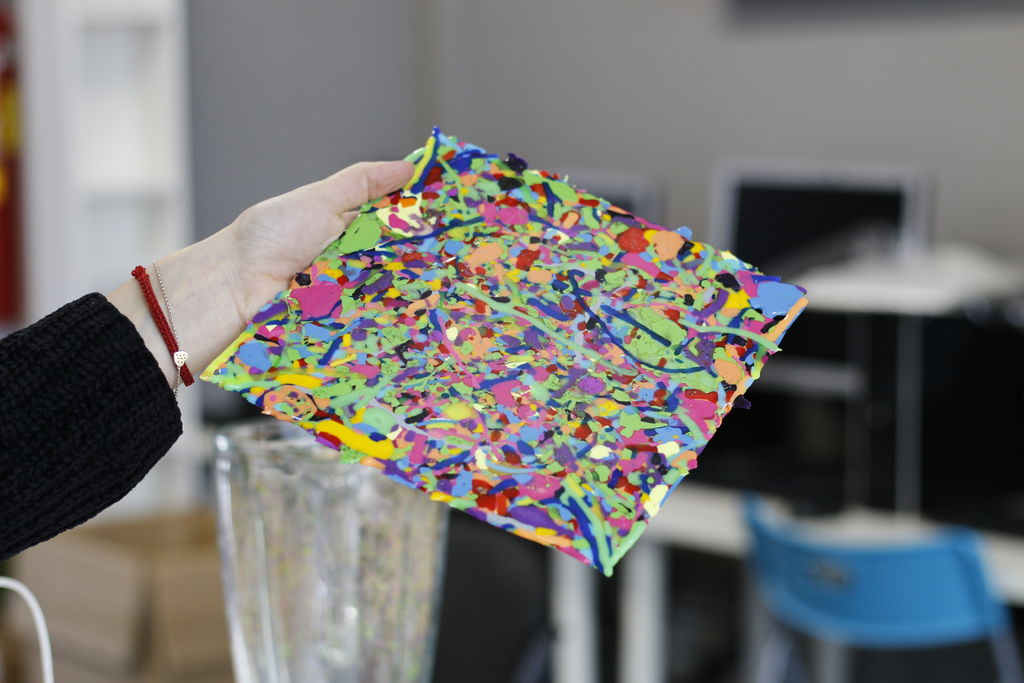
After experimenting the maker found that the best results by melting the small plastic bits at 190-200 C for 20 – 25 minutes. After the plastic straps are melted, you need to quickly remove them and flatten them out on the wooden panels. Perform the pressing procedure quickly as the melted plastic cools down. Keep the oven paper on the plastic and add as much weight as you can onto the wood panels, and you’ll have a perfect sheet of recycled PLA.

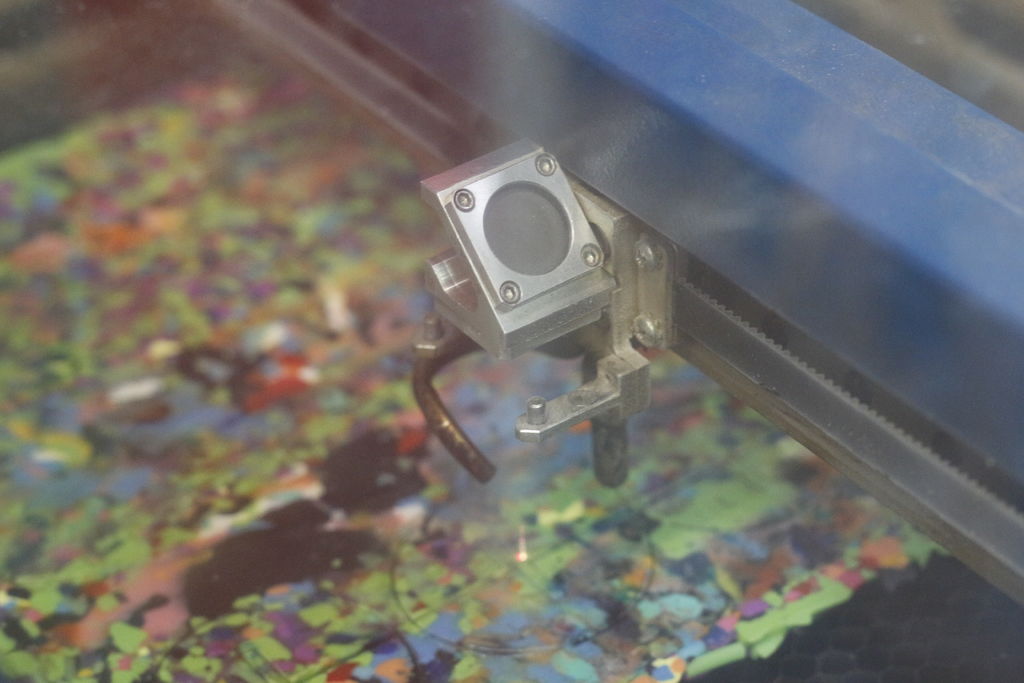
Finally, Flowalistik uses an Epilog Laser Mini 18 40W laser cutter to cut the 3mm plastic panels. You can use the same settings as you would for a 3mm sheet of acrylic. The designer adds that he had to increase the power of the laser in order to make the engraving more apparent.

You can learn more about the Plastic Smoothie project and the laser cutting process on Flowalistik’s Instructables post. If you want to continue supporting the designer and his intriguing projects, head on over to his Patreon page.

Plastic pollution is what we are dealing with every day and thus we have to take every possible step to stop it. So do join the “Plastic Smoothie” project and get rid of all the plastic extras and failed prints.

Geeetech enlightens you on such projects which will help you save the environment.

Credits: instructables.com,all3dp.com

Tuesday, March 20, 2018

Top 10 3D Printed models if you love video games!

As an avid gamer, there will be loads of intricate figurines and memorabilia from your favorite video games that you will want to add to your collection. And if you’re someone who owns a 3D printer, then you can very well make your own models!

So in today’s Top 10 list, let’s take a look at some of the coolest 3D printed models if you love video games!

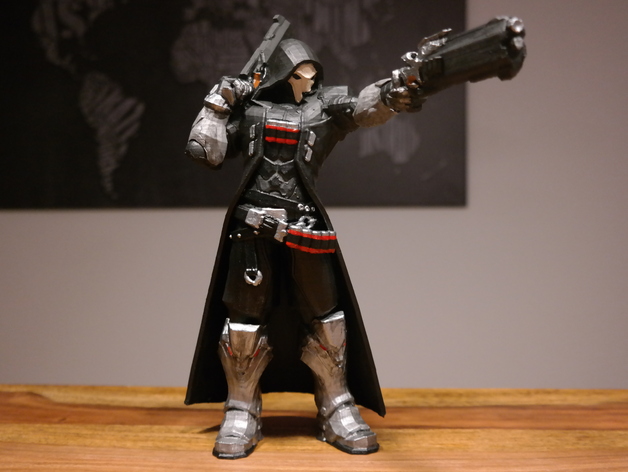
Overwatch- Reaper

Thanks to the amazing 3D printing community it’s super easy to download and print just about any gaming model. And since Overwatch is so popular it’s not at all hard to find a 3D model of your favorite avatar.

If you’re wondering which watch models on Thingiverse happens to be the most popular(and the one with the most amount of makes) its shockingly not Tracer, but in fact- Reaper. And if you too want to print your own then you can find it on Thingiverse here.

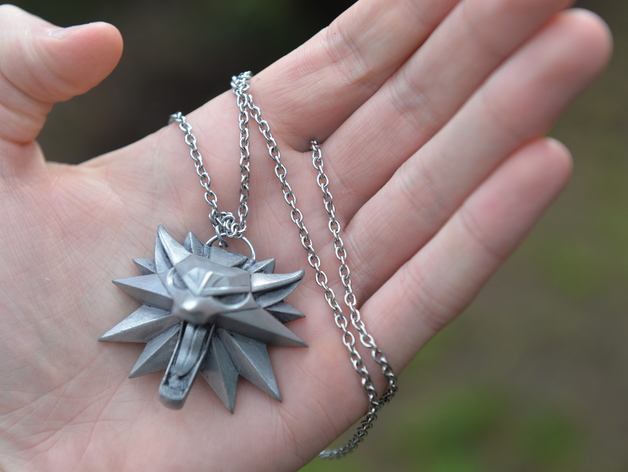
Witcher- Wolf Medallion

This Wolf Medallion may not vibrate like Geralt’s, but it definitely looks cool enough to pass off as the real thing! Designed by Daniel_W you can print out your own in silver PLA or paint it up after. Either way, it looks really cool and once you string it into a chain.


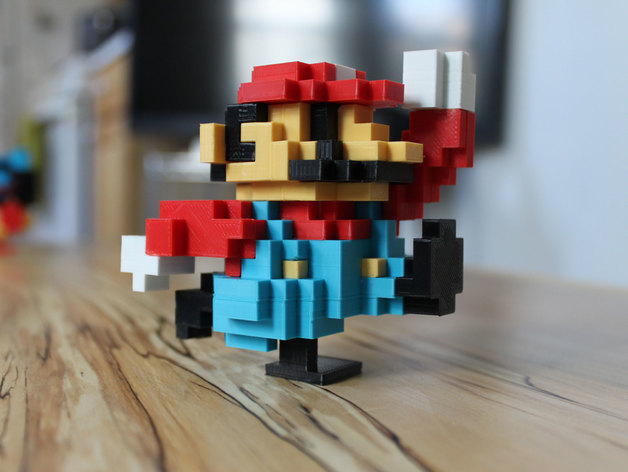
8 Bit Mario

There are so many Mario models to choose from but this 8-bit version by jakejake is hands down our favorite. With 26 pieces to print, assembling this 3D printed Mario is a fun little puzzle all on its own. But once you’re done putting it all together, the final result is well worth it. Don’t you think so? Find the STL files and all the instructions for this design here.

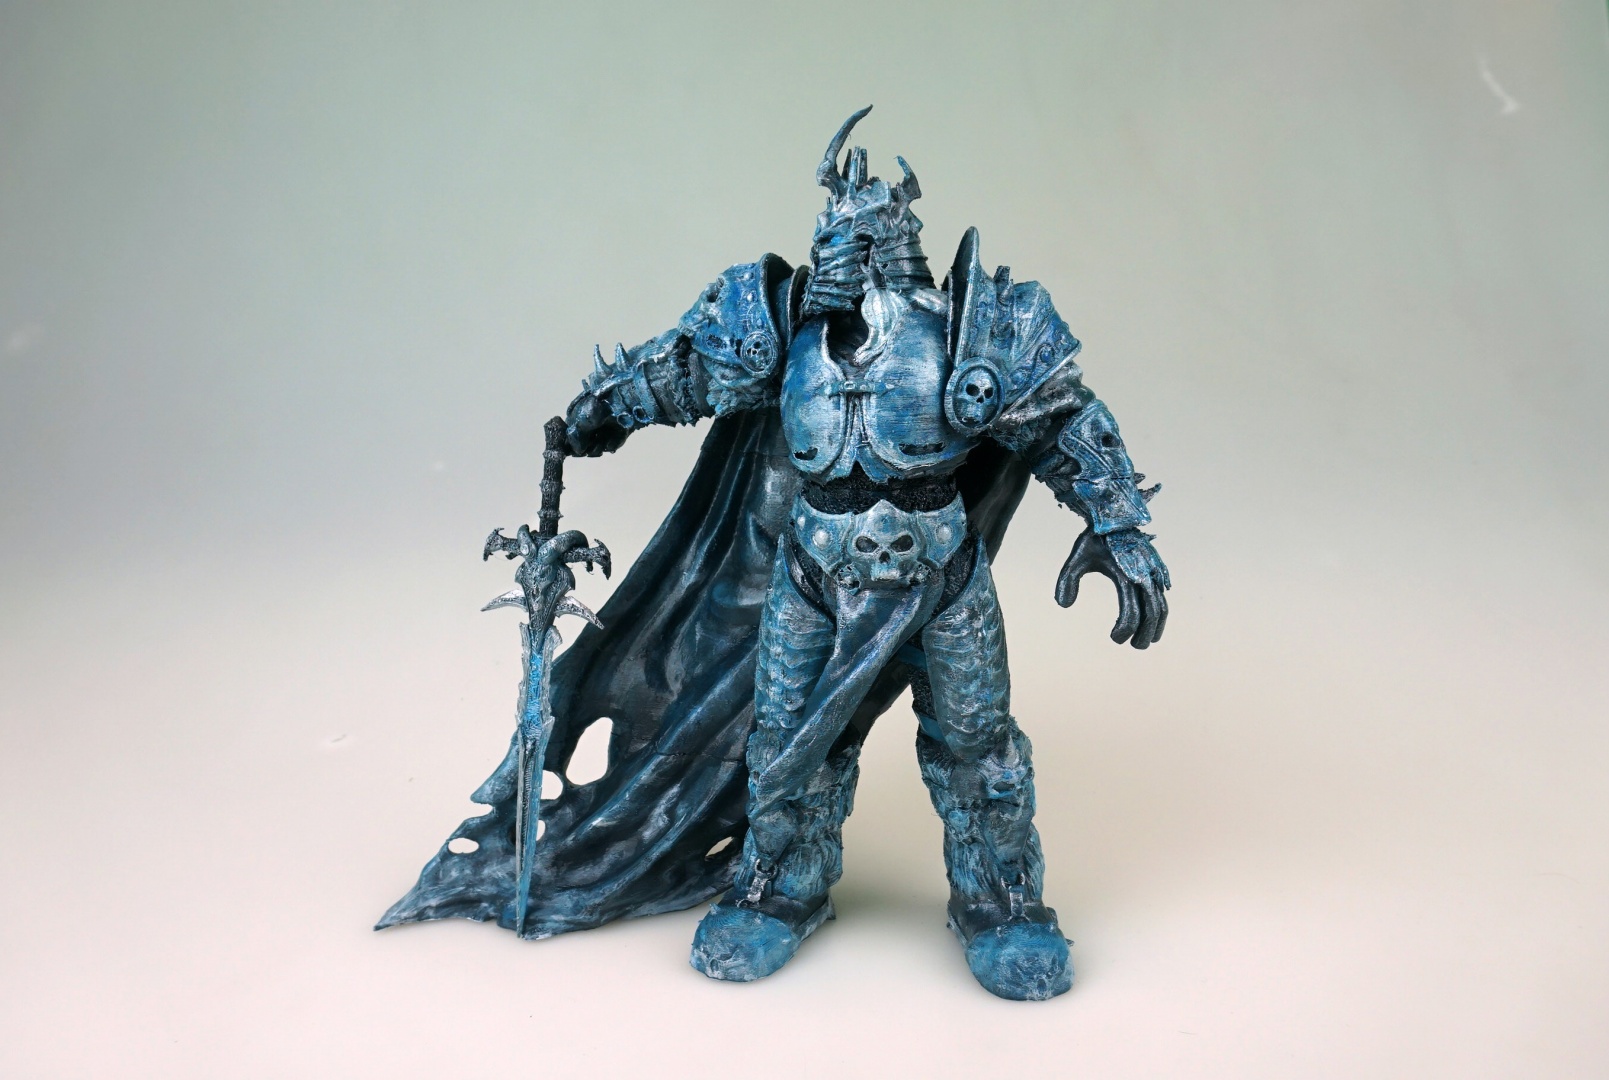
World of Warcraft- The Lich King

If you’re a fan of  World of Warcraft then you’ll agree that with a world so massive, there are plentiful characters that you can 3D print. However, we had to include the ice cold Lich King- Arthas Menethil because there’s nothing more badass than a figurine of Arthas wielding the Frostmourne! Made by Matthew McKeown you can find this design on MyMiniFactory here.

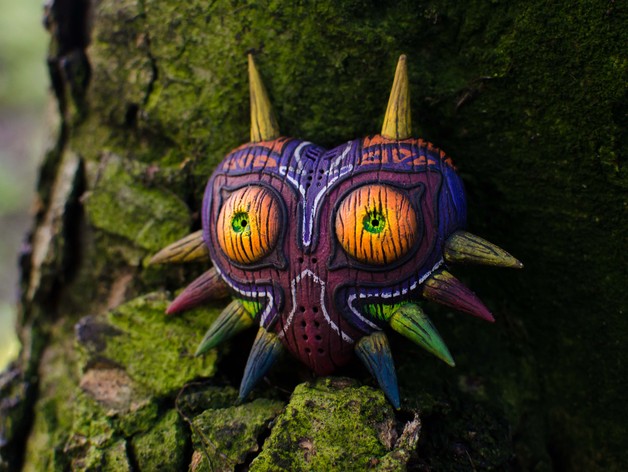
Legend of Zelda- Majoras Mask

We could probably make a whole list solely on all the awesome Legend of Zelda printables available out there. But if we’re going to pick just one then it has to be this fantastic design of Majoras Mask made by WeeMadSausage.

The design itself is intricate, vibrant and beautiful. You don’t have to use a wood filament but using it does add a certain charm to the mask, making it more realistic.


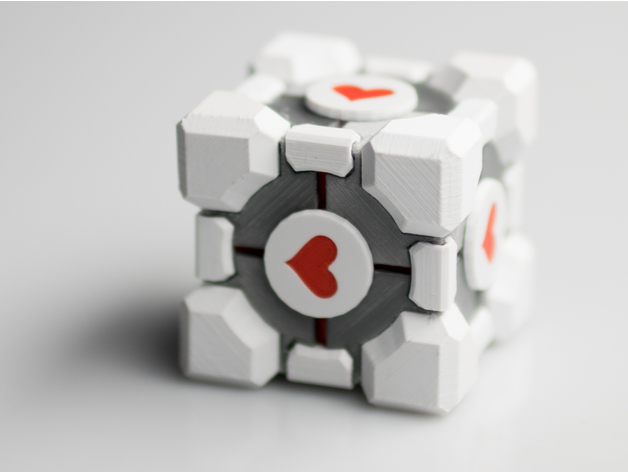
Portal- Companion Cube

Doesn’t this 3D printed Companion Cube look like it came straight out of the Portal game? Created by Ellindsey this model consists of 40 different 3D printed parts that are designed to snap together well enough that you won’t even need any glue!

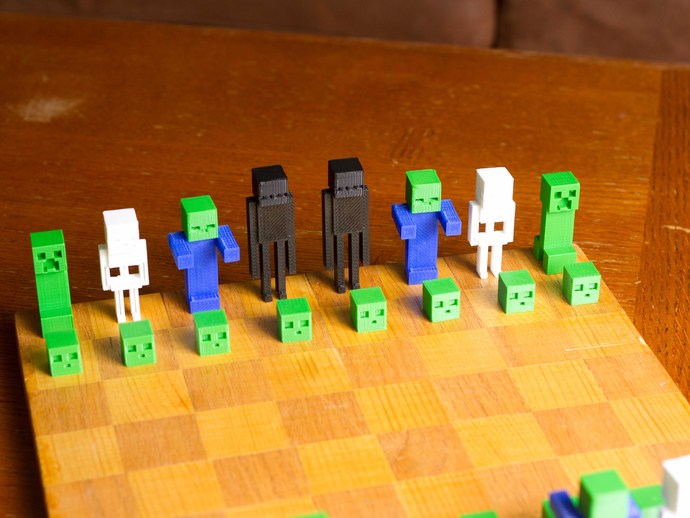
Minecraft- Chess Set

What do you get when you merge the world of Minecraft with chess? A creative and aesthetic design by PotatoFi that is sure to rekindle your curiosity in the game of chess. And even if you don’t intend to play, it makes for a great showpiece too. You can download the STL files for this print here along with the instructions and tips from the maker.

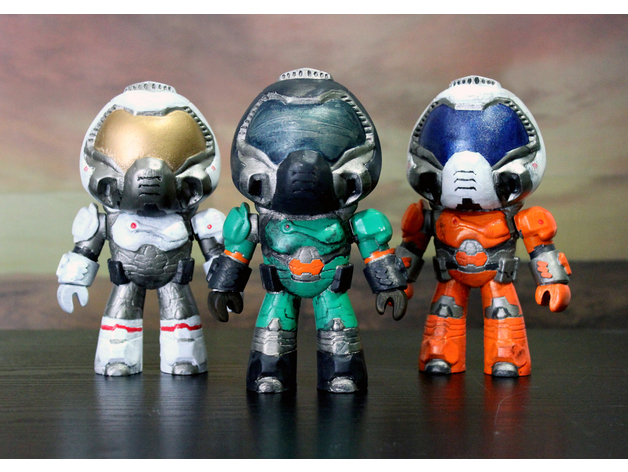
Doom- Electronic Doomguy models

After taking a look at these adorable figurines you may find it hard to believe that Doom is a brutally intense game where you’re killing demons but nevertheless, we love these models made by zembacraftworks. Oh and they’re electronic too! Check out Zemba Craftworks easy tutorial so you that you can make your own!

Mortal Kombat- Sub Zero Mask

You too can be as cool as Sub Zero(get it?) once you 3D print his mask! Designed by Geoffro you can use this mask as a prop or even as cosplay. Just be sure to credit the designer! Find the print files here!

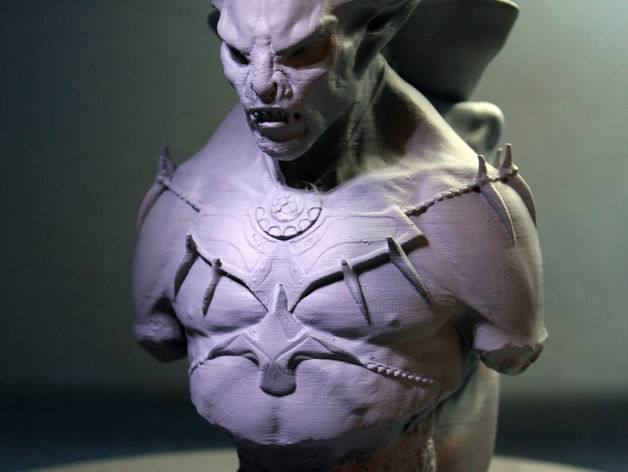
The Elder Scrolls V:  Vampire Lord Bust

Create your very own eerie Vampire Lord Bust from Skyrim thanks to designer Vsions and his stunning 3D printed model. There are two parts to this model- the main bust and some small horns which can later be assembled. Follow the instructions and STL files available on Thingiverse- here

Need a 3D printer to get started? Go check out our Store!

Credits: thingiverse.com

Friday, March 16, 2018

These Beer Bottles got their 3D Printing Makeover done and it’s Cool.

If your weekends are always spent partying either at home chilling or at a pub and Beer is your favorite drink along with a passion for 3D Printing.When you go to a bar you order your drinks maybe soft drinks or hard drinks, get high and enjoy the moments.But do you ever notice the bottles, each one is different, the packaging, the labels, brands and also the prices.

You just comment “Huh, neat” grab the drink and enjoy getting high, after all only what is inside the bottle matters.Few people realize just how much work goes into packaging redesign, or how it actually does impact the buyer, even on a subliminal level. Many big teams of designers work to get a new look which is just perfect, while the manufacturer evaluates the costs and decides if a change is worth it.

Rather than throwing away the bottles and adding up to the pollution, you can take a step to revolutionize things and this article will tell you exactly how you can.We have bought a good news for you, so get excited.

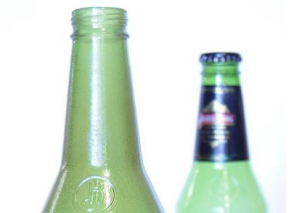
The Australian Beer that recently underwent bottle makeover is James Boag’s.  The makers of the bottle were thinking about getting a makeover done but also thought whether it would be worth the money. They didn’t want to make a change just because they could; the new design decided would have to be attractive enough to be well-received by customers. They were hoping to make this determination before significant time and money were spent on the redesign.

The packaging company Orora, that supplies James Boag’s bottles, it decided to go for 3D Printing prototype for the The organization contacted 3D Systems On Demand Manufacturing, which went up against the challenge of making a 3D printed bottle with an indistinguishable clearness and tone from glass, and also the same close by heave.new bottle.Using SLA 3D printing technology and VisiJet SL Clear resin, 3D Systems 3D printed four prototypes, countering the disparities in weight by adjusting the interior wall thickness of the design file based on the density of the resin. They also carefully color-matched to get the same green as the original bottles.

Subsequent to being 3D printed, the bottles experienced an in-house completing protocol that included wet and dry sanding and the application of a surface tint and last clear coat. As per Tracy Beard, General Manager for the On Demand Manufacturing office in Lawrenceburg, Tennessee, a large number of clear parts are delivered each week in that office alone.

It took just seven days for the models to be finished, and soon thereafter they were furnished with labels and caps and loaded with fluid. They were then placed in a shop for observing, and criticism demonstrated that the new plan was a hit, giving the James Boag’s group the certainty to proceed with the full overhaul.

Thus the Boag’s  Company did a makeover of their Beer Bottles with help of 3D Printing so now you can also have a 3D Printed bottle as an aesthetic in your house.Thus you even don’t throw the bottle and keep it with you.

Get set started with 3D printing right away with your own 3D Printer which will help to get the best from 3D Printing. Explore your vision in the new era of 3D Printing with Geeetech.

Credits:3ders.org.

Monday, March 12, 2018

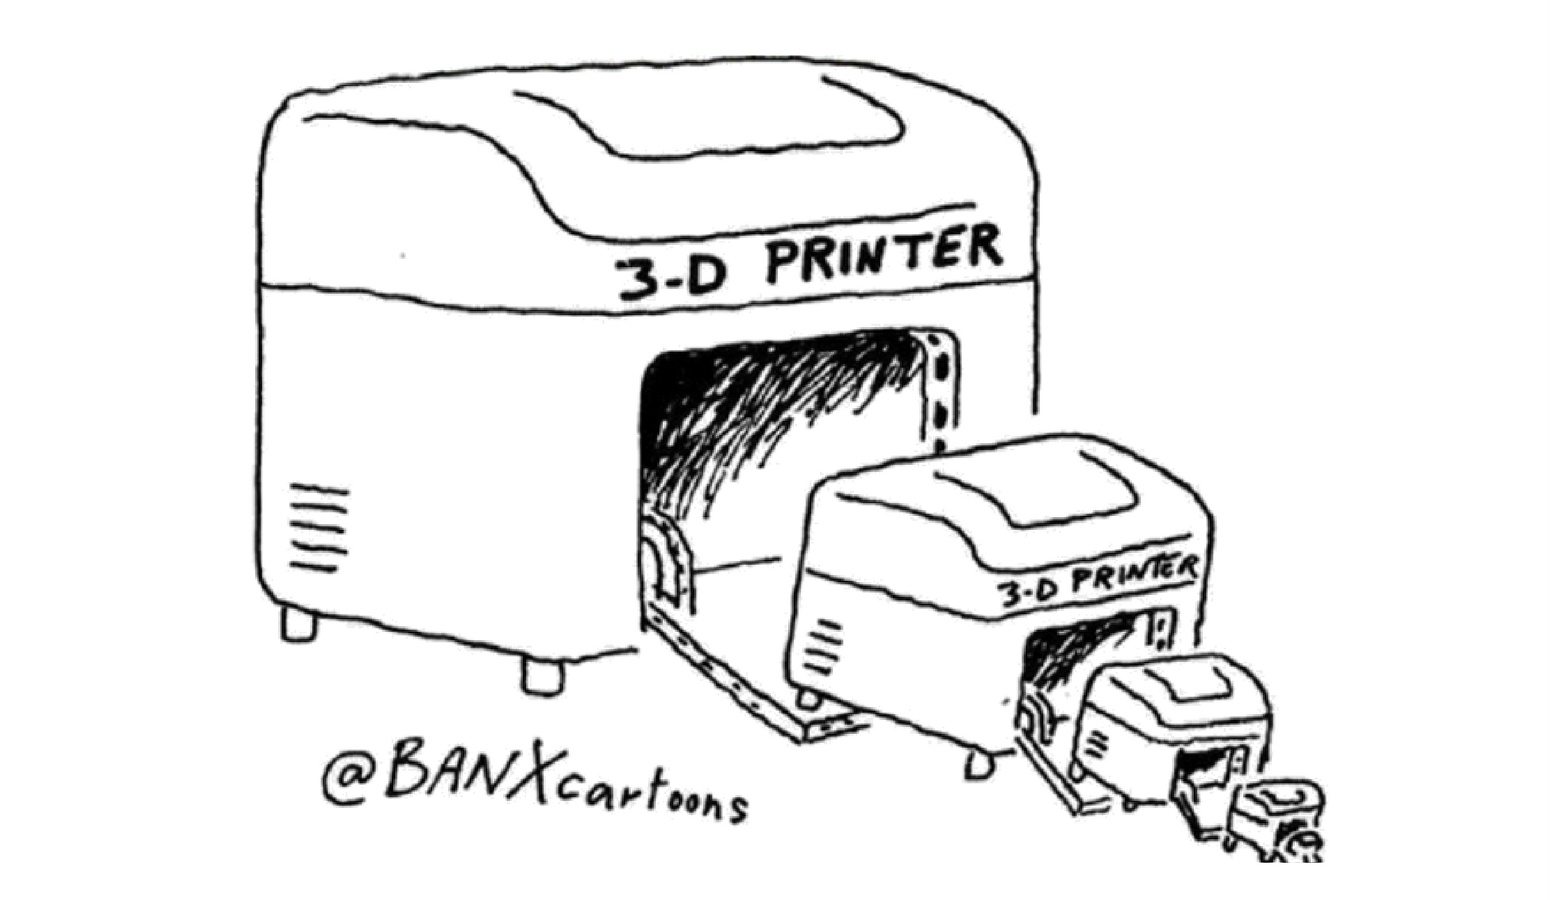
Can you 3D print a 3D printer?

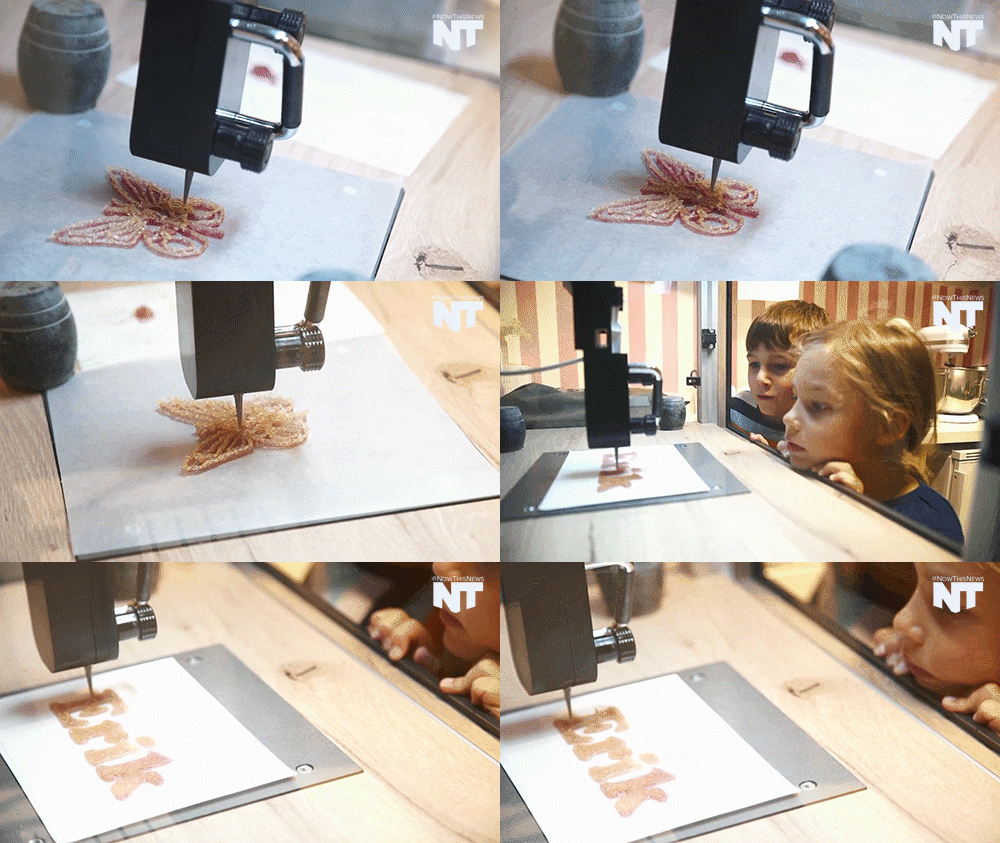
3D printers can pretty much print just about anything. It’s even possible to 3D print your very own gummy candy now. So it only makes sense that we should be able to 3D print a 3D printer itself, right? Well, the answer’s a bit more complicated than a simple yes or no. But let’s takes a look-

From prosthetic arms and organs to 3D printing an entire house, it’s safe to say that 3D printing has come a long way and changed our lives like never before.

However, one question that we’re all curious about is Can you 3d print a 3d printer?

Is It Possible?

Most of it- Yes! A 3D printer can print out most of the parts that you will need to build your own 3D printer. The structural components that make up a 3D printing machine can be printed and assembled even though the process itself would be time-consuming. But 3D printing the electronic parts is certainly more complex.

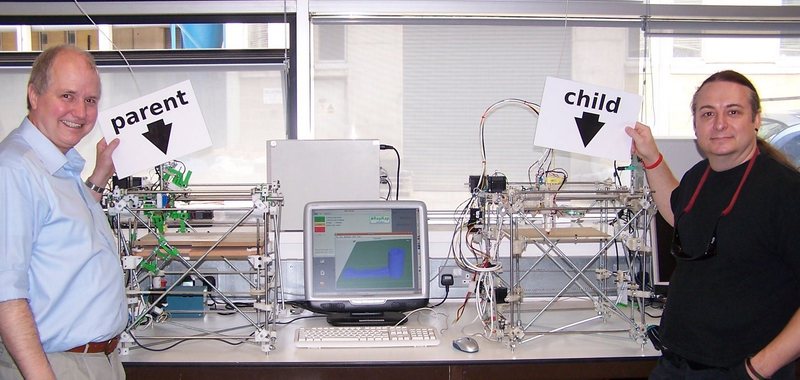
Reprap- The 3D printer that prints itself!


RepRap was the first ever self-replicating 3D printer designed for the purpose of 3D printing another one! Developed in 2008 by Dr. Adrian Bowyer, RepRap can print more than 50% of the components required to assemble a whole new 3D printer and the best part? It’s open source and freely available so anyone can make one! In addition to this, RepRap uses FDM technology which means the 3D printed parts can easily be made using the popular ABS and PLA filaments.

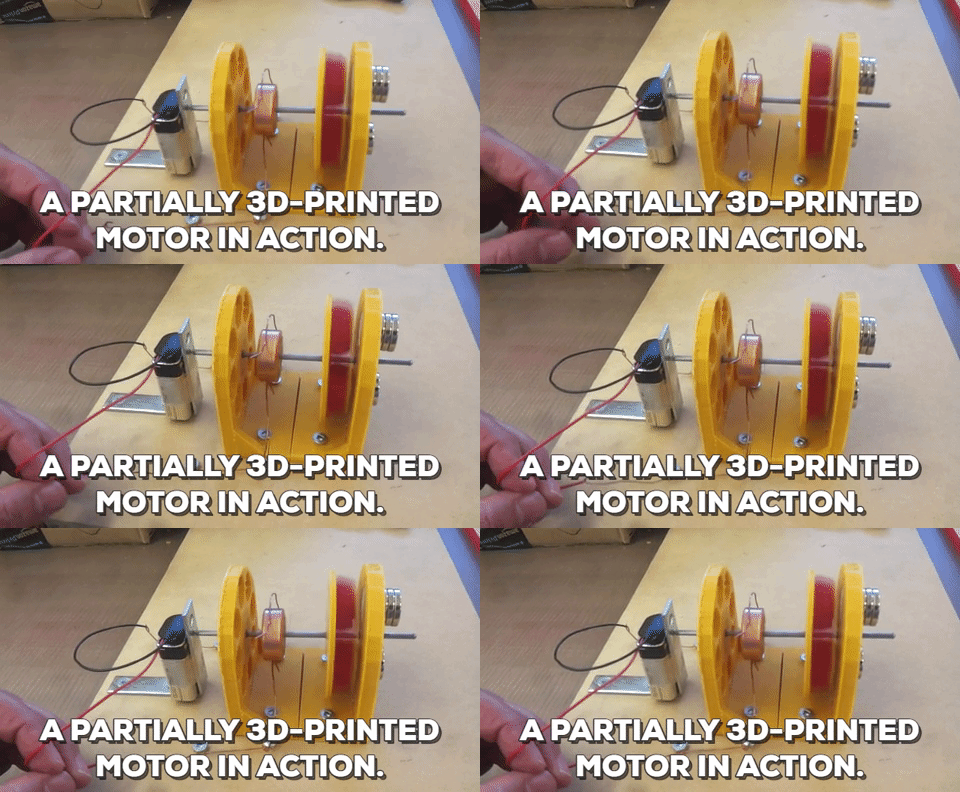
However, some of the electronic and metal parts especially a fully functioning motor are still hard to 3D print though there have been several attempts.

This means that although you can print most of the parts of a new 3D printer, we’re still not all the way there. 3D printing an entire motor and other mechanical parts are not something that can be done easily even if we use metal and other materials.

The good news?

Since 3D printing is an ever-evolving industry, we’re sure it’s only a matter of time that we print a fully functional 3D printer complete with the electronic and mechanical parts.

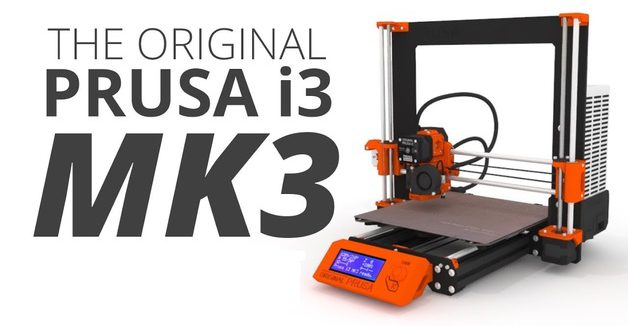
But until then, we can use RepRap! And since it’s an open source project free for all to use, you can build a 3d printer right from your home. In fact, Reprap’s Prusa i3 is one of the most used 3D printers in the world!  And with a comparatively lower cost and easy-to-assemble 3D printer kit, it’s easy to see why.

Apart from this, you can even check out Geeetech’s very own Prusa I3 A Pro 3D printer which is a great DIY kit and super easy to assemble!

Credits: reprap.org, space.com
Friday, March 9, 2018

Multi-Material 3D Printing is a lot more fun than you think!

The 3D Printing community is constantly making new efforts and updating new processes to get things done easily. The most difficult process is multi-material and multi-color 3D printing. Both are time-consuming processes and also more fun. You can know everything about multi-color printing at Now you can 3D print your models in multi-color.

During the initial stages of 3D Printing, the whole object had to be printed using a single material. That’s impossible because you can’t print a house or fashion accessories with a single material.Thus Multi-material 3D Printing, prints a single object with two or more filaments rather than just using PLA, ABS or any other filament.

This is a bit tricky! You can use a dual extruder printer or get things done with a single extruder printer itself.

The question is how?

A Dual extruder has multiple extruders that allow you to have multiple filaments ‘piped in’ and ready to be used whenever the object being printed requires them, and this is where the saved time comes from.Having different filaments ‘ready to go’ means you no longer have to pause a print, empty out the extruder of the previous filament, feed in the next filament, and resume the print every time you need a different material. The printer will simply call on which filament it needs when it needs it.

While with a single extruder when you want to print a multi-material thing you have to replace the previous material with the other one and then print it. This takes time as in 3D Printing it prints layer-wise and if you have multiple layers of multiple materials than it requires a lot of time just changing the filament.

How to create a multi-material print with a Single Extruder printer?

The secret? Spread the different materials across different layers of a single extruder printer. Both of the models that are shown have the materials at separate heights; on separate layers. The process basically works by printing with one material to a certain height, pausing the printer, switching materials, and continuing the print.

Step 1: Choose your 3D Model

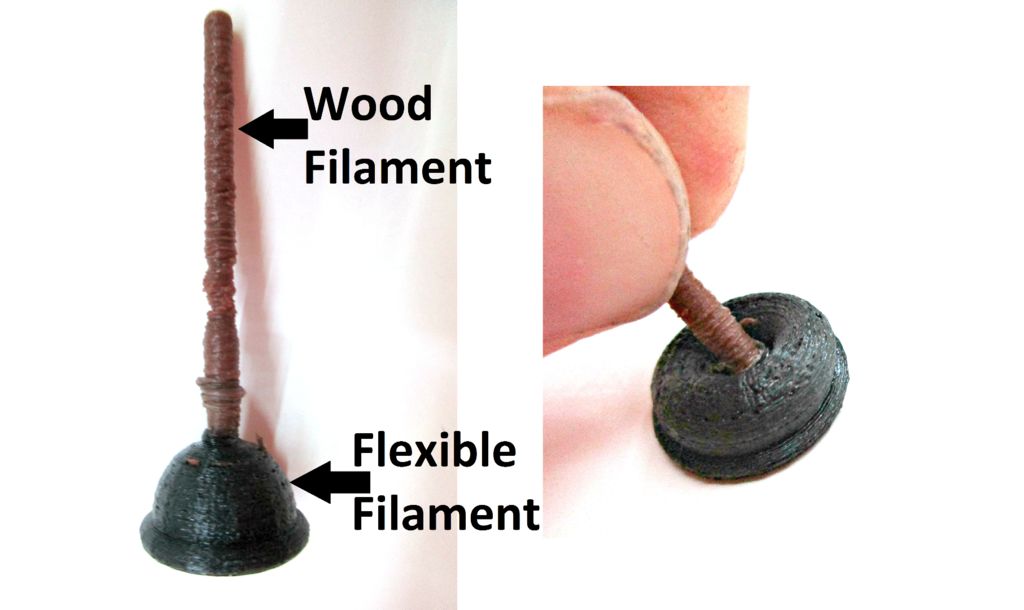
Icecats has explained this with really well with an example of printing a toilet plunger as it has a flexible filament and a wood filament.So you need to find a good 3D model from Thingiverse or MyMiniFactory or any other 3D Printing website. You need to keep certain things in mind like:

  • Choose the object wisely which makes sense of carrying out a multi-material printing process.
  • Keep a certain height within two materials as this is the key to the process like the flexible plungers base is lower than the wooden handle.
  • See whether the model is printable with the desired materials.

Step 2: GCODE and other settings

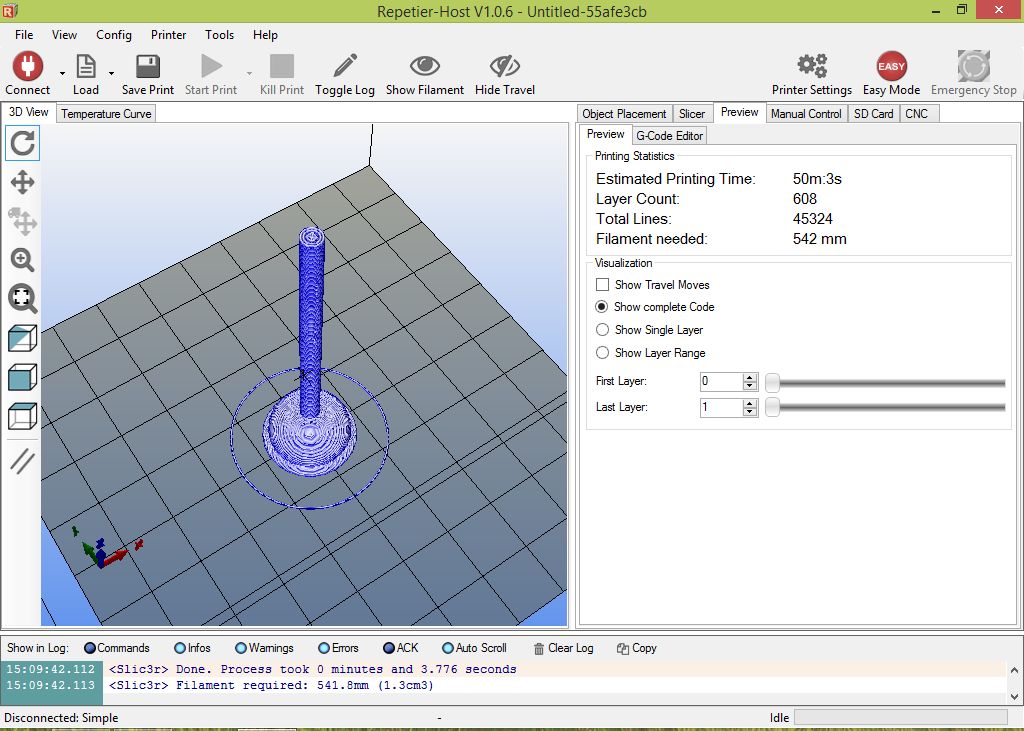
  • Slice your 3D Model into a GCODE with your 3D Printers host software.
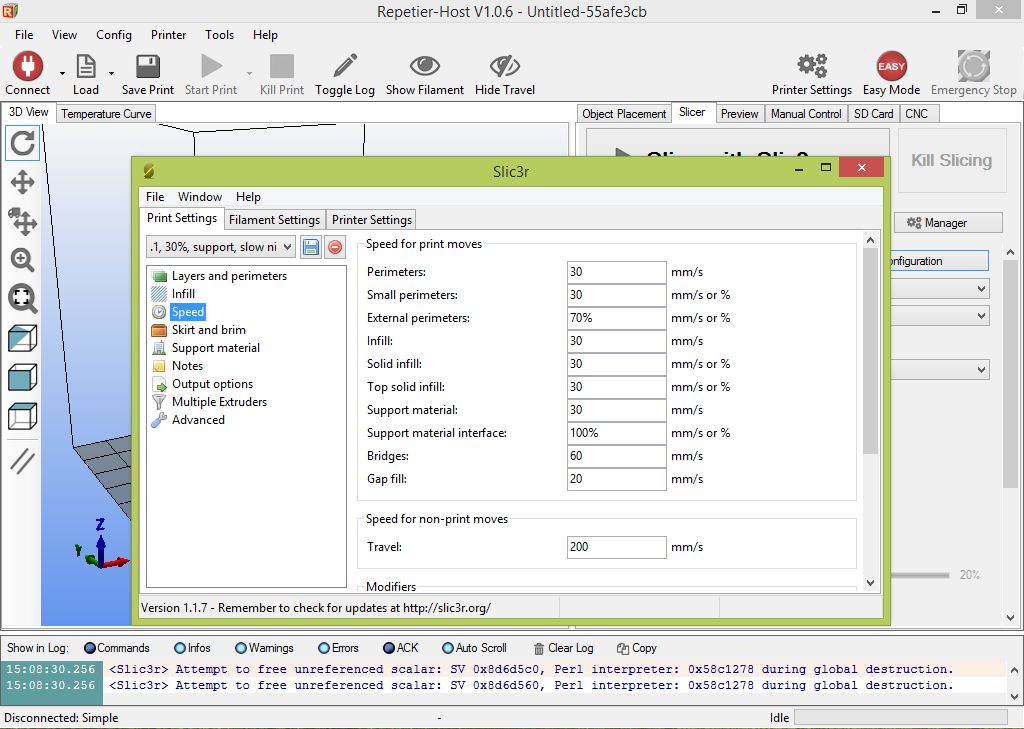
  • Look up the speed settings into it and then set it up to the slowest.
  • Find a proper balance of layer height, infill, and retraction settings for your prints.
  • After you are ready, heat the printer and fill the first material into it. You can change the temperature later when you want to fill in the other material. The first material used by icecats was Ninjaflex.

Step 3: Switching materials

  • Monitor the printer as the first material is extruded.
  • When you want to switch the material, just pause the printer, it usually takes a bit of time for the printer to stop, raise the printer to 10 mm height on the z-axis.
  • To prevent the leakage you need to place a piece of paper below the extruder. If necessary, adjust the hot end temperature in the Manual Control tab to suit the second material.
  • Switch to your second material and purge the extruder until the new material comes out pure. Remove your piece of paper and continue the print. Repeat this process as many times as necessary.

Step 4: The Final Results

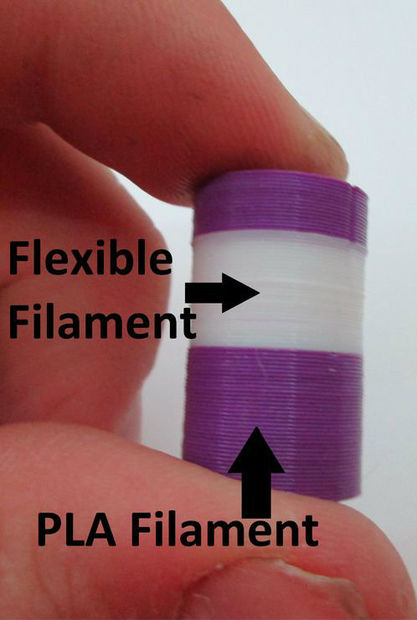
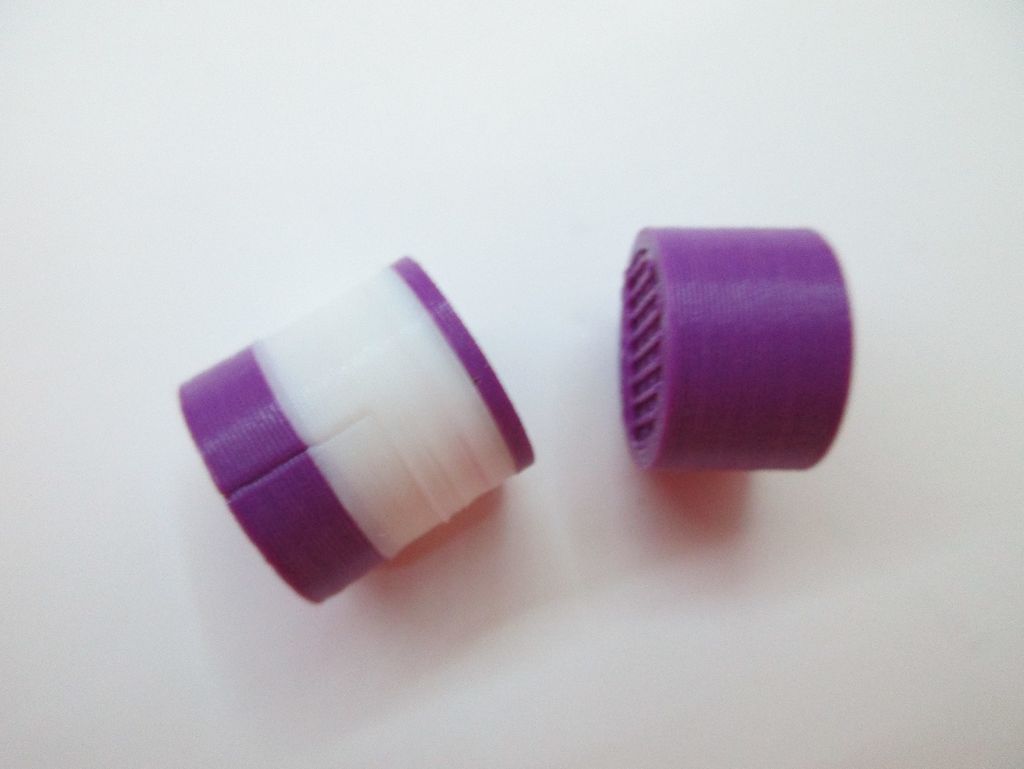
Icecats tells how his 3D Print resulted in, he basically used two different  PLA/NinjaFlex and wood/NinjaFlex. He says that both tests worked well for him.The purple and white cylinder shown above was printed with PLA and NinjaFlex. He has stressed that the print until it broke- two PLA layers spit apart, which means that the NinjaFlex/PLA bond is actually stronger than the PLA/PLA bond! The bonding between the wood/NinjaFlex was similarly high strength.

Here are some other ideas for prints to try.

  • hard PLA/ABS box with NinjaFlex hinge
  • hard PLA/ABS model car with NinjaFlex shocks and tires
  • wood “table” with PLA/ABS legs

Thus you can try multi-material printing with your single extruder printers as well and give your prints the real touch as you want.

Get these dual or single extruder printers for better prints and experiences of 3D Printing.

Credits: instructables.com.

Friday, March 2, 2018

DIY: 3D Print your own Bluetooth Speaker

If you have access to a 3D printer, a bit of maker prowess, and a love for sound, you can build your own 3D Printed Mini Bluetooth Speakers.

Create your ultimate 3D  Printed speaker box

Coder and tinker Yasthil Bhagwandeen shares a new Instructables project on how to build your very own 3D Printed Mini Bluetooth Speakers, now that is really cool. 3D Printing technology is discovering new ways to make things simpler and productive and so even an audio gear is not an exception.

 https://youtu.be/5IMl47iG-28

With companies like print+ and V-Moda using 3D printing to offer a modification to consumers, the technology could soon become a valuable part of the audiophile’s sonic experience.

Yasthil Bhagwandeen takes a DIY approach with his new project, showing how to print your own mini Bluetooth speakers. The coder and Tinker shows the full process of the project right from trials, failures, designs to the finished final successful project.

What will you need?

3D Printed mini blue tooth speakers need a handful of components and tools.

COMPONENTS

TOOLS

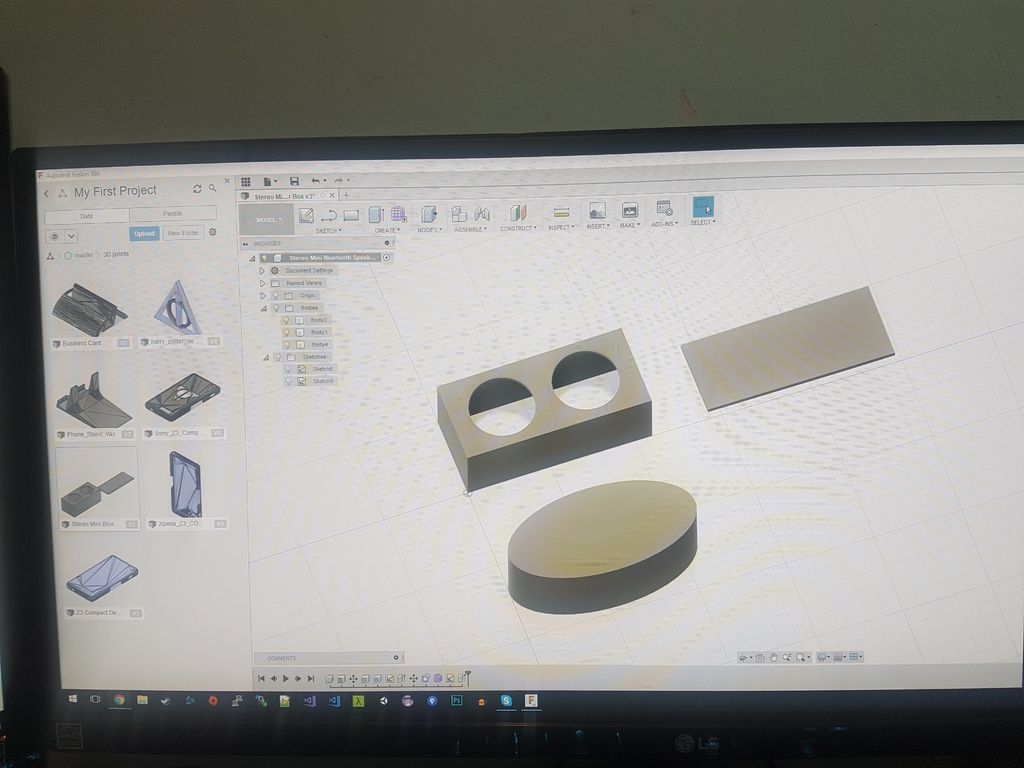
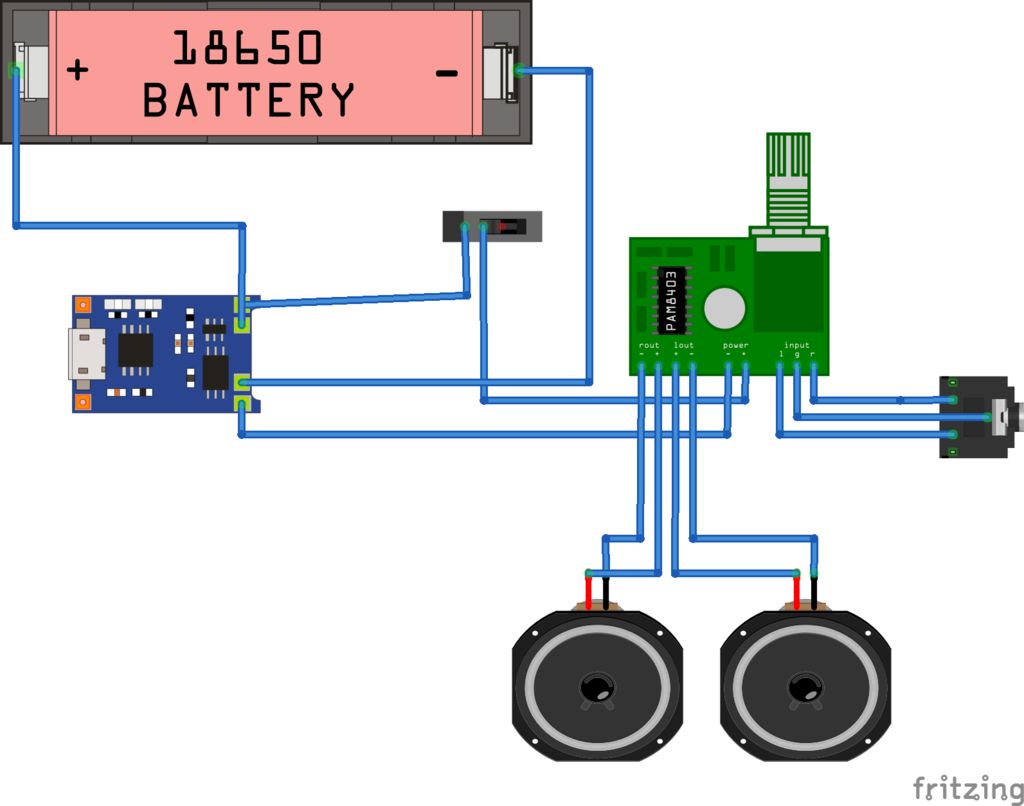
Design the Speaker Box The software used is Fusion 360 and you can get the STL files from Thingiverse. Make sure that you use the vernier calipers correctly as the measurements are important so that the electronic component can be assembled properly in the box so that there is no noise and disturbance in the quality of the sound. Print it out: Bhagwandeens version of mini Bluetooth speakers uses a Anet A8 and the filament used is CC Tree PLA  of 1.75 mm, layer height of 0.32 mm and 50 percent infill. The 3D model for the speaker box, designed by the tinkerer on Fusion 360, is a relatively quick 5 hour 3D print. He also shares the initial mistakes and subsequent redesign that came with developing this project. Obstacles included incorrect measurements, which made it difficult to fit in the speakers, as well as forgetting to print holes for the switch, jack, and micro USB slot. Eventually, Bhagwandeen overcame these issues and was able to build his speakers. Before going to the further step of soldering the maker recommends to test the electronic components and check whether they are working properly.Then start with the soldering which has to be done accordingly to the below schematic diagram.   After the soldering process simply uses the hot glue gun to assemble the electronic elements into the 3D Printed speaker box. The speaker enclosure is designed in such a way that it is easy to open and shut the box without any problem.

The speaker isn’t extremely loud, but it does produce a fair amount of volume. It’s an intermediate project that does require some time and maker skills, but it also seems like a nice undertaking for a beginner looking to get familiar with soldering, or even a more experienced maker who wants a fun and useful project for the weekend. Either way, you can bring your favorite sounds right to your own DIY speaker box and get speakers of your own designs and you can even customize it.

So start with 3D Printing right away and know about the latest trends of the industry with Geeetech.

credits: all3dp,instructables.com

Thursday, March 1, 2018

Troubleshooting: Here are some easy ways you can prevent layer shifts

The 3D Printing Problem

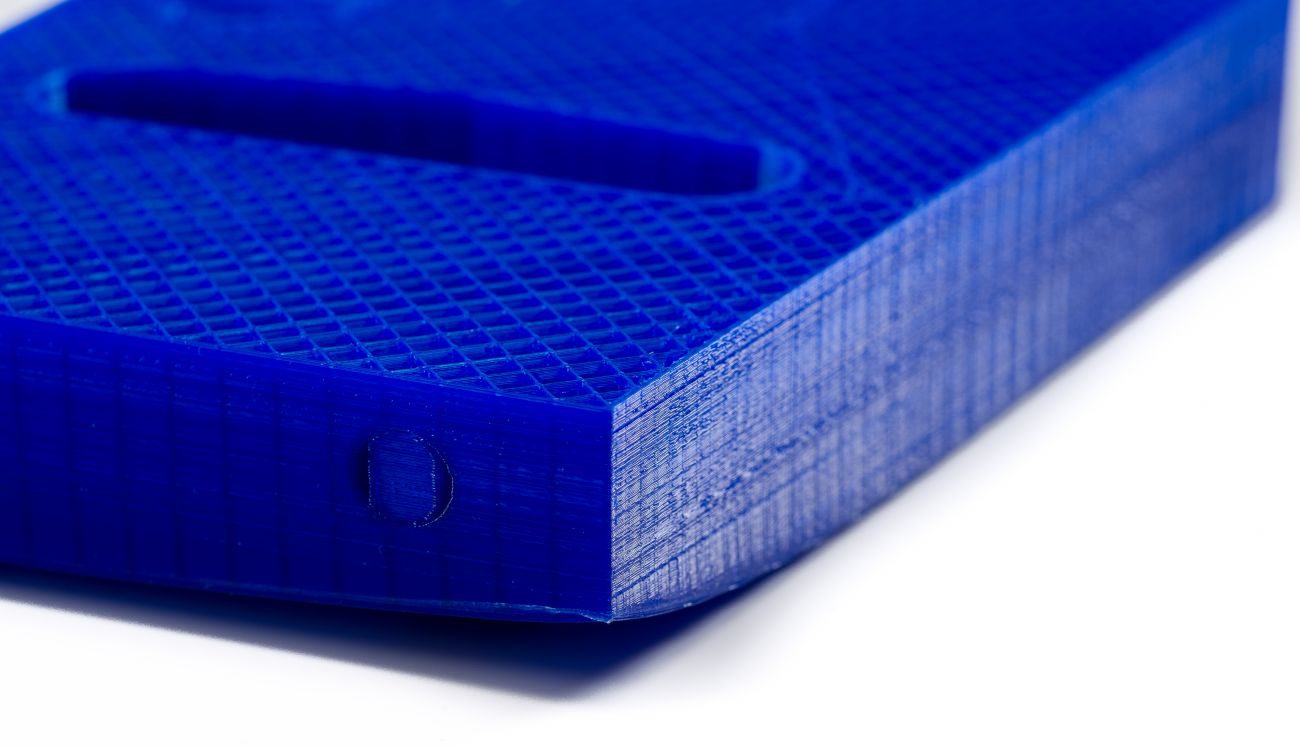
Your print may start out looking fine but as it progresses, you notice a shift in between the layers. It looks similar to a step and this effect is known as a layer shift. It may be subtle or could end up ruining your print entirely!

Why does it happen?

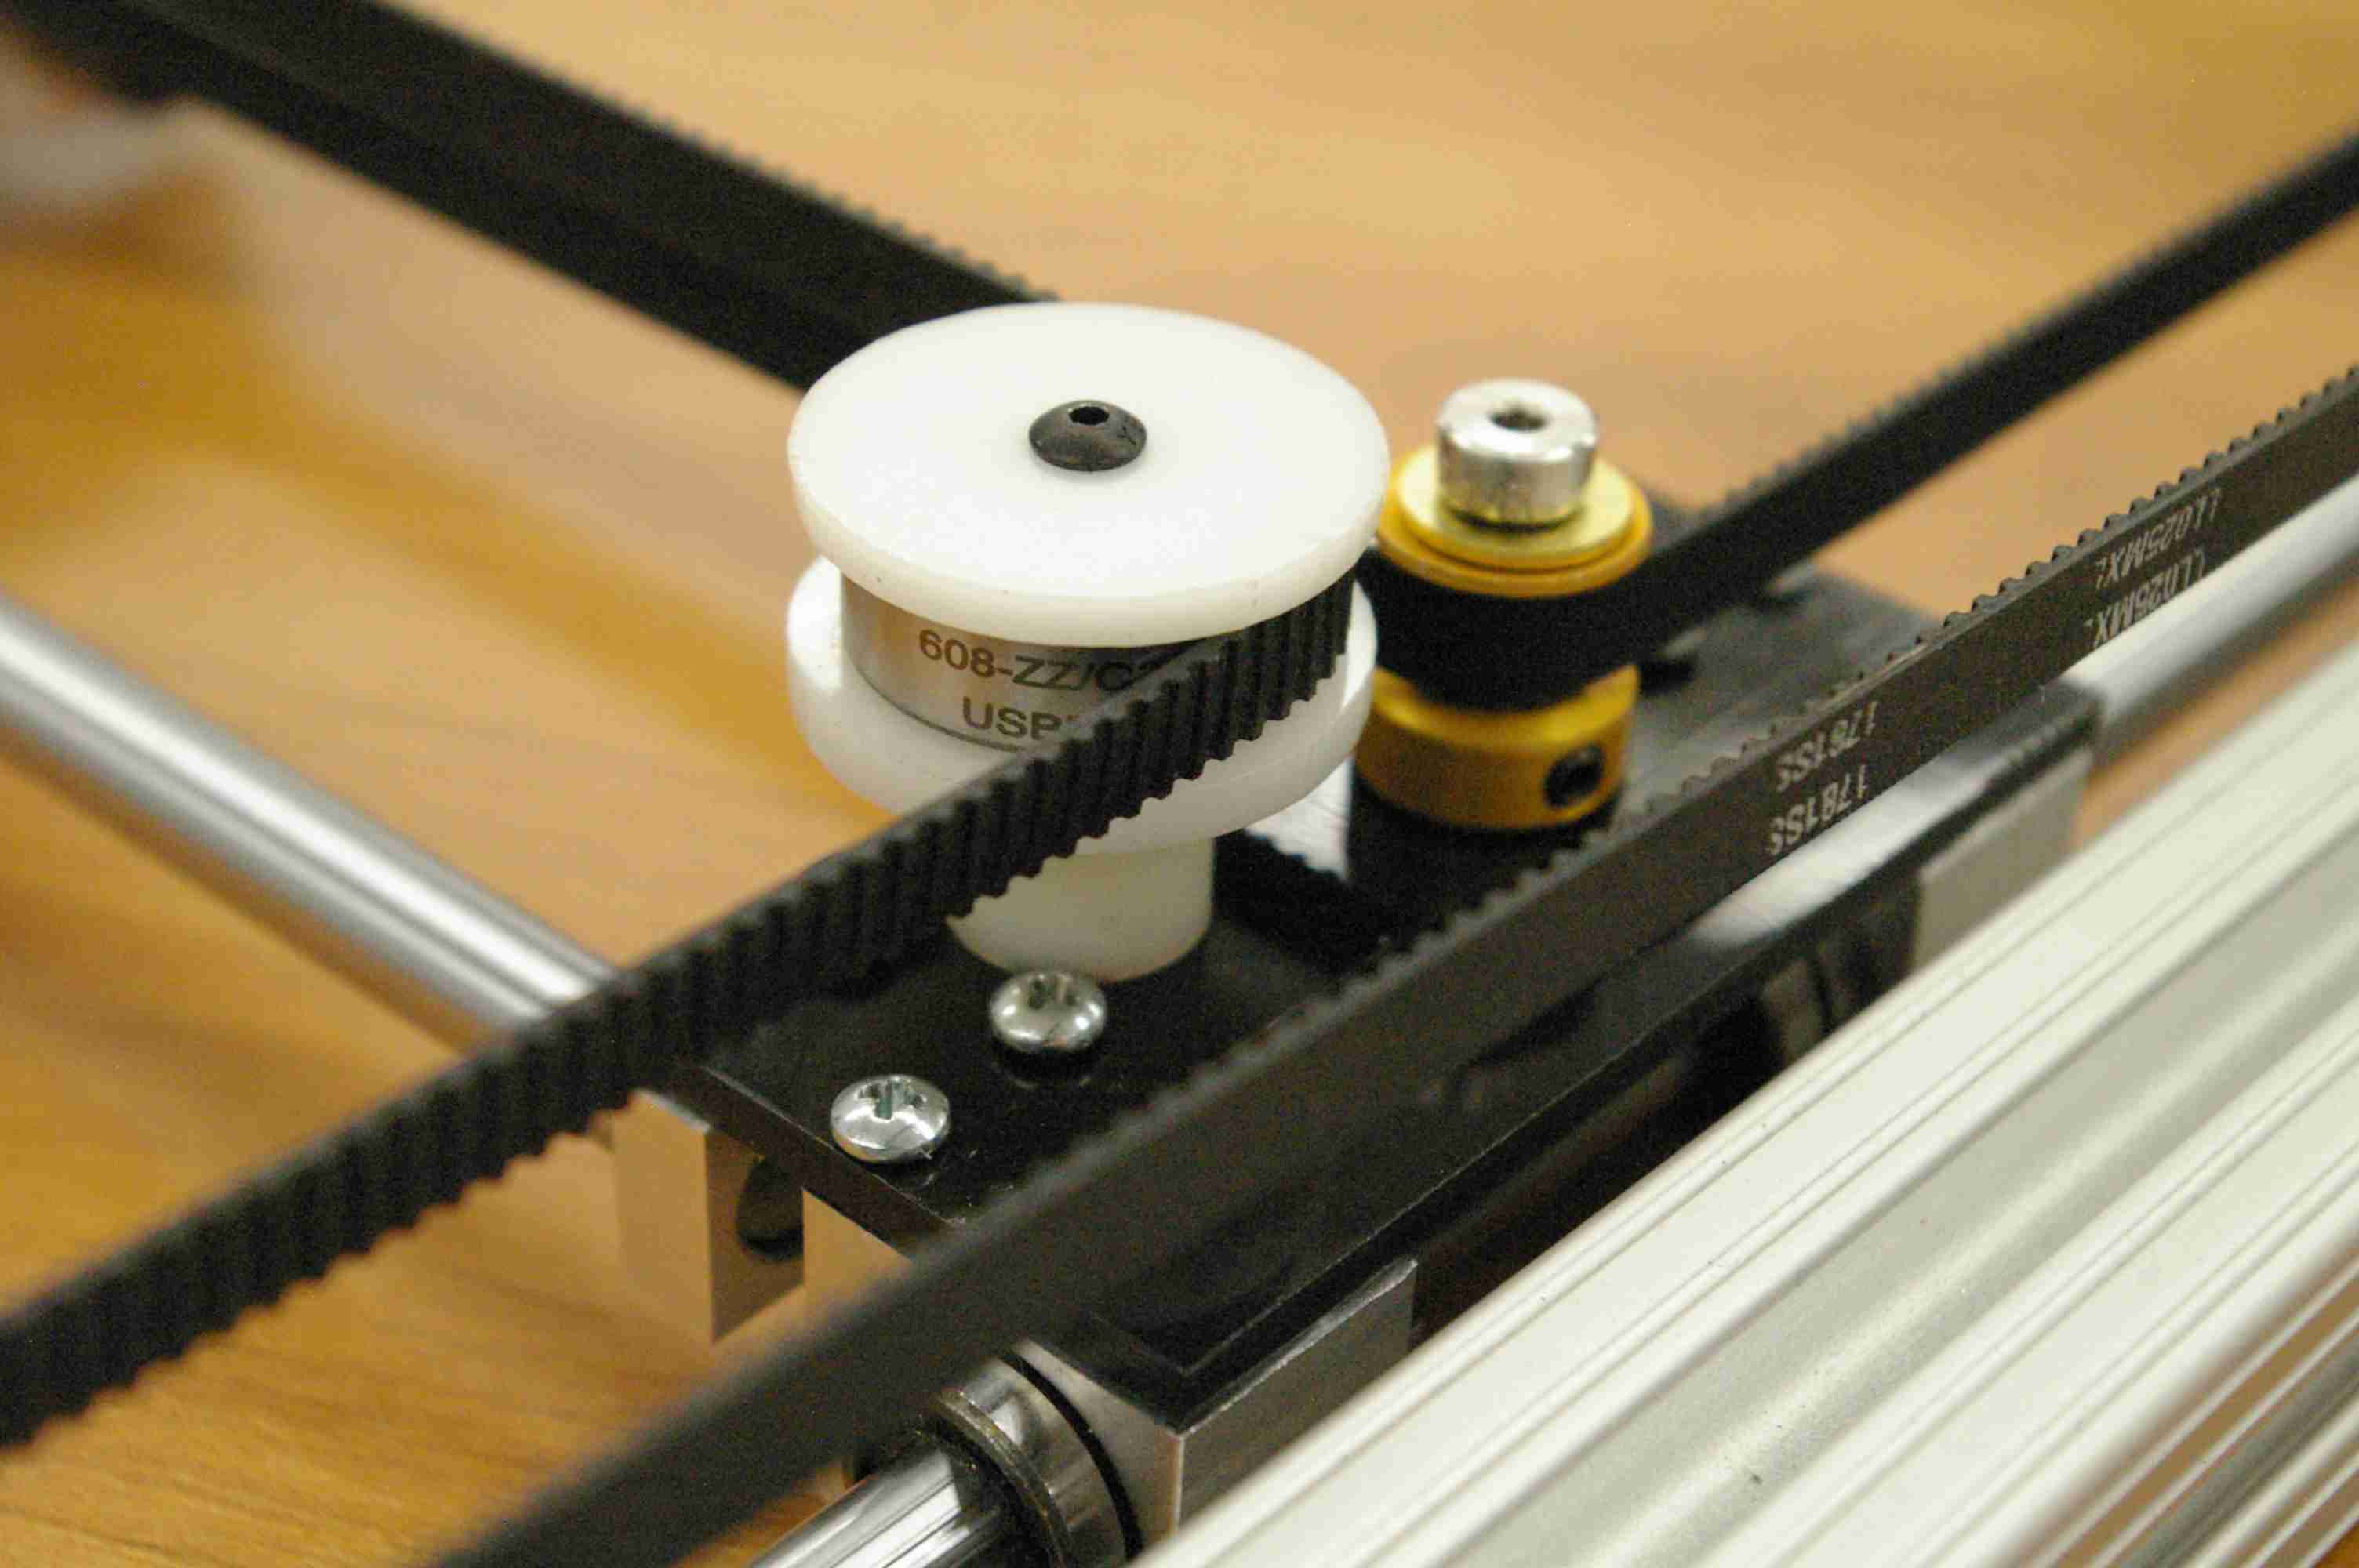
There are many different reasons that contribute to shifting in the layers so its hard to pinpoint it to just one. The most common, however, are the slipping of pulleys and loose grub screws but it could also be something as simple as nudging your printer and causing a disturbance in the print job.

How to fix it?

Fix the Print Bed firmly in place 

Check the print bed to see if there are any clips or screws that have become loose. Since printers have detachable print beds it’s a common problem that occurs but also one that can be fixed easily with the help of pliers.

Similarly, ensure that the printer is on a stable and secure base as well as kept in an area where it is not prone to being knocked or hit. You’ll notice that even a small disturbance to the printer during your print job can cause shifting or other layer issues.

Fix the grub screws

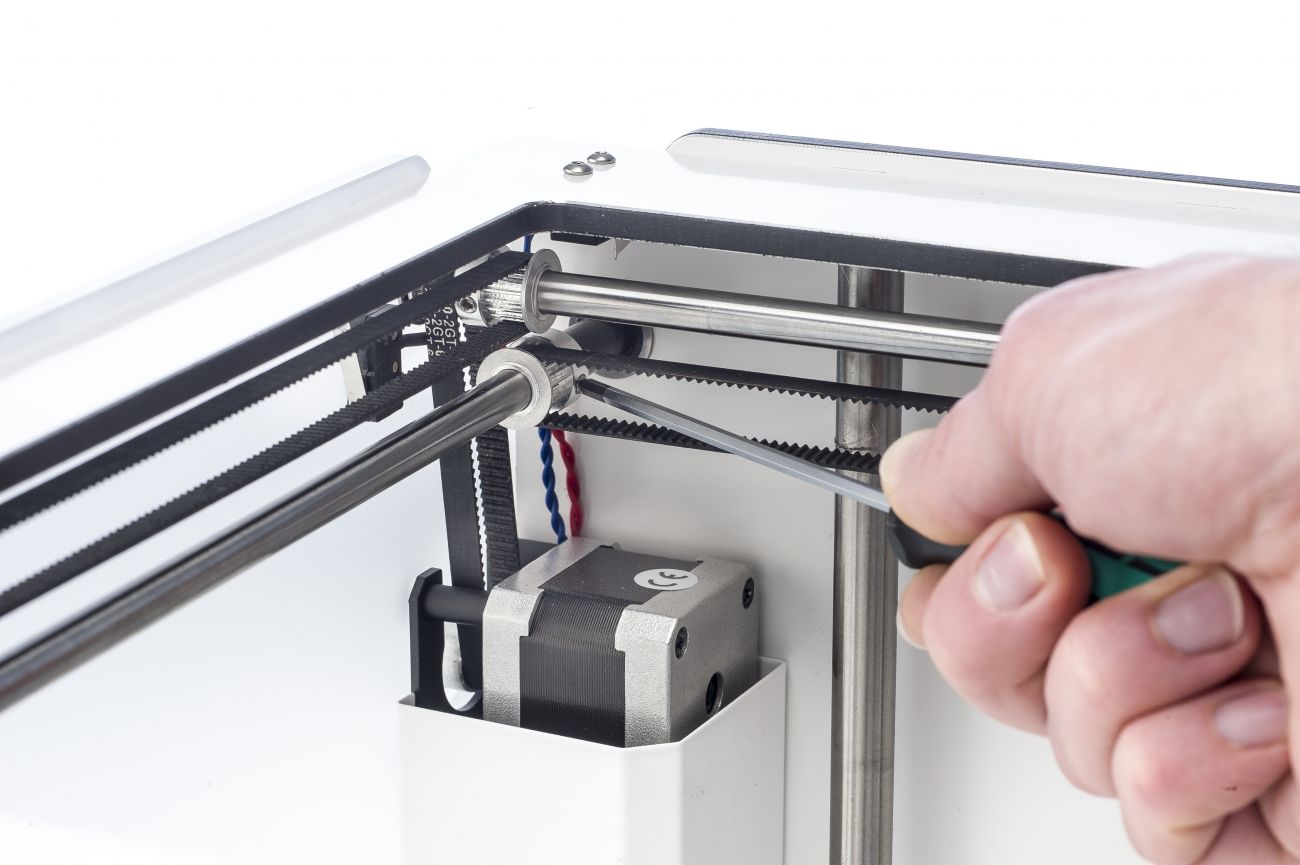
When there are sudden shifts in layers, it’s most probably due to one or more pulleys not secured properly to the axis/axes. You can check this when your layers start to shift and notice the pulleys moving and consequently tighten the respective grub screws. Use a small Allen to tighten them.

Check the belts

Another important thing to check is the tension of the belts. You can adjust the belt position to ensure the tension is the same between all the belts. However, if the problem persists and if you’ve had your printer for a while then you should probably change the belts.

Fix stiff rods by oiling them

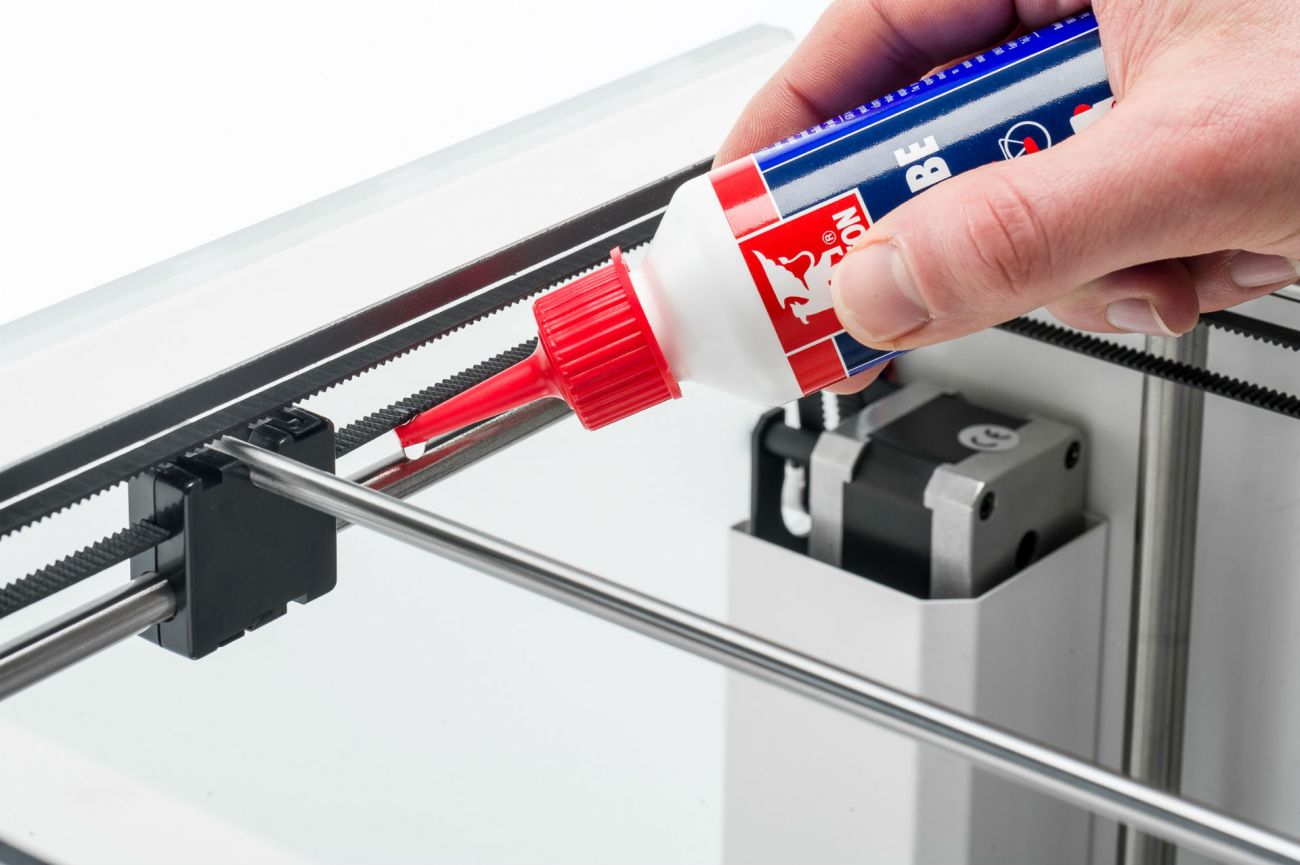
Rods can get stiff and encounter resistance over time which affects the print and causes shifts in the layers. Ideally, the print head should move around easily without resistance. you can perform a simple check to test this.

Turn off the power and check the head by moving it manually in both X and Y direction. If the head moves around stiffly then its time to oil the rods with some light machine oil.

Check the alignment of the rods

Misalignment in rods is another reason that contributes to stiffness. Again perform a check by moving the head to the left/right side and consequently to the front/back of the printer. The distance between the sliding blocks and the pulleys should be equal on both sides. If the axes aren’t square you can fix this by loosening the screws on the two pulleys of one rod, adjust the sliding block and then re-tighten the screws.

Apart from this, check if your rods are bent by removing them and rolling them on a flat surface. You’ll instantly realize if they’re deformed or bent and can replace them.

Check for warped layers

Warping takes place when there is uneven cooling between the layers which results in the edges rising up. If this happens, the print can release from the bed and this makes is much easier for the layers to shift. You can combat warping by adjusting the speed of the cooling fans but if the problem continues, check out our Troubleshooting Guide To Fix Warping.

Decrease the print speed

Many a time, the reason could simply be that your printer is printing too fast. A clicking sound heard during the print job indicates this and you should first check to see if the filament is slipping and if not, then proceed to reduce the print speed by going into your slicer settings.

Credits: rosso3d.com, doubltjumpelectric.com, ultimaker.com, 3dprinting.stackexchange.com

Tuesday, February 27, 2018

Top 5 Artistic Uses of 3D Printing

Exploring new technologies in 3D Printing is something that enthusiasts and businesses are looking up to.Every great artist is adding some creativity and newness to the 3D Printing field.

The below workpieces are developed by some great artists:

A next level Fashion

Download your clothes, print them and get ready for every event with a unique design made by you. Danit Peleg is using 3 D Printing in Fashion.Like other artists in the Fashion world trying to use new methods techniques and fabrics to ensure an innovative hand to the industry, Peleg is also contributing to her new ideas and ways. The new dimension added to her work is the ability for customers to customize the designs.

Last year, she launched a new feature on her website enabling customers to personalize and order the world’s first 3D printed garment available to purchase online. In future, due to advancements, she wishes that these fashion design files could be downloaded and printed at home.Customizing a jacket on Peleg’s website will set you back about $1,500.

Barack Obama’s State of Union speech

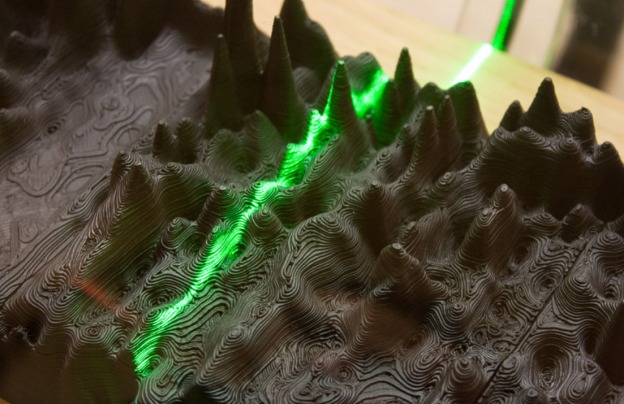
Artist Giles Azzaro in his work, ‘Next Industrial Revolution,’ captures a 39-second clip of Barack Obama’s speech regarding 3D printing in a tangible form. He created a digitally patented software that can create a personal voice in 3D and can be printed and played.In the wake of preparing the bit of Obama’s speech for five hours, he printed the structure for 350 hours on a work area 3D printer.

The model resembles “alien scenes” with every one of the peaks and troughs to take after the high and low tones of the president’s voice. A laser passes the formed surface checking the sound account as appeared beneath and divulges the message on an intelligent screen.

The working of the gadget has appeared in this video here. You need to see it to trust it!Azzaro has also created voice sculptures of Albert Einstein, Mahatma Gandhi, Neil Armstrong, Marilyn Monroe, John F Kennedy and others.

 Rob and Nick Carter 

The married couple, Rob and Nick Carter make old artforms new again by interpreting it into 3D prints. Their bronze models pay respect to crafted by ace painters like Vincent van Gogh and Giorgione. Underneath they brought an ink drawing—”The Heavy Trunk of an Oak, Sawn-Off Horizontally Above Its Roots,” which Dutch painter Jacob de Gheyn II finished in 1600—to life as a progression of nine bronze tree stumps masterminded in an open-air establishment at Kensington Gardens in England. The stumps were designed utilizing 3D examining, printing and bronze throwing strategies.

Vincent Van Gogh’s Ear

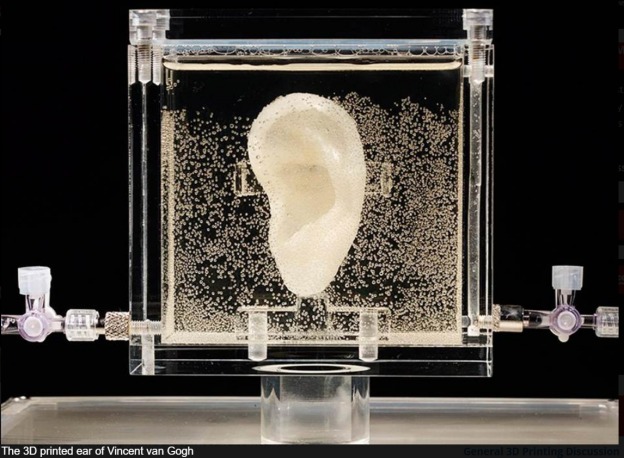
Vincent van Gogh, an extraordinary craftsman from the 1800s, is notoriously known for removing his ear to provide for a whore in 1888. He passed on soon after. An American based craftsman, Diemut Strebe, willingly volunteered to reproduce this bit of life systems. She gathered DNA and cells from his living awesome grandson, Lieuwe van Gogh, and a stamp that Vincent van Gogh had once licked. She at that point worked with MIT to build a tissue material from the DNA and utilized a biocompatible 3D printer and programming to print a correct reproduction of his ear.

This bit of craftsmanship, called ‘Sugababes’, definitely emerges at the Center for Art and Media in Karlsruhe, Germany, since it is alive! The ear is put in a supplement arrangement as appeared above for food. To make it considerably more amazing, guests can converse with it and it can hear! The sound info is handled and changed over into nerve motivations progressively. It, be that as it may, can’t react.

More insights about this insane bit of workmanship are accessible here.

King Tut’s Tomb – A Replica Fit For a King

Tutankhamun, an Egyptian pharaoh was well known when his almost in place tomb was found by Howard Carter in 1922. Passed on mysteriously at 18 years old subsequent to a decision for almost 10 years, King Tut’s tomb has been the most seen, considered, and discussed in Egyptian history.

Notwithstanding, because of the inordinate research and archeological work, numerous were worried over the conservation and corruption of this momentous bit of history. In 2009, an English craftsman, Adam Lowe, chose to create a replica of his tomb precisely, every inch for inch, with his organization Factum Arte. The $690,000 venture looked so credible when it was finished that it conveyed tears to the eyes of an Egyptologist, Salima Ikram.

3D Printing changes your way to look at things and explore new doors towards making things possible so start it today and print your dreams out. Get the best printers at Geeetech.

Credits:interestingengineering.com,grabcad.com

Friday, February 23, 2018

Best 3D Rendering Software you need to have…

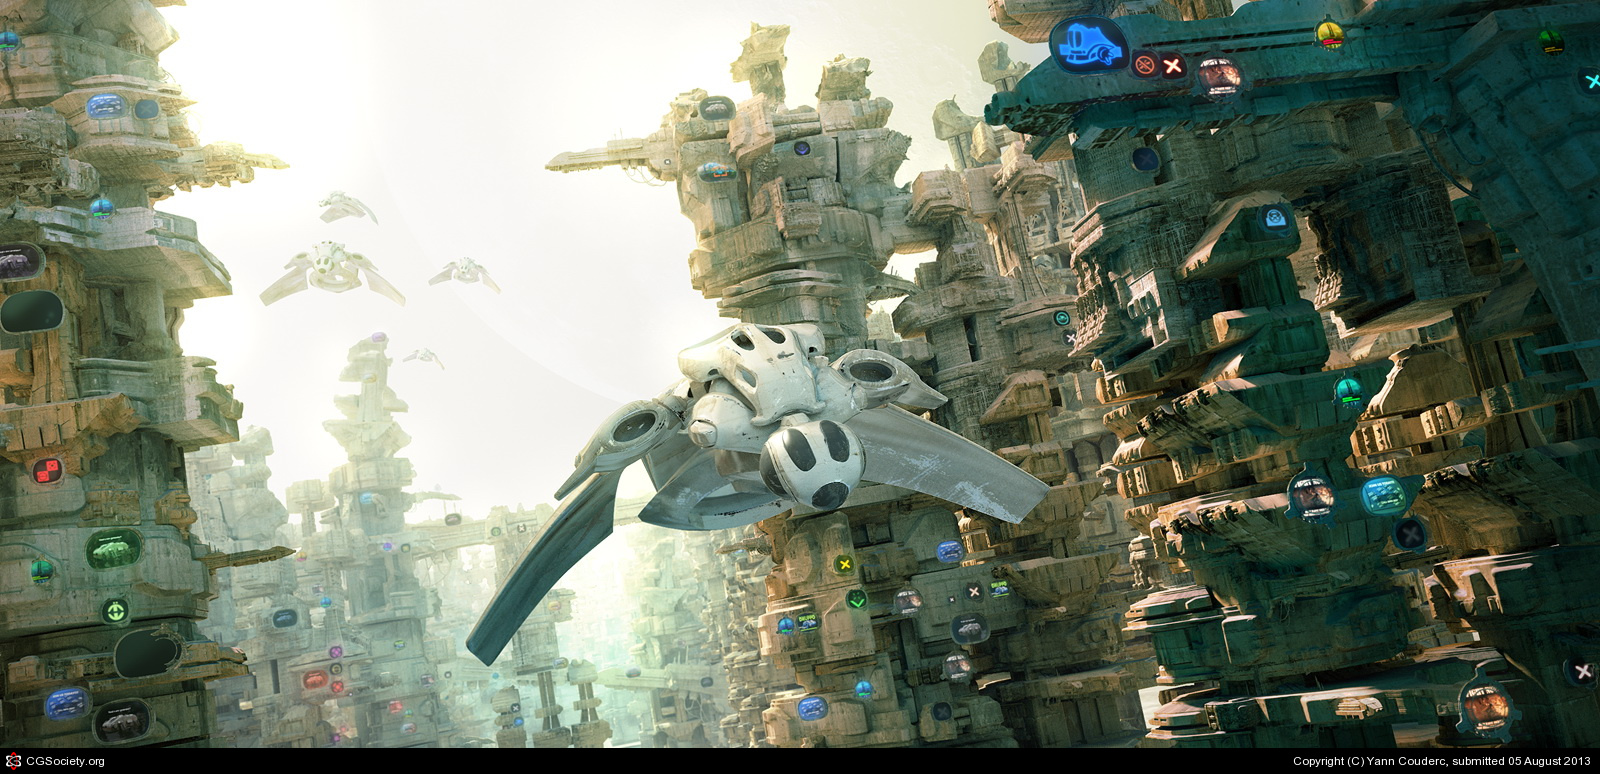
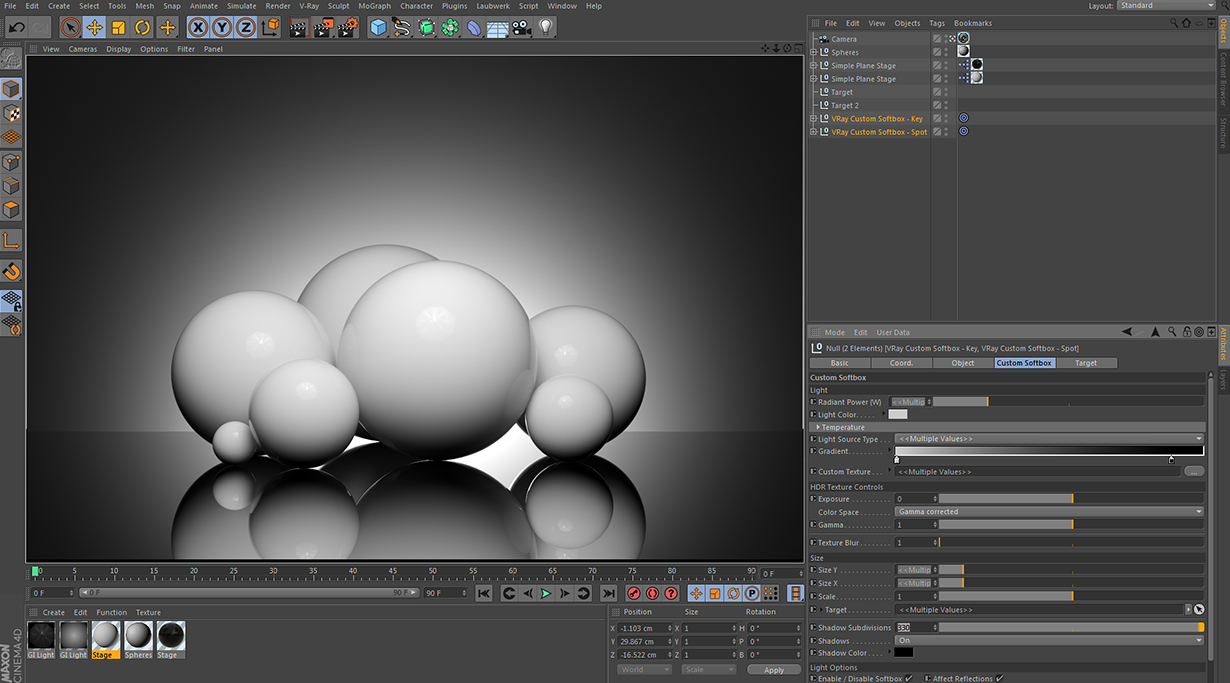
Rendering involves giving life to your 3D designs by adding the simulation of shadows, realistic lighting,  atmosphere, texture, color and optical effects such as the refraction of light or motion-blur scene on moving objects – or the rendering might not be realistic at all, and could be designed to appear as a painting or abstract image.

Rasterization and Raytracing are the methods of rendering which makes it more important. Raterization is for real-time graphics such as computer games and raytracing is a higher degree of quality than rasterization. This technology attempts to recreate the physical process.

Unbiased and Biased Rendering:

The common terms you get hit by when you are using rendering software are unbiased and biased rendering.

Unbiased 3D rendering programming endeavor to compute physically exact images. That implies they follow back the way of a light beam in a numerically correct way, without making any easy routes. This technique can bring about longer render times. Hence, fair rendering is seldom utilized for energized films. Rather, it is found in graphic designing and architectural visualization, since render time doesn’t have that much effect on the venture’s calendar.

Biased 3D rendering programming, thusly, is produced for productivity. While calculating the ways of light beams, they deliberately cheat to chop down the render time. In particular, this implies they insert between outlines or apply the blur. It takes some skill to finetune a biased renderer to deliver a persuading result. Be that as it may, on expansive scale movement or embellishments ventures, it is worth to go the additional mile as far as cash and time are saved.

The basic software that you can use for 3D Rendering are:

V-Ray

Since it has best quality and speed, it is known in the market as one of the best software for rendering, V-Ray is a one-sided raytracer that can outfit both a CPU and a GPU (RT) utilizes brute force and path tracing calculations. You can think that it’s coordinated into a vast cluster of 3D displaying suites. It is accessible enough that beginners or enthusiasts can try it and also has an advanced version for the professionals to make their designs of amazing quality.

Price: $750

Hardware: CPU/GPU

OS: Windows, macOS, Linux

Clarisse

A 3D rendering engine and has many credits for itself, like the new Star Wars movie.You can learn Clarisse for free with the Personal Learning Edition. The renders made with the PLE are limited to 2560×1440 resolution and may not be used for commercial purposes.

The rendering capacities of Clarisse are exceptionally cutting-edge. For example, it encourages the coordination of rendered pictures and arrangements from another 3D rendering programming with profound picture yield. To separate it, Clarisse yields outputs depth data for each pixel.

Price:Free / $999-$2,899

Hardware : CPU/GPU

OS: Windows, macOS, Linux

Solidworks Visualize

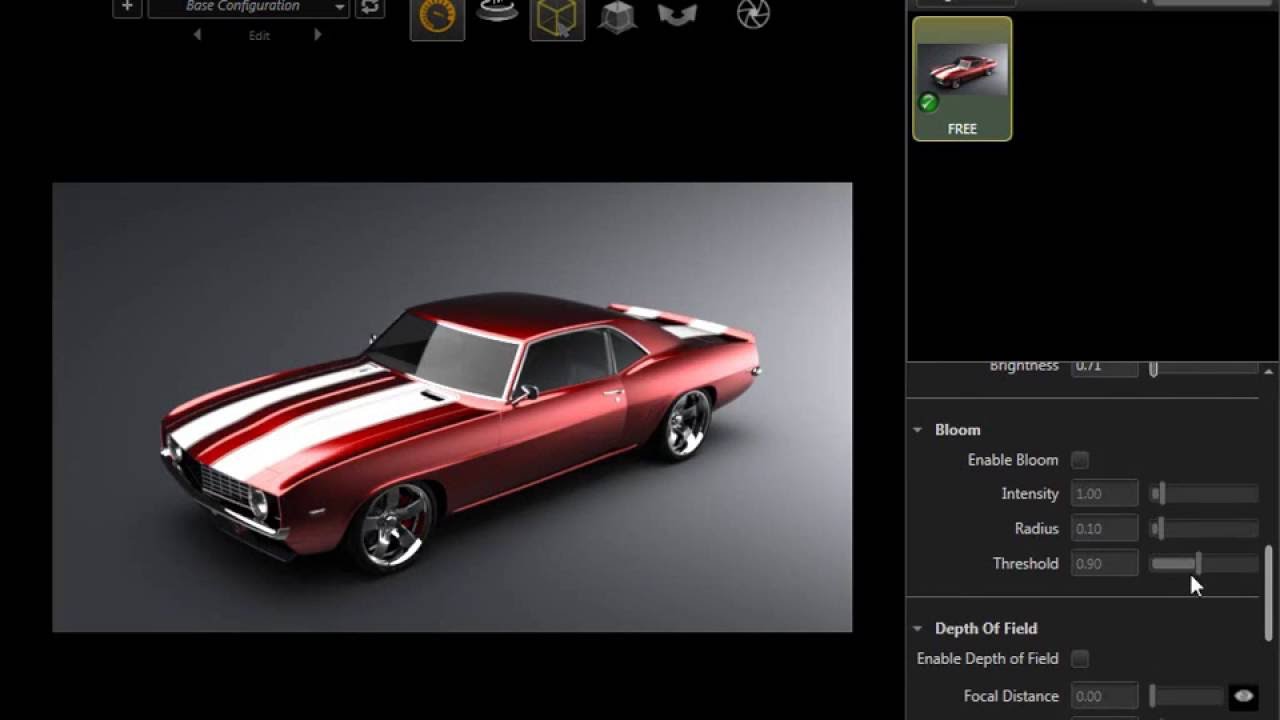
Rendering just doesn’t give stunning visual effects but also tries to bridge the gap of an emotional response from prospective customers and stakeholders of engineering projects.Subsequently, it underpins Solidworks’ own particular configurations, as well as CAD information from Autodesk Alias, Rhino, SketchUp, and numerous others. It is an unbiased 3D rendering software which offers an instant progress preview.

When you need to composite complex effects it can output multiple render passes which comes in handy.The intuitive interface of Solidworks Visualize enables even non-specialists to create photorealistic renders that can be used in marketing campaigns. Also, it provides tools that facilitate the animation and scene-setup of mechanical parts.

Price: $1830

Hardware: CPU/GPU

OS: Windows

RenderMan

In the event that you have seen any Pixar motion picture, at that point you have just seen the energy of its homegrown 3D rendering programming, RenderMan. Pixar broadly spearheaded numerous systems that are these days industry rehearse. For instance, RenderMan was the first to incorporate multi-bounce beam traced global illumination.

One of the later augmentations to this 3D rendering programming is an estimator for forefront quality way followed subsurface diffusing. Its intuitive controls for the diverse layers make it simple to rapidly accomplish a reasonable and engaging look. Additionally, moving volumes can be rendered in unparalleled quality on account of twisting volume obscure.

Hair and hide are a critical benchmark for the nature of any renderer. In RenderMan, they can be taken care of productively with its propelled hair shading calculation. Be that as it may, this immense list of capabilities can be awkward for single craftsmen. It takes a group to tame this mammoth!

Price: $495

Hardware: CPU

OS: Windows. macOS, Linux

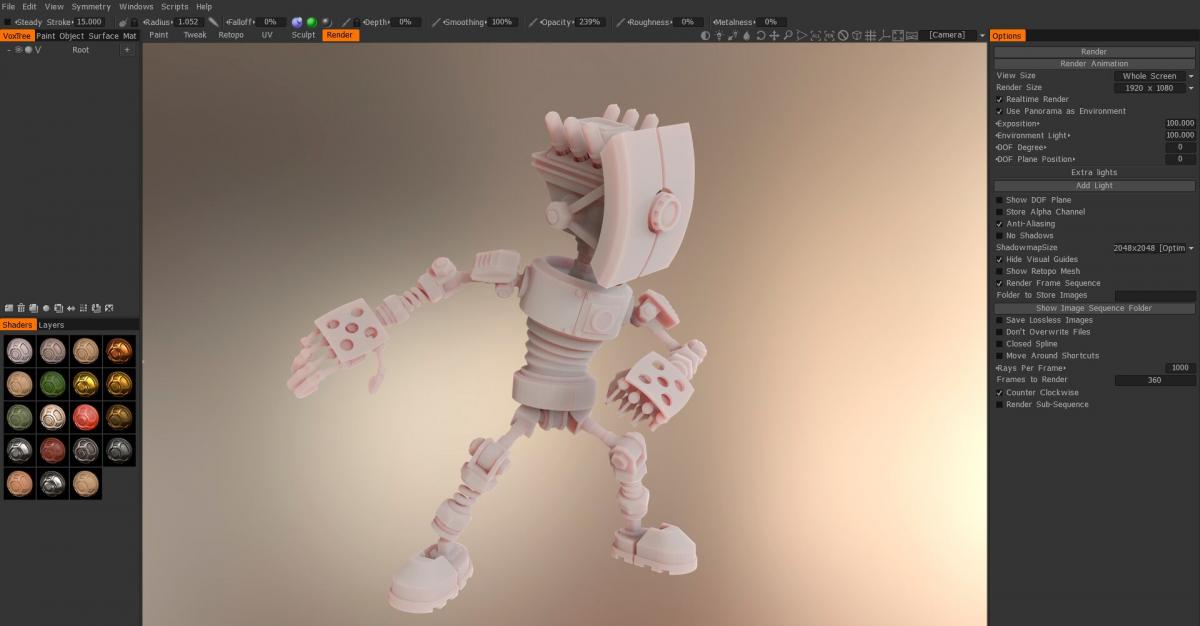
This software will help you out in making your 3D Prints more better and visually appealing. There are many other rendering software that we have not mentioned here which are pretty easy to use and give better results.

Thus rendering your designs is important while 3D Printing.

Credits: youtube.com,all3dp, cgmeetup.net,3stools.info,3dcoat.com